Fluffy Computing

— Your Fun and Friendly Guide to Mastering the Google Cloud Platform Console!🌐🛠️🚀

Hello, Cloud Adventurers and Future GCP Gurus! 🌟😄

Welcome to an exciting journey through the Google Cloud Platform (GCP) Console! Whether you’re a seasoned developer or a curious newbie, navigating the GCP Console can unlock a world of possibilities for your projects. Think of it as your magical dashboard 🧙‍♂️✨, where you can control and manage all your cloud services with just a few clicks.

So, grab your favorite beverage ☕, put on your explorer hat 🎩, and let’s dive into the GCP Console together!

🌟 What is the GCP Console?

The GCP Console is a web-based interface that allows you to manage your Google Cloud resources. It’s like the cockpit of a high-tech spaceship 🛸—sleek, powerful, and a bit overwhelming at first glance. But don’t worry! By the end of this guide, you’ll navigate it like a pro. 😎

🚪 Getting Started: Accessing the GCP Console

Step 1: Sign Up or Sign In

  • New to GCP? Head over to Google Cloud Platform and click on “Get started for free” to create an account. You’ll get a $300 credit to explore GCP services! 🤑
  • Already have an account? Go to the GCP Console and sign in with your Google credentials.

🗺️ The Lay of the Land: GCP Console Overview

Upon logging in, you’ll be greeted with the Dashboard. Let’s break down the key components:

1. Navigation Menu 📂

Located on the left, this is your primary way to access GCP services.

GCP Console with the Navigation Menu expanded, highlighting Compute Engine, Cloud Storage, etc.

2. Project Information 📋

At the top, you’ll see your current project name and ID. Projects are the main way to organize your resources in GCP.

This diagram shows that Project A contains Compute Engine, Cloud Storage, and BigQuery resources.

3. Search Bar 🔎

Need to find something quickly? Use the search bar at the top to search for services, APIs, or resources.

4. Pin Favorite Services 📌

You can pin frequently used services to the top bar for quick access.

Screenshot showing services like Compute Engine and Cloud Storage pinned at the top for easy access.

🛠️ Navigating Key Services

Let’s explore some essential services and how to access them.

Compute Engine 🖥️

Compute Engine lets you create and manage virtual machine instances.

How to Access:

  1. Click on Navigation Menu > Compute Engine > VM instances.
  2. Here, you can create new instances, monitor existing ones, and manage settings.

This sequence diagram shows the steps to create a VM instance.

Cloud Storage ☁️

Store and retrieve data with ease.

How to Access:

  1. Go to Navigation Menu > Storage > Browser.
  2. Create buckets, upload objects, and manage permissions.

Screenshot showing the Cloud Storage Browser with a list of buckets.

BigQuery 📊

Analyze large datasets with Google’s serverless, highly scalable data warehouse.

How to Access:

  1. Navigate to Navigation Menu > BigQuery.
  2. Run queries, manage datasets, and visualize data.

🔐 Managing IAM and Permissions

Control who has access to your resources.

How to Access:

  • Click on Navigation Menu > IAM & Admin > IAM.

This diagram illustrates how users and service accounts are assigned roles within a project.

🔔 Setting Up Billing and Budgets

Keep track of your spending to avoid surprises! 😮

How to Access:

  • Go to Navigation Menu > Billing.

Features:

  • Dashboard: Overview of your billing account.
  • Transactions: Detailed list of charges.
  • Budgets & Alerts: Set spending limits and receive notifications.

Screenshot showing the Billing Dashboard with charts and cost breakdowns.

🧰 Tools and Shortcuts

Cloud Shell 🖥️

A built-in command-line interface right in your browser.

  • Access: Click the Activate Cloud Shell icon “>_” in the top-right corner.
  • Use Case: Run gcloud commands, manage resources, and automate tasks.

Screenshot of the Cloud Shell terminal open at the bottom of the console.

Cloud Console Mobile App 📱

Manage your resources on the go!

  • Download: Available on Google Play and App Store.
  • Features: Monitor resources, receive alerts, and perform basic management tasks.

🎯 Tips and Tricks for Efficient Navigation

  • Use Keyboard Shortcuts: Press “?” to view available shortcuts. ⚡
  • Customize Your Dashboard: Rearrange widgets to prioritize information important to you. 🖼️
  • Leverage the Cloud Marketplace: Quickly deploy solutions and services. 🚀

🤖 Automate with APIs and SDKs

Prefer code over clicks? GCP offers robust APIs and client libraries.

  • APIs & Services: Enable APIs for your project via Navigation Menu > APIs & Services.
  • Client Libraries: Available for languages like Python, Java, Go, and more.

This diagram shows the interaction between a developer and GCP APIs.

😄 Let’s Add Some Humor!

Why did the cloud go to school?

To become a little smarter! 😆☁️

📢 Final Thoughts

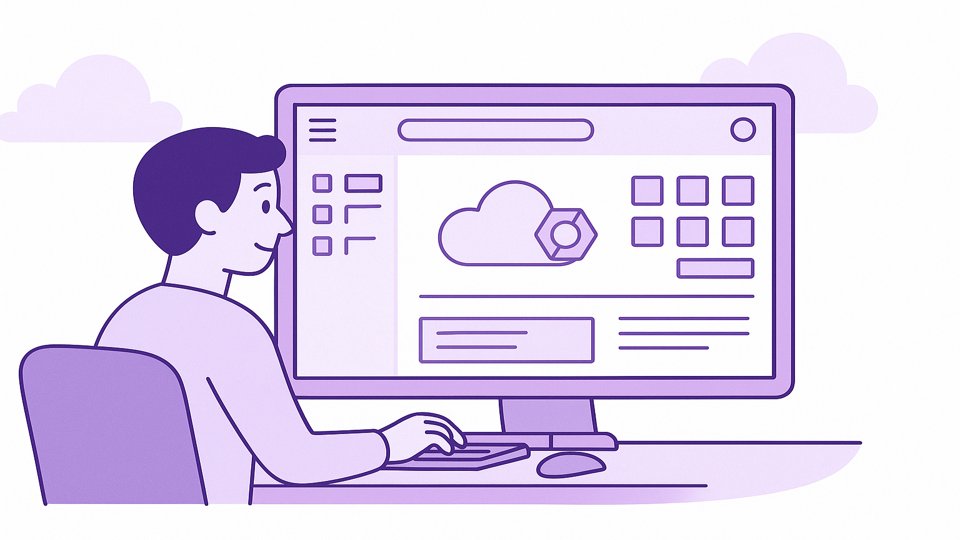
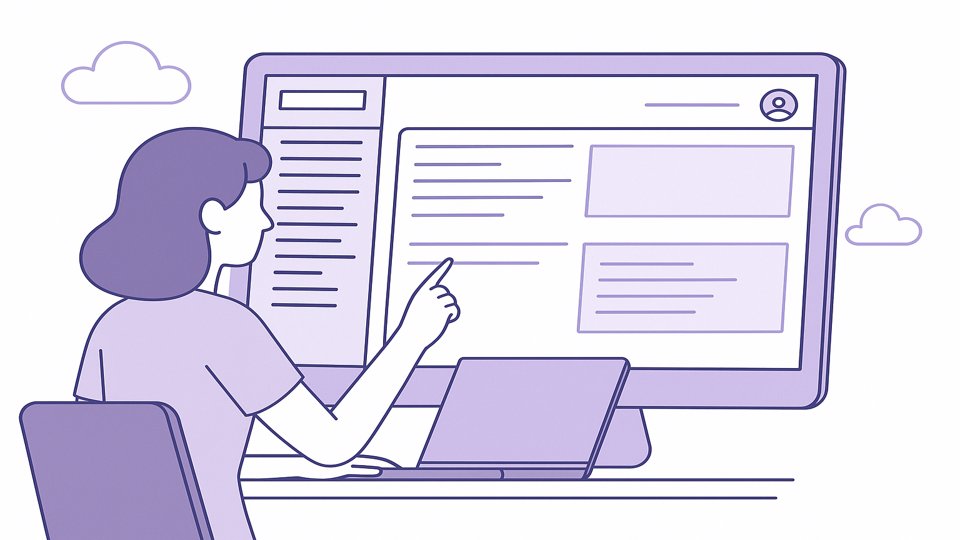
Navigating the GCP Console might seem daunting at first, but with a bit of exploration, you’ll find it’s an intuitive and powerful tool. It’s your central hub for managing all things cloud, from deploying virtual machines to analyzing big data.

Remember, the key to mastering the console is to explore, experiment, and don’t be afraid to click around! After all, curiosity didn’t kill the cat—it launched it into the cloud! 🐱☁️

🤗 Join the Conversation!

Have tips, tricks, or experiences with the GCP Console? Share them below! Let’s help each other become GCP pros. 💬

P.S. Why did the developer join the circus? Because they wanted to work on their juggling of multiple cloud services! 🎪🤹

The Journey Continues…

Thanks for joining me on this exciting tour of the GCP Console! I hope you’re feeling more confident and ready to take on the cloud.

Until next time, keep your spirits high and your clouds well-configured! ☁️✨

Disclaimer: No virtual machines were harmed in the making of this blog post, though some electrons were mildly excited. 😉🔌

Let’s Keep the Conversation Cloudy!

Feel free to share this post with friends, colleagues, or anyone who’s ready to navigate the GCP Console with confidence and a smile. Together, we’ll conquer the cloud! ☁️🏔️

Note: All emojis are intended to add a splash of fun and visual excitement to the topics discussed. 🎨✨

```

— Embarking on a Cloud Journey with Google’s Magic Wand!☁️🚀

Hello, Tech Explorers and Cloud Enthusiasts! 🌟😄

Welcome to the exciting world of Google Cloud Platform (GCP)! If you’ve been curious about cloud computing or are considering GCP for your next project, you’re in the right place. Today, we’ll dive into what makes GCP stand out, its strengths and weaknesses compared to AWS and Azure, and why it might be the perfect cloud companion for you. So, grab your favorite snack 🍿, settle in, and let’s soar through the cloud together with a sprinkle of humor and plenty of emojis!

🌐 What is Google Cloud Platform?

Google Cloud Platform (GCP) is Google’s suite of cloud computing services that runs on the same infrastructure that Google uses for its end-user products like Google Search, Gmail, and YouTube. Imagine harnessing the power of Google’s massive, reliable, and secure infrastructure for your own applications—sounds like magic, right? 🪄✨

Key Offerings of GCP:

  • Compute Engine 🖥️: Virtual machines running in Google’s data centers.
  • App Engine 🚀: Platform-as-a-Service (PaaS) for building scalable web applications.
  • Cloud Storage 💾: Object storage that’s secure and scalable.

  • BigQuery 📊: A fully-managed, serverless data warehouse for analytics.
  • Kubernetes Engine ⚙️: Managed Kubernetes service for containerized applications.
  • Cloud Functions 🔄: Serverless execution environment for building event-driven applications.

🏆 Strengths of GCP

Let’s explore what makes GCP shine in the crowded cloud market!

1. Superior Network Infrastructure 🌐⚡

GCP boasts one of the largest and fastest global networks, leveraging Google’s extensive fiber optic infrastructure. This means low latency and high throughput for your applications, whether your users are in New York or New Delhi. It’s like having a private highway for your data traffic! 🚄💨

https://cloud.google.com/about/locations#regions

https://cloud.google.com/about/locations#network

2. Innovative Data and Analytics Tools 📊🤖

With services like BigQuery,, Dataflow, and Cloud AI Platform, GCP excels in data analytics and machine learning. If you’re into big data or AI, GCP offers powerful tools to process and analyze data at scale. It’s like having a data scientist genie at your command! 🧞‍♂️🔢

3. Kubernetes Leadership ⚙️🐳

Google created Kubernetes, the open-source container orchestration system. Google Kubernetes Engine (GKE) provides a robust, managed environment for deploying, managing, and scaling containerized applications. If containers are your thing, GCP is the home court! 🏠🏀

4. Competitive Pricing 💰👌

GCP offers innovative pricing models like sustained use discounts and preemptible VMs, which can lead to significant cost savings. It’s like finding extra fries at the bottom of your bag—unexpected but delightful! 🍟🎉

5. Commitment to Open Source 🤝🌐

Google is a strong supporter of open-source technologies, integrating them into GCP services. This fosters flexibility and avoids vendor lock-in, giving you the freedom to innovate. It’s like having a cloud that plays well with others! 👫🤗

⚠️ Weaknesses of GCP

No platform is perfect, and GCP has its areas for improvement.

1. Market Share and Maturity 📉⏳

Compared to AWS and Azure, GCP has a smaller market share and a shorter history in the cloud arena. This can translate to fewer third-party integrations and a smaller community. It’s like being the new kid on the block—you might need to work a bit harder to make friends! 🏘️👶

2. Fewer Global Regions 🌍📍

GCP has fewer data center regions compared to AWS and Azure. This might affect latency and data residency requirements for some businesses. It’s like having fewer branches of your favorite coffee shop—sometimes you have to go a bit further for that latte! ☕️🚗

3. Service Gaps 🕳️🔍

While GCP offers a robust set of services, there are specific areas where it doesn’t match the breadth of offerings available on AWS and Azure. Let’s delve into some of these service gaps:

a. Enterprise-Friendly Services 🏢🔒

  • Microsoft Ecosystem Integration:
    • Azure shines with its seamless integration with Microsoft tools like Active Directory, Office 365, and SharePoint. If your organization relies heavily on Microsoft products, Azure provides a unified experience that GCP lacks.
    • GCP Gap: GCP doesn’t offer native integrations with these Microsoft services, which might require additional configuration or third-party tools.

b. Hybrid Cloud and On-Premises Solutions 🖥️🌩️

  • AWS Outposts and Azure Stack:
    • AWS Outposts and Azure Stack allow you to run cloud services on-premises, providing a consistent hybrid experience.
    • GCP Gap: While GCP has Anthos, which enables hybrid and multi-cloud deployments, it doesn’t offer the same level of on-premises hardware solutions as AWS and Azure.

c. Internet of Things (IoT) Services 🌐📡

  • Comprehensive IoT Platforms:
    • AWS IoT Core and Azure IoT Hub offer extensive IoT services, including device management, analytics, and edge computing.
    • GCP Gap: GCP’s IoT Core is functional but less mature, with fewer features and integrations compared to its counterparts.

d. DevOps and Developer Tools 🛠️👨‍💻

  • Integrated DevOps Services:
    • AWS provides services like CodeCommit, CodeBuild, CodeDeploy, and CodePipeline for end-to-end DevOps workflows.
    • Azure DevOps offers a suite of tools for planning, development, delivery, and operations.
    • GCP Gap: GCP has Cloud Build and Cloud Source Repositories, but the ecosystem is not as extensive, potentially requiring additional third-party tools.

e. Machine Learning Hardware Options 🧠⚙️

  • Specialized Hardware Instances:
    • AWS offers Inf1 instances powered by AWS Inferentia chips for high-performance machine learning inference.
    • Azure provides ND-series VMs with NVIDIA GPUs for AI workloads.
    • GCP Gap: While GCP offers TPUs (Tensor Processing Units), they are primarily designed for TensorFlow workloads, limiting flexibility for those using other frameworks.

f. Marketplace and Third-Party Ecosystem 🛒🌐

  • Robust Marketplaces:
    • AWS Marketplace and Azure Marketplace have extensive catalogs of third-party software, services, and integrations.
    • GCP Gap: GCP’s marketplace is growing but still lags behind in the variety and number of offerings, which might limit options for readily available solutions.

g. Compliance and Regulatory Support 📜🔒

  • Industry-Specific Compliance:
    • AWS and Azure have a broader range of compliance certifications, including specific regional and industry standards.
    • GCP Gap: While GCP maintains many essential certifications, it may not cover some niche compliance requirements needed by certain industries.

h. Support for Legacy Systems 🖥️⏳

  • Mainframe and Legacy Workload Support:
    • AWS and Azure offer services to migrate and run legacy systems, including mainframes.
    • GCP Gap: GCP provides fewer options for organizations looking to lift and shift legacy workloads to the cloud.

🥊 GCP vs. AWS vs. Azure

Let’s see how GCP stacks up against its main competitors.

Compute Services 🖥️

  • AWS EC2: Offers a vast array of instance types and configurations.
  • Azure Virtual Machines: Integrates well with Microsoft tools and services.
  • GCP Compute Engine: Competitive pricing with strong performance.

GCP Strength: Cost-effective options and innovative features like custom machine types.

Storage Services 💾

  • AWS S3: Highly durable and scalable object storage.
  • Azure Blob Storage: Seamless integration with other Azure services.
  • GCP Cloud Storage: Unified object storage with consistent APIs.

GCP Strength: Simplified storage classes and automatic tiering.

https://cloud.google.com/storage?hl=en

Data Analytics 📊

  • AWS Redshift: Managed data warehouse service.
  • Azure Synapse Analytics: Unified experience for big data and data warehousing.
  • GCP BigQuery: Serverless, highly scalable, and cost-effective.

GCP Strength: BigQuery’s performance and ease of use make it a standout for analytics.

AI and Machine Learning 🤖

  • AWS SageMaker: Comprehensive ML service.
  • Azure Machine Learning: Strong integration with Microsoft ecosystem.
  • GCP AI Platform: Advanced AI services and pre-trained models.

GCP Strength: Google’s AI expertise shines through its advanced tools and models.

Pricing 💰

  • AWS: Pay-as-you-go with options for reserved instances.
  • Azure: Similar to AWS with enterprise agreements.
  • GCP: Sustained use discounts and per-second billing.

GCP Strength: Flexible pricing models can lead to savings.

😄 Let’s Add Some Humor!

Why did the developer choose GCP over AWS and Azure?

Because they wanted their code to be in Good Cloud Position! 😎☁️

🎯 Is GCP Right for You?

Choosing a cloud provider depends on your specific needs. Here’s when GCP might be the best fit:

  • Data Analytics and Machine Learning Projects: If you’re working with big data or AI, GCP’s tools are top-notch. 🧠📈
  • Containerized Applications: If you’re leveraging Kubernetes, GKE offers a seamless experience. 🐳⚙️
  • Cost-Conscious Deployments: Innovative pricing can help optimize your budget. 💵💡
  • Open Source Enthusiasts: GCP’s commitment to open-source technologies provides flexibility. 🌐❤️

🚀 Getting Started with GCP

Ready to dive in? Here’s how to get started:

1. Sign Up for a Free Trial 📝

  • GCP offers a $300 credit for new users, valid for 90 days.
  • Visit cloud.google.com to create your account.

2. Explore the Console 🖥️

  • The GCP Console is your dashboard for all services.
  • Navigate through Compute Engine, Cloud Storage, and more.

3. Check Out Quickstarts and Tutorials 📚

  • GCP provides extensive documentation and tutorials.
  • Start with deploying a virtual machine or setting up a storage bucket.

4. Engage with the Community 👥

  • Join forums, attend webinars, and participate in Q&A sessions.
  • The community is growing and eager to help!

📢 Final Thoughts

Google Cloud Platform offers a powerful, innovative, and flexible cloud solution. With its strong emphasis on data analytics, machine learning, and open-source technologies, GCP is a compelling choice for many businesses and developers. While it may trail AWS and Azure in market share and certain services, it’s a rising star that’s worth considering.

Remember, the best cloud provider is the one that aligns with your project’s needs and your team’s expertise. So, why not give GCP a try? After all, who wouldn’t want a bit of Google’s magic in their next project? 🪄✨

🤗 Join the Conversation!

Have experiences with GCP, or perhaps a cloud joke to share? Drop them below! Let’s make this journey interactive and fun. 💬

P.S. Why did the cloud storage file feel lost? Because it couldn’t find its directory! 😂☁️

The Journey Continues…

Thanks for joining me on this whirlwind tour of Google Cloud Platform! Whether you’re considering GCP for your next project or just curious about what it offers, I hope this introduction has been enlightening and enjoyable.

Until next time, keep your head in the clouds and your code bug-free! ☁️🐞🚫

Disclaimer: No clouds were harmed in the making of this blog post, though some may have been mildly amused. 😉☁️

Let’s Keep the Conversation Cloudy!

Feel free to share this post with friends, colleagues, or that one person who still thinks “GCP” stands for “Great Coffee Place.” Together, we’ll continue exploring the wonders of the cloud with smiles and curiosity! ☁️🎉

Note: All emojis are intended to add a splash of fun and visual excitement to the topics discussed. 🎨✨

```

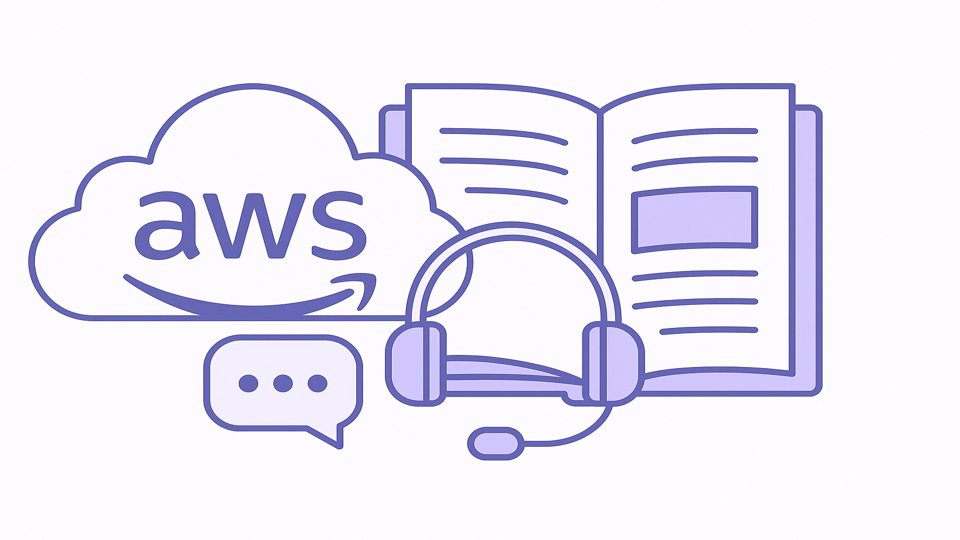
— Navigating AWS with Expert Help and Handy Guides, Sprinkled with Fun! 🛠️📚🔍

Hello, Cloud Conquerors and AWS Adventurers! 🌟☁️😄

Welcome back to our exhilarating AWS journey! After launching your first EC2 instance 🖥️🚀, it’s time to ensure you have all the support and knowledge you need to keep soaring in the cloud. Today, we’re diving into AWS Support and Documentation Resources—your trusty companions for troubleshooting, learning, and mastering AWS services. Whether you’re a newbie needing guidance or a seasoned pro seeking advanced tips, AWS has got your back. So, grab your favorite beverage ☕️🍹, settle in, and let’s explore these invaluable resources together with plenty of emojis and a dash of humor!

🛡️ Why AWS Support and Documentation Matter

Imagine AWS as a vast, bustling city 🏙️—full of opportunities, but sometimes a bit overwhelming to navigate alone. That’s where AWS Support and Documentation come into play. They’re your friendly tour guides 🧭, ensuring you find your way, solve problems, and make the most out of your AWS experience without getting lost in the cloud maze.

Key Reasons to Utilize AWS Support and Documentation:

  • Troubleshooting Issues 🛠️🔍: Resolve technical problems efficiently.
  • Learning and Development 📚💡: Gain in-depth knowledge about AWS services.
  • Optimizing Resources 📈💰: Maximize performance while minimizing costs.
  • Staying Updated 🔄✨: Keep up with the latest AWS features and best practices.

💼 AWS Support Plans: Choose Your Shield

AWS offers various support plans tailored to different needs and budgets. Let’s break them down with some fun analogies and emojis!

1. Basic Support 🆓🔧

  • What It Is: Free for all AWS customers.
  • Includes:
    • 24/7 access to customer service.
    • Access to the AWS Knowledge Center and forums.
    • AWS Trusted Advisor with seven core checks.
  • Analogy: Think of Basic Support as the helpful neighborhood librarian 📚—always available to answer your questions and guide you to the right resources.

2. Developer Support 🧑‍💻💬

  • What It Is: Ideal for experimenting and testing in AWS.
  • Includes:
    • Business hours email access to Cloud Support Associates.
    • Guidance on best practices.
    • General architectural advice.
  • Analogy: Developer Support is like having a friendly mentor 🧙‍♂️—ready to offer advice and help you navigate your development projects.

3. Business Support 🏢🛡️

  • What It Is: Suited for production workloads and businesses.
  • Includes:
    • 24/7 access to Cloud Support Engineers via phone, chat, and email.
    • Access to the full suite of AWS Trusted Advisor checks.
    • Infrastructure Event Management for additional fees.
  • Analogy: Business Support is your trusty security team 🕶️🛡️—ensuring your operations run smoothly and securely around the clock.

4. Enterprise Support 👑🚀

  • What It Is: Designed for large enterprises with complex needs.
  • Includes:
    • All Business Support features.
    • Assigned Technical Account Manager (TAM).
    • Access to Infrastructure Event Management.
    • Proactive guidance and strategic planning.
  • Analogy: Enterprise Support is like having your very own executive assistant 📝—handling high-level strategies and ensuring everything operates flawlessly.

📚 AWS Documentation: Your Cloud Encyclopedia

When it comes to learning AWS, AWS Documentation is your go-to resource. It’s comprehensive, well-organized, and packed with everything you need to know. Let’s explore the key types of documentation AWS offers, complete with placeholders for handy diagrams!

1. Getting Started Guides 🚀📖

Perfect for beginners, these guides help you set up and start using AWS services quickly.

https://docs.aws.amazon.com/AmazonS3/latest/userguide/GetStartedWithS3.html

A screenshot of the AWS Getting Started guide page for Amazon S3, showcasing step-by-step instructions.

2. Developer Guides 👨‍💻🛠️

In-depth resources for developers to build and manage applications on AWS.

https://docs.aws.amazon.com/lambda/latest/dg/welcome.html

A screenshot of the AWS Developer Guide for Lambda, highlighting code snippets and best practices.

3. API References 🔗📜

Detailed documentation for AWS APIs, enabling you to integrate and automate services.

https://docs.aws.amazon.com/AWSEC2/latest/APIReference/Welcome.html

A screenshot of the Amazon EC2 API Reference page, showing available endpoints and parameters.

4. Tutorials and Workshops 🧑‍🏫🔍

Hands-on tutorials and workshops to practice and reinforce your AWS skills.

https://aws.amazon.com/ec2/getting-started/

A screenshot of an AWS tutorial page guiding users through launching an EC2 instance.

5. Whitepapers and Best Practices 📄🏅

Authoritative guides on AWS architecture, security, and optimization strategies.

https://docs.aws.amazon.com/wellarchitected/latest/framework/welcome.html

A screenshot of the AWS Well-Architected Framework whitepaper, outlining key principles and best practices.

6. FAQs and Troubleshooting 🛠️❓

Quick answers to common questions and solutions to typical issues.

https://aws.amazon.com/rds/faqs/

A screenshot of the Amazon RDS FAQ page, featuring frequently asked questions and answers.

🛠️ AWS Support Center Features

The AWS Support Center is your hub for accessing support plans, submitting cases, and finding documentation. Here’s what you can do there:

1. Submit a Support Case 📨🔍

Whether you have a billing question or a technical issue, you can submit a support case directly from the Support Center.

https://docs.aws.amazon.com/awssupport/latest/user/case-management.html

https://support.console.aws.amazon.com/support/home#/case/create

Screenshots of the AWS Support Center showing the case submission form with fields for describing the issue.

2. Access Support Plans 💼🛡️

Review and manage your current support plan or upgrade to a different one based on your needs.

https://aws.amazon.com/premiumsupport/plans/

Screenshots of the AWS Support Plans page, detailing the features of each support tier.

3. Browse Documentation and Resources 📚🔗

Quickly navigate to AWS Documentation, tutorials, and other helpful resources directly from the Support Center.

https://aws.amazon.com/contact-us/

https://docs.aws.amazon.com/awssupport/latest/user/getting-started.html

Screenshots of the AWS Support Center dashboard with links to various documentation and resource sections.

🎯 How to Use AWS Support and Documentation Effectively

Maximize the benefits of AWS Support and Documentation with these tips:

1. Identify Your Needs First 🔍📝

Determine whether you need technical support, architectural guidance, or billing assistance before reaching out.

2. Utilize Search Features 🔎✨

Use the search bar in the Documentation and Support Center to quickly find the information you need.

3. Leverage Community Forums 👥💬

Join AWS forums and communities to ask questions, share experiences, and learn from other users.

https://aws.amazon.com/developer/community/?cards.sort-by=item.additionalFields.publishedDate&cards.sort-order=desc

A screenshot of the AWS Community Forums page, showing various discussion threads and topics.

4. Regularly Review Whitepapers and Best Practices 📄🏆

Stay informed about the latest AWS strategies and best practices by regularly reading whitepapers and official guides.

5. Take Advantage of Training Resources 🎓📚

Enroll in AWS training courses and certifications to deepen your knowledge and enhance your skills.

😂 Cloud Computing Humor Break!

Why did the cloud go to therapy?

Because it had too many layered issues! 😅☁️

🌟 Final Thoughts: Empower Your AWS Journey

AWS Support and Documentation are your best friends in the cloud, providing the knowledge and assistance you need to thrive. Whether you’re troubleshooting a tricky issue 🛠️ or learning a new service 📚, these resources ensure you’re never alone on your AWS adventure. Embrace them with curiosity and confidence, and watch your cloud skills soar! 🚀✨

Pro Tips:

  • Bookmark Key Documentation: Keep your favorite guides and tutorials handy for quick access.
  • Stay Proactive: Regularly check the Support Center for updates and new resources.
  • Engage with the Community: Participate in forums and AWS events to expand your network and knowledge.
  • Monitor Your Usage: Keep an eye on your AWS usage and billing to stay within your budget and Free Tier limits.

📢 Stay Tuned!

Tomorrow, we’ll dive into Best Practices for AWS IAM 🛡️✨, where we’ll explore advanced strategies to enhance your security posture and streamline access management. Get ready to level up your IAM game! 🚀

Got questions, experiences with AWS Support and Documentation, or your own cloud jokes? Drop them below! Let’s make this journey interactive and fun. 💬

P.S. Why did the AWS support engineer bring a ladder to work? Because they wanted to reach the cloud! 😄☁️⬆️

The Journey Continues…

Thanks for joining me on this insightful exploration of AWS Support and Documentation Resources! 🌟 Remember, a well-supported cloud environment is a happy and productive one. Embrace these resources to navigate AWS with ease and confidence. Until next time, keep your cloud adventures supported and your spirits high! ☁️✨

Disclaimer: No support tickets were harmed in the making of this blog post, though some may have been mildly entertained. 😉🛠️

Let’s Keep the Conversation Cloudy!

Feel free to share this post with friends, colleagues, or that one person who thinks “AWS Support” is a new dance move. 💃🕺 Together, we’ll continue unraveling the wonders of AWS with humor and helpful insights! ☁️🎉

Note: All emojis are intended to add a splash of fun and visual excitement to the topics discussed. 🎨✨

```

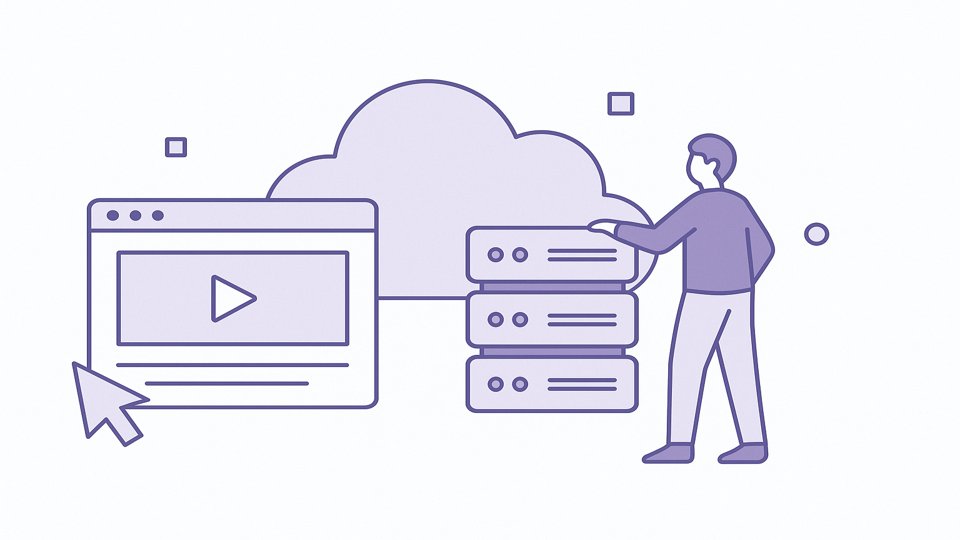
— Launching Your Cloud Adventure with a Click and a Smile!🖥️🚀✨


Hello, Aspiring Cloud Navigators and Future AWS Heroes! 🦸‍♂️☁️

Welcome back to our thrilling AWS journey! After exploring the vast landscape of AWS Identity and Access Management (IAM) 🔐👥🛡️, it’s time to take a leap into the exciting world of Amazon EC2 (Elastic Compute Cloud). Think of EC2 as your very own virtual computer in the cloud—ready to run applications, host websites, and more, all without the hassle of physical hardware. Whether you’re a developer, a student, or simply a tech enthusiast, creating your first EC2 instance is a milestone worth celebrating 🎉😄. So, grab your favorite snack 🍿, put on your explorer hat 🎩, and let’s embark on this cloud-filled adventure together!


🌟 What is Amazon EC2?

Amazon EC2 is a web service that provides resizable compute capacity in the cloud. In simpler terms, it allows you to rent virtual servers to run your applications, store data, and perform various computing tasks without the need for physical hardware. Imagine having a powerful computer that you can scale up or down based on your needs—whether you’re building a simple blog or a complex machine learning model, EC2 has got you covered! 🖥️💡

Why Use EC2?

  • Flexibility and Scalability 📈🔄: Scale your computing resources up or down based on demand.
  • Cost-Effective 💸🤑: Pay only for what you use, with no upfront costs.
  • Wide Range of Instances 🛠️🔧: Choose from various instance types optimized for different tasks.
  • Global Reach 🌍✈️: Deploy your applications in data centers around the world for low latency and high availability.

🚀 Step-by-Step Guide to Creating Your First EC2 Instance

Ready to dive in? Let’s walk through the process of launching your very first EC2 instance with ease and a touch of humor!

Step 1: Log in to the AWS Management Console 🖥️🔑

  1. Visit the AWS Website: Go to aws.amazon.com and click on “Sign In to the Console” in the top right corner.
  2. Enter Your Credentials: Input your email and password. If you’re new to AWS, you can create a free account to get started without any charges (thanks to the AWS Free Tier!). 🆓✨

Step 2: Navigate to the EC2 Dashboard 🌐📊

  1. Access EC2: Once logged in, find the “Services” menu at the top and select “EC2” under the Compute category. It’s like finding the main control room for your cloud operations! 🛠️🔍

A screenshot of the AWS Management Console showing the Services menu with EC2 selected under Compute.

Step 3: Launch a New Instance 🚀🖱️

  1. Click “Launch Instance”: You’ll find this button in the EC2 Dashboard. It’s your gateway to creating a new virtual server! 🖱️✨
  2. Choose an Amazon Machine Image (AMI) 🖥️📜:
    • What It Is: An AMI is a template that contains the software configuration (operating system, applications, etc.) for your instance.
    • Recommendation: Start with a Free Tier eligible AMI, such as Ubuntu Server 20.04 LTS or Amazon Linux 2. They’re reliable and perfect for beginners! 🐧🟢

A screenshot of the AMI selection page highlighting free-tier eligible options like Ubuntu Server and Amazon Linux.

Step 4: Select an Instance Type 🏷️🔧

  1. Instance Types: Choose the instance type that best fits your needs. For starters, t2.micro or t3.micro are great choices—they’re free-tier eligible and perfect for learning.
  2. Description: These instances offer a balance of compute, memory, and networking resources, making them ideal for small applications and testing environments. 📊🧑‍💻

A screenshot showing the instance type selection with t2.micro highlighted as a free-tier option.

Step 5: Configure Instance Details ⚙️📋

  1. Number of Instances: Start with 1 unless you have a specific need for more.
  2. Network Settings: Choose the default VPC (Virtual Private Cloud) and subnet. For now, the default settings are just fine. It’s like choosing the right neighborhood for your virtual home! 🏡🌐
  3. Advanced Options: For beginners, the default settings will suffice. As you get more comfortable, you can explore advanced configurations. 🔍🔧

A screenshot of the instance configuration page showing default settings for network and subnet.

Step 6: Add Storage 💾🗄️

  1. Default Storage: AWS provides a default amount of storage based on your AMI selection. For most beginners, the default settings are sufficient.
  2. Additional Storage: If needed, you can add more storage. Just like adding more shelves to your virtual closet! 🧥📚

A screenshot of the storage configuration page with options to add more storage highlighted.

Step 7: Add Tags 🏷️🌈

  1. Tags: Tags are labels that help you organize your instances. For example, add a tag like “Name to easily identify your server later.
  2. Best Practice: Use descriptive names to keep track of multiple instances. It’s like labeling your files for easy access! 🗂️📝

A screenshot of the tagging page with a tag labeled “Name“.

Step 8: Configure Security Group 🔐🛡️

  1. Security Groups: These act as virtual firewalls, controlling inbound and outbound traffic to your instance.
  2. Create a New Security Group: For your first instance, allow SSH (port 22) for Linux or RDP (port 3389) for Windows. It’s like setting up the gates to your virtual castle! 🏰🔑
  3. Best Practice: Restrict access to specific IP addresses to enhance security. No unwanted guests allowed! 🚫👥

A screenshot of the security group settings showing SSH access (port 22) enabled for specific IP addresses.

Step 9: Review and Launch ✅🚀

  1. Review Settings: Double-check all your configurations to ensure everything is set up correctly.
  2. Select Key Pair 🔑: Choose an existing key pair or create a new one. This is essential for securely accessing your instance. Download and save your key pair—think of it as your VIP pass to the cloud! 🗝️🎟️
  3. Launch: Click “Launch” and watch your EC2 instance come to life! 🎉🖥️

A screenshot of the final review page showing a summary of all configurations before launching the instance.


🛡️ Best Practices for Managing Your EC2 Instance

Congratulations! You’ve successfully launched your first EC2 instance. Now, let’s ensure you manage it like a pro:

1. Connect to Your Instance 🌐🔌

  • SSH for Linux 🐧🔑: Use an SSH client to securely connect to your instance.
  • RDP for Windows 🪟🖱️: Use Remote Desktop Protocol to access your Windows instance.

A screenshot of an SSH terminal connected to a Linux EC2 instance.

2. Monitor Your Instance 📈👀

  • CloudWatch 📊🔍: Use Amazon CloudWatch to monitor your instance’s performance and set up alarms for unusual activity. It’s like having a fitness tracker for your server! 🏋️‍♂️📉

A screenshot of the CloudWatch dashboard showing metrics like CPU usage, memory, and network activity.

3. Secure Your Instance 🔒🛡️

  • Regular Updates 🔄🛠️: Keep your operating system and applications updated to protect against vulnerabilities.
  • Firewall Rules 🚫🔥: Continuously review and update your security groups to minimize exposure.

4. Manage Costs 💸

📊🔍: Regularly check your AWS Billing Dashboard to keep track of your spending and ensure you stay within the Free Tier limits.

  • Stop or Terminate Unused Instances 🛑❌: If you’re not using an instance, stop or terminate it to avoid unnecessary charges. It’s like turning off the lights when you leave a room! 💡🏃‍♂️

A screenshot of the AWS Billing Dashboard displaying usage statistics and cost breakdowns.


🎯 Real-World Use Cases: How EC2 Transforms Businesses

Amazon EC2 is a versatile tool used by businesses of all sizes for various applications:

1. Web Hosting 🕸️🏠

Host your website on an EC2 instance for reliable performance and scalability. Whether it’s a personal blog or an e-commerce site, EC2 can handle the traffic spikes effortlessly.

2. Application Development 👨‍💻🔧

Develop, test, and deploy applications using EC2’s flexible environments. Collaborate with your team in real-time without worrying about infrastructure constraints.

3. Data Analysis 📈🔍

Run big data applications and perform complex analyses with the compute power of EC2. It’s like having a supercomputer in your back pocket! 🖥️💼

4. Machine Learning 🤖📊

Leverage EC2 instances with GPU capabilities to train machine learning models faster. It’s the rocket fuel your AI projects need! 🚀🧠

An architecture diagram illustrating EC2 use cases such as web hosting, application development, data analysis, and machine learning.


😂 Cloud Computing Humor Break!

Why did the cloud server bring a ladder to work?

Because it wanted to reach new heights! 😄☁️⬆️


📝 Let’s Get Interactive!

Quiz Time! 🧠

Question: What is the primary purpose of an Amazon EC2 instance?

A) To store data
B) To provide scalable computing power
C) To manage user access
D) To monitor application performance

Think you know the answer?


Answer: B) To provide scalable computing power 🖥️💨

Congrats if you got it right! 🎉 EC2 instances are all about giving you the computing resources you need, whenever you need them.


🌟 Final Thoughts: Embrace Your EC2 Adventure

Creating your first AWS EC2 instance is just the beginning of your cloud journey. With EC2’s robust features and AWS’s comprehensive ecosystem, the possibilities are endless. Whether you’re building a simple website or deploying a complex application, EC2 provides the flexibility and power to bring your ideas to life. Remember, the cloud is your playground—explore, experiment, and have fun! 🏰🔍

Pro Tips:

  • Leverage AWS Documentation 📚🔍: AWS offers extensive guides and tutorials to help you get the most out of EC2.
  • Join AWS Communities 👥🌐: Engage with other AWS users through forums, meetups, and online communities to share knowledge and gain insights.
  • Automate with Scripts 🤖📜: Use scripts and tools like AWS CLI and SDKs to automate your EC2 management tasks, saving you time and effort.

📢 Stay Tuned!

Tomorrow, we’ll delve into AWS Security Best Practices 🛡️✨, where we’ll explore advanced strategies to keep your cloud environment secure and efficient. Get ready to level up your security game! 🚀


Got questions, experiences with EC2, or your own cloud jokes? Drop them below! Let’s make this journey interactive and fun. 💬


P.S. Why did the EC2 instance apply for a job? Because it wanted to scale up its career! 😂📈


The Journey Continues…

Thanks for joining me on this exciting journey of creating your first AWS EC2 instance! 🌟 Remember, the cloud is a vast and dynamic space full of opportunities—embrace it with curiosity and confidence. Until next time, keep your instances running smoothly and your cloud adventures soaring high! ☁️✨


Disclaimer: No physical servers were harmed in the making of this blog post, though some virtual ones may have been mildly entertained. 😉💻


Let’s Keep the Conversation Cloudy!

Feel free to share this post with friends, colleagues, or that one person who still thinks “EC2” stands for “Extra Cool Computers.” Together, we’ll continue unraveling the wonders of AWS and the cloud! ☁️🎉


Note: All big animated emojis are intended to add a splash of fun and visual excitement to the topics discussed. 🎨✨

```

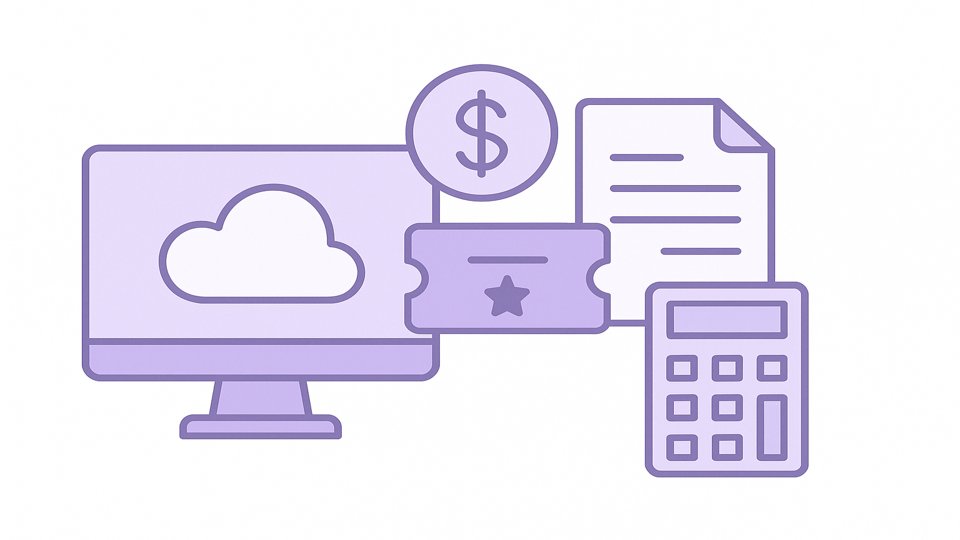
🆓💸📊— Unlocking AWS Without Breaking the Bank, with a Dash of Fun!

Hello, Thrifty Cloud Explorers and Budget-Savvy Tech Enthusiasts! 💰☁️😃

Welcome back to our AWS adventure! After mastering IAM 🔐👥🛡️, it’s time to talk about something equally important: AWS Free Tier and Billing Overview. Whether you’re a student, a startup founder, or just someone who loves freebies 🎁, understanding AWS’s Free Tier and how billing works is essential to making the most out of your cloud journey without blowing your budget. So, grab your piggy bank 🐷💰 and let’s dive into the world of AWS Free Tier and billing with plenty of humor and emojis along the way!

🆓 What is AWS Free Tier?

The AWS Free Tier is like a free sample at your favorite grocery store 🛒—a way to try out AWS services without spending a dime. It’s designed to help new users get hands-on experience with AWS and explore its vast array of services without the financial commitment. Think of it as your golden ticket 🎫 to the cloud kingdom, allowing you to experiment, learn, and build without worrying about costs (at least initially)!

Key Components of the Free Tier

  1. Always Free 🕒💡
    • Certain services are free forever within specific usage limits. Examples include:
      • Amazon DynamoDB: 25 GB of storage
      • AWS Lambda: 1 million free requests per month
  2. 12-Month Free Tier 📅🎉
    • Most services are free for 12 months following your AWS sign-up date. Highlights include:
      • Amazon EC2: 750 hours of t2.micro or t3.micro instances per month
      • Amazon S3: 5 GB of Standard Storage
  3. Trials 🛍️⏳
    • Short-term free trials for new services that allow you to test them out for a limited time or usage.

🌟 Benefits of the AWS Free Tier

1. Cost-Efficient Learning 📚💸

The Free Tier allows you to explore AWS services without the fear of unexpected bills. It’s perfect for students, hobbyists, and startups looking to learn and innovate without hefty investments.

2. Experimentation and Prototyping 🧪🚀

Build and test prototypes, experiment with different services, and develop your projects without financial constraints. It’s like having a sandbox to play in before building your dream castle! 🏰⚒️

3. Scale Your Skills 📈🔍

As you grow more comfortable with AWS, you can transition from the Free Tier to paid services seamlessly, scaling your infrastructure as needed. Think of it as leveling up in a video game—unlock new abilities as you progress! 🎮✨

💸 Understanding AWS Billing

While the Free Tier is fantastic, understanding AWS Billing is crucial to avoid surprises. Let’s break it down in a fun and engaging way!

1. Pay-As-You-Go Model 🛒💳

AWS operates on a pay-as-you-go basis, meaning you only pay for the services you use. It’s like ordering à la carte at a restaurant—no need to pay for a full menu if you just want a burger and fries! 🍔🍟

2. Billing Dashboard 📊🖥️

The Billing Dashboard is your financial command center. It provides insights into your spending, usage, and cost optimization opportunities. Think of it as your personal finance tracker, keeping you informed and in control. 💼📈

A screenshot of the AWS Billing Dashboard with colorful graphs and charts displaying monthly costs and usage statistics.

3. Cost Allocation Tags 🏷️💡

Tags are labels you assign to your AWS resources, helping you categorize and track costs by project, department, or any other criteria. It’s like color-coding your bills for easy sorting and tracking! 🎨📑

Diagrams illustrating the application of cost allocation tags to various AWS resources for organized billing. Further reading:https://docs.aws.amazon.com/awsaccountbilling/latest/aboutv2/cost-alloc-tags.html

4. Budgets and Alerts 🚨📅

Set up budgets and alerts to monitor your spending and receive notifications when you approach or exceed your budget limits. It’s like having a financial guardian angel watching over your expenses! 👼📈

 Screenshots of the AWS Budgets setup interface showing budget limits and configured alert thresholds.

⚠️ Avoiding Unexpected Charges

While the Free Tier is generous, it’s essential to manage your usage to prevent unexpected charges. Here are some tips to keep your budget in check:

1. Monitor Your Usage Regularly 👀📅

Keep an eye on your usage patterns through the Billing Dashboard and AWS Cost Explorer. Regular monitoring helps you stay aware of your consumption and identify any unusual spikes early.

2. Set Up Billing Alerts 🛎️📲

Configure billing alerts to notify you when your costs approach your predefined limits. It’s like setting alarms to wake you up before overspending! ⏰💸

3. Use Cost Management Tools 🛠️💡

Leverage AWS’s cost management tools like AWS Cost Explorer, AWS Budgets, and AWS Trusted Advisor to gain insights and optimize your spending. Think of these tools as your financial fitness trainers, helping you stay lean and efficient! 🏋️‍♂️📉

4. Shut Down Unused Resources 📴🔌

Ensure you stop or terminate resources that are no longer in use. Idle resources can rack up costs without you realizing it—like leaving the lights on in an empty house! 🏠💡


Diagram showing the process of identifying and shutting down unused EC2 instances to reduce costs.

5. Take Advantage of Free Tier Limits 🆓✅

Understand the Free Tier limits and ensure your usage stays within these boundaries. It’s like knowing how much candy you can eat without getting a stomach ache! 🍬😅

📝 Let’s Get Interactive!

Quiz Time! 🧠

Question: Which AWS service allows you to set budgets and receive alerts when your spending approaches the set limit?

  1. A) Amazon EC2
    B) AWS Cost Explorer
    C) AWS Budgets
    D) Amazon S3

Think you know the answer?

Answer: C) AWS Budgets 🆓💡

Congrats if you got it right! 🎉 AWS Budgets is your go-to tool for setting spending limits and receiving alerts, helping you stay on top of your cloud expenses.

😂 Cloud Computing Humor Break!

Why did the cloud break up with the data center?

Because it found someone more serverless! 😏☁️

📊 AWS Free Tier and Billing Architecture Diagrams: Placeholders

To better visualize how AWS Free Tier and Billing work, here are some suggested architecture diagrams you can include in your blog:

1. Free Tier Service Usage Diagram 🆓📦

An architecture diagram highlighting AWS Free Tier services like EC2, S3, Lambda, and their respective usage limits.

2. Billing Dashboard Flowchart 📈🔄

A flowchart showing the process of tracking costs through the Billing Dashboard, setting budgets, and receiving alerts.

3. Cost Allocation Tagging Structure 🏷️🗂️

An architecture diagram displaying how cost allocation tags are applied to various AWS resources like EC2 instances, S3 buckets, and RDS databases.

🌟 Final Thoughts: Mastering AWS Free Tier and Billing

Understanding the AWS Free Tier and Billing Overview is like having a financial map 🗺️ for your cloud journey. By leveraging the Free Tier, you can explore and experiment with AWS services without financial strain. Simultaneously, mastering billing management ensures that your cloud expenses remain under control, allowing you to scale your projects sustainably.

Pro Tips:

  • Start Small: Utilize the Free Tier to get hands-on experience without worrying about costs.
  • Stay Informed: Regularly check your usage and billing to stay within free limits.
  • Optimize Continuously: Use AWS cost management tools to find savings and optimize your infrastructure.
  • Educate Your Team: Ensure everyone involved understands the Free Tier benefits and billing practices to prevent overspending.

📢 Stay Tuned!

Tomorrow, we’ll dive into Navigating the AWS Management Console 🖥️🛠️, where we’ll explore advanced features, tips for optimizing your workflow, and creating your first EC2 instance. Exciting times ahead! 🚀

Got questions, experiences with AWS Free Tier and billing, or your own cloud jokes? Drop them below! Let’s make this journey interactive and fun. 💬

*P.S. Why did the

cloud server bring a ladder to work?*

Because it wanted to reach new heights! 😄☁️⬆️

The Journey Continues…

Thanks for joining me on this deep dive into AWS Free Tier and Billing Overview! 🌟 Remember, the cloud offers immense possibilities, and with the right knowledge, you can harness its power without emptying your wallet. Until next time, keep your cloud adventures cost-effective and your spirits high! ☁️✨

Disclaimer: No wallets were harmed in the making of this blog post, though some may have been pleasantly surprised by the savings! 😉💳

Let’s Keep the Conversation Cloudy!

Feel free to share this post with friends, colleagues, or that one person who thinks “Free Tier” is a new yoga pose. 🧘‍♂️ Together, we’ll continue unraveling the wonders of AWS without breaking the bank! ☁️🎉

Note: All big animated emojis are intended to add a splash of fun and visual excitement to the topics discussed. 🎨✨

```

— Guarding the Gates of Your AWS Kingdom with Style and Smiles!

Hello, Security Superstars and Cloud Guardians! 🦸‍♂️☁️

Welcome back to our AWS adventure! After exploring the vast AWS Global Infrastructure 🌍⚡, it’s time to focus on something just as crucial: AWS Identity and Access Management (IAM). Think of IAM as the vigilant gatekeeper 🚪🛡️ of your AWS kingdom, ensuring that only the right people have access to the right resources. Whether you’re a seasoned IT pro or a curious newcomer, understanding IAM is essential for keeping your cloud environment secure and efficient. So, grab your virtual shield 🛡️, put on your superhero cape 🦸‍♀️, and let’s dive into the world of IAM with a sprinkle of humor and plenty of emojis! 🎉😄

🌟 What is AWS IAM?

AWS Identity and Access Management (IAM) is a powerful service that helps you securely control access to AWS resources. Imagine IAM as the ultimate bouncer at the hottest club in town 🎉🚪—it checks IDs, ensures only invited guests get in, and keeps the party safe and enjoyable for everyone.

With IAM, you can:

  • Manage Users 👤: Create and manage individual users who need access to your AWS resources.
  • Create Groups 👥: Organize users into groups with specific permissions.
  • Define Roles 🛠️: Assign permissions to entities that AWS services or external users can assume.
  • Set Policies 📜: Define rules that determine what actions users, groups, and roles can perform.

🏗️ Core Components of IAM

To master IAM, you need to understand its core components. Let’s break them down with some fun analogies and emojis!

1. Users 👤

What It Is: Individual identities with specific permissions to access AWS resources.

Analogy: Think of users as the employees in your AWS company. Each has their own ID badge 🏷️ that grants them access to different parts of the office.

2. Groups 👥

What It Is: Collections of users that share the same permissions.

Analogy: Groups are like departments in your company—Marketing, Engineering, HR—all with their own access levels and responsibilities.

3. Roles 🛠️

What It Is: IAM roles are identities with specific permissions that AWS services or external users can assume temporarily.

Analogy: Roles are like guest passes at your office party—temporary access for visitors without giving them a permanent badge.

4. Policies 📜

What It Is: JSON documents that define permissions and control access to AWS resources.

Analogy: Policies are like the rulebook of your office—specifying who can enter which rooms and what they can do inside.

🔐 Why IAM is Essential

Without IAM, managing access to your AWS resources would be like leaving the doors of your house wide open 🏠🚪—a recipe for chaos and potential breaches. Here’s why IAM is indispensable:

1. Security First! 🔒

IAM ensures that only authorized users can access your resources, protecting your data from unauthorized access and potential cyber threats. It’s like having a high-tech security system for your digital assets.

2. Fine-Grained Access Control 🎯

With IAM, you can define precise permissions, granting users only the access they need to perform their tasks. This principle of least privilege minimizes the risk of accidental or malicious actions.

3. Scalability and Flexibility 📈🔄

As your organization grows, IAM scales with you. Easily add new users, create groups, and assign roles without disrupting your existing setup. It’s like adding new rooms to your house without tearing down walls.

4. Compliance and Auditing 📋🔍

IAM helps you maintain compliance with industry standards and regulations by providing detailed logs and reports on who accessed what and when. Think of it as having a security camera system that records all activities for future reference.

🛡️ Best Practices for Using IAM

To make the most out of IAM and keep your AWS environment secure, follow these best practices:

1. Use the Principle of Least Privilege 🎯

Grant users only the permissions they need to perform their jobs. Avoid giving excessive permissions that could lead to unintended actions or security risks.

2. Enable Multi-Factor Authentication (MFA) 🔐📲

Add an extra layer of security by requiring MFA for all users, especially for those with administrative privileges. It’s like having a double lock on your door for added protection.

3. Regularly Rotate Credentials 🔄🔑

Change passwords and access keys regularly to reduce the risk of unauthorized access. Think of it as updating your security codes to keep intruders out.

4. Use Roles Instead of Root Accounts 🛠️👑

Avoid using the root account for everyday tasks. Instead, create IAM roles with the necessary permissions. It’s like delegating responsibilities to trusted team members instead of doing everything yourself.

5. Monitor and Audit IAM Activities 👀📝

Regularly review IAM policies, user permissions, and access logs to ensure everything is in order. It’s like conducting periodic security audits to identify and fix vulnerabilities.

1. IAM User and Group Structure Diagram 🧩

An IAM architecture diagram illustrating users organized into groups, each with specific policies attached.

2. IAM Roles and Policies Flowchart 🔄

A flowchart showing the process of IAM roles being assumed by users or services, with policies governing their permissions.

3. IAM Security Best Practices Diagram 🛡️

A diagram showcasing IAM best practices, including multi-factor authentication, least privilege access, and regular credential rotation.

🎯 Real-World Use Cases: How IAM Protects Your AWS Environment

1. Development Teams 👩‍💻👨‍💻

Development teams can be granted specific permissions to access resources necessary for building and testing applications, without exposing sensitive production environments.

2. IT Administrators 🛠️🖥️

IT admins require broad access to manage and configure AWS resources. By assigning them appropriate roles, you ensure they have the tools they need without compromising overall security.

3. External Contractors 🧑‍💼🔗

External contractors can be given temporary roles with limited permissions, ensuring they have access only to the resources needed for their tasks and nothing more.

😂 Fun Facts and Humor 🤣🎉

1. The Origin of IAM’s Name 🧐🤔

Did you know IAM stands for Identity and Access Management? But let’s be honest—it could easily stand for I Am Marvelous, given how powerful and essential it is in the AWS ecosystem! 🦸‍♂️✨

2. IAM Policies: More Rules Than a Board Game 🎲📜

Crafting IAM policies can sometimes feel like creating the rules for an elaborate board game—everyone needs to know what they can and cannot do to keep the game fair and fun!

3. IAM as the Ultimate Bouncer 🚪🕶️

Imagine IAM as the bouncer at a nightclub, meticulously checking IDs and ensuring that only the right guests get into the right sections. No unwanted party crashers allowed! 🎉🚫

📝 Let’s Get Interactive!

Quiz Time! 🧠

Question: What is the primary purpose of AWS IAM?

  1. A) To manage billing and costs
    B) To control access to AWS resources
    C) To deploy applications
    D) To monitor performance

Think you know the answer?

Answer: B) To control access to AWS resources 🔐👥

Congrats if you got it right! 🎉 IAM is all about managing who can access your AWS resources and what actions they can perform, ensuring your cloud environment stays secure and efficient.

🌟 Final Thoughts: Become an IAM Pro!

AWS Identity and Access Management is your first line of defense in securing your AWS environment. By understanding and implementing IAM best practices, you can protect your resources, streamline access, and maintain a secure and organized cloud infrastructure. Think of IAM as the unsung hero 🦸‍♀️ of your AWS setup—quietly working behind the scenes to keep everything safe and running smoothly.

Pro Tips:

  • Start with Users and Groups: Organize your team by creating users and grouping them based on their roles.
  • Leverage IAM Roles: Use roles for applications and services instead of embedding credentials.
  • Regularly Review Permissions: Periodically audit user permissions to ensure they align with current responsibilities.
  • Stay Informed: AWS regularly updates IAM features—keep an eye on the AWS IAM Documentation for the latest tips and tricks.

📢 Stay Tuned!

Tomorrow, we’ll delve into Best Practices for AWS IAM 🛡️✨, where we’ll explore advanced strategies to enhance your security posture and streamline access management. Get ready to level up your IAM game! 🚀

Got questions, experiences with IAM, or your own cloud jokes? Drop them below! Let’s make this journey interactive and fun. 💬

P.S. Why did the IAM policy apply for a job? Because it wanted to manage access! 😂🔑

The Journey Continues…

Thanks for joining me on this deep dive into AWS Identity and Access Management! 🌟 Remember, a secure cloud is a happy cloud—so keep your IAM settings tight and your spirits high! ☁️✨

Disclaimer: No identities or access permissions were harmed in the making of this blog post, though some may have been mildly entertained. 😉🔐

Let’s Keep the Conversation Cloudy!

Feel free to share this post with friends, colleagues, or that one person who still thinks IAM stands for I Am Marvelous. Together, we’ll continue unraveling the wonders of AWS! ☁️🎉

Note: All emojis are intended to add a splash of fun and visual excitement to the topics discussed. 🎨✨

```

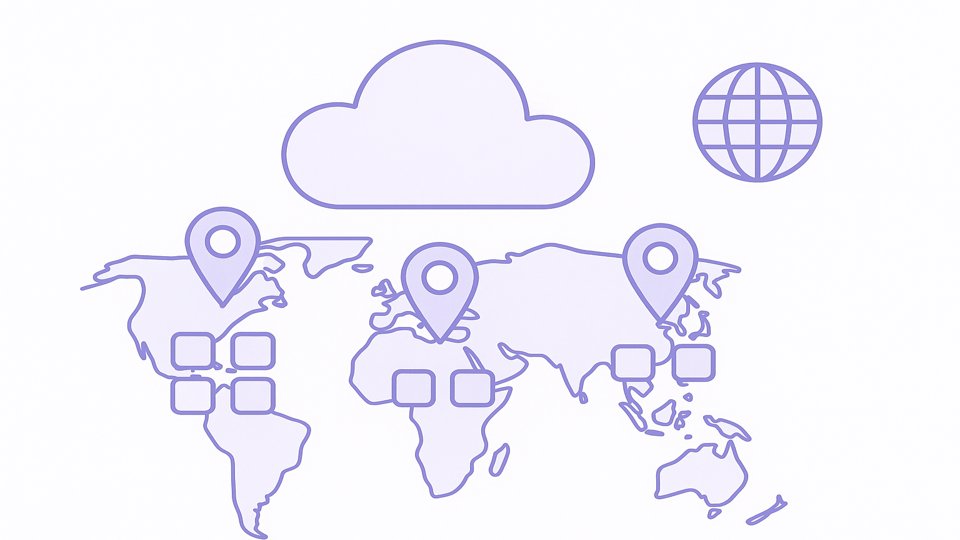
AWS Global Infrastructure: Regions and Availability Zones 🌍🏢⚡

— Exploring AWS’s Worldwide Web with Maps, Mazes, and Magic!

Hello, Global Cloud Navigators and AWS Explorers! 🧭🌟

Welcome back to our AWS adventure! After mastering the AWS Management Console, it’s time to zoom out and take a look at the bigger picture—the AWS Global Infrastructure. Think of it as the world map 🗺️ for your cloud services, featuring Regions and Availability Zones (AZs). Whether you’re a globe-trotting developer or a homebody business owner, understanding this infrastructure is key to unlocking AWS’s full potential. So, grab your virtual passport ✈️ and let’s embark on this global journey together!

🌐 What is AWS Global Infrastructure?

The AWS Global Infrastructure is the backbone that powers all AWS services worldwide. It’s designed to provide high availability, fault tolerance, and low latency by distributing resources across various geographic locations. Imagine AWS as a vast network of interconnected cities 🏙️, each equipped with state-of-the-art facilities to keep your applications running smoothly.

Key Components: Regions and Availability Zones

  • Regions 🏞️: Geographic areas containing multiple data centers.
  • Availability Zones (AZs) 🏢⚡: Isolated data centers within a region to ensure redundancy and reliability.

🏁 Understanding AWS Regions

What is a Region?

A Region is a distinct geographic area where AWS clusters multiple Availability Zones. Each region is completely independent, with its own set of resources, services, and data centers. Think of a region as a country 🌎, each with its own government and infrastructure to manage its own affairs.

Why Regions Matter

  1. Latency Reduction 🕒🚀
    • Choose a region closest to your users to ensure faster response times.
  2. Data Residency Compliance 📜🔒
    • Meet legal and regulatory requirements by storing data in specific geographic locations.
  3. Disaster Recovery 🌪️🛡️
    • Distribute resources across regions to protect against regional failures.

🏢 Exploring Availability Zones (AZs)

What is an Availability Zone?

An Availability Zone is one or more discrete data centers with redundant power, networking, and connectivity within a region. AZs are designed to be isolated from failures in other AZs, ensuring that a problem in one AZ doesn’t affect the others. Think of AZs as neighborhoods within a city 🏘️, each with its own infrastructure to keep things running smoothly.

Benefits of Availability Zones

  1. High Availability 🌟🔄
    • Deploy applications across multiple AZs to ensure they remain available even if one AZ goes down.
  2. Fault Tolerance 🛠️🧱
    • Isolate failures to a single AZ, preventing them from cascading across the entire region.
  3. Scalability 📈🔝
    • Easily scale your applications by leveraging resources from multiple AZs.

🗺️ AWS Regions Around the World

AWS boasts a sprawling global infrastructure, with regions spread across North America, Europe, Asia-Pacific, South America, Africa, and the Middle East. Here are a few notable regions:

  1. US East (N. Virginia) 🇺🇸🗽
    • One of the oldest and largest AWS regions, serving millions of users.
  2. Europe (Frankfurt) 🇩🇪🏰
    • Key for businesses operating in Europe, ensuring data residency and compliance.
  3. Asia Pacific (Tokyo) 🇯🇵🏯
    • Vital for serving the tech-savvy and populous markets of Asia.

World map highlighting various AWS regions with icons representing major cities like N. Virginia, Frankfurt, Tokyo, etc. For latest update, please visit: https://aws.amazon.com/about-aws/global-infrastructure/

⚡ Why AWS Uses Regions and AZs

1. Redundancy and Reliability

By spreading resources across multiple AZs and regions, AWS ensures that your applications remain up and running even in the face of hardware failures, power outages, or natural disasters. It’s like having backup generators and multiple power grids to keep the lights on! 💡🔋

2. Performance Optimization

Deploying your applications in regions closest to your users minimizes latency, providing a smoother and faster user experience. It’s like having local branches of your favorite store in every neighborhood—quick and convenient! 🏪✨

3. Cost Efficiency

Choosing the right region can help optimize costs based on pricing variations and resource availability. It’s like shopping around for the best deals to save money while still getting what you need! 🛒💸


🎯 Best Practices for Using Regions and AZs

1. Choose the Right Region

  • Proximity to Users 🗺️👥: Select a region near your primary user base for optimal performance.
  • Compliance Needs 📜🔐: Ensure the region complies with data residency and regulatory requirements.
  • Service Availability 🛠️🔍: Not all AWS services are available in every region, so check availability before deciding.

2. Distribute Across Multiple AZs

  • Deploy Redundantly 🔄🛡️: Spread your resources across at least two AZs to enhance availability.
  • Load Balancing ⚖️🚦: Use load balancers to distribute traffic evenly across AZs, preventing any single AZ from becoming a bottleneck.

3. Implement Disaster Recovery Plans

  • Multi-Region Backups 🌍💾: Store backups in different regions to protect against regional disasters.
  • Automate Failover 🤖🔄: Set up automated failover mechanisms to switch to backup resources seamlessly in case of an outage.

📝 Let’s Get Interactive!

Quiz Time! 🧠

Question: What is the primary purpose of AWS Availability Zones (AZs)?

A) To increase storage capacity
B) To reduce latency
C) To ensure high availability and fault tolerance
D) To lower costs

Think you know the answer?


Answer: C) To ensure high availability and fault tolerance 🛡️🌟

Congrats if you got it right! 🎉 AZs are designed to keep your applications running smoothly by providing redundant resources and isolating failures.


😂 Cloud Computing Humor Break!

Why did the cloud go to school?

To become a little smarter! 😄☁️


🌟 Final Thoughts: Mastering the AWS Global Infrastructure

Understanding the AWS Global Infrastructure is crucial for building resilient, high-performing, and compliant applications. By strategically selecting regions and distributing resources across Availability Zones, you can harness the full power of AWS’s global network. It’s like having a well-planned city where everything works in harmony! 🏙️🌈

Pro Tips:

  • Stay Updated 📅🔔: AWS frequently adds new regions and AZs. Keep an eye on announcements to take advantage of the latest infrastructure.
  • Monitor Performance 📈👀: Use AWS monitoring tools to track the performance of your applications and make informed decisions about region and AZ selection.
  • Optimize Costs 💰🔍: Regularly review your usage and adjust your infrastructure to maximize cost efficiency without compromising performance.

📢 Stay Tuned!

Tomorrow, we’ll dive into Benefits and Challenges of Cloud Computing 🏆⚠️. We’ll explore the superpowers and kryptonite of cloud computing, helping you make informed decisions for your cloud strategy. Exciting insights await! 🚀


Got questions, experiences with AWS regions and AZs, or your own cloud jokes? Drop them below! Let’s make this journey interactive and fun. 💬


P.S. What did one AWS server say to the other? “I think we’re in sync!” 😂🔄


The Journey Continues…

Thanks for joining me on this global tour of the AWS Infrastructure! 🌍✨ Remember, the cloud is vast and full of opportunities—embrace it with curiosity and a sense of humor. Until next time, keep exploring and optimizing your cloud adventures! ☁️🚀


Disclaimer: No regions or data centers were harmed in the making of this blog post, though some may have been mildly amused. 😉💻


Let’s Keep the Conversation Cloudy!

Feel free to share this post with friends, colleagues, or that one person who still thinks “AZ” stands for “Arizona.” Together, we’ll continue unraveling the wonders of the AWS Global Infrastructure! ☁️🎉


Note: All big animated emojis are intended to add a splash of fun and visual excitement to the topics discussed. 🎨✨

```

— Your Fun and Friendly Guide to Mastering the AWS Dashboard!

Hello, Cloud Explorers and AWS Adventurers! 🧭🌟

Welcome back to our cloud computing journey! After diving into the basics of Amazon Web Services (AWS) yesterday, it’s time to get hands-on and explore the AWS Management Console. Think of it as the cockpit of a high-tech spaceship 🚀—full of buttons, controls, and blinking lights, ready to launch your cloud missions. Don’t worry; we’ll navigate this together with plenty of humor, emojis, and maybe a few laughs along the way. So, buckle up, grab your favorite snack 🍿, and let’s embark on this interactive tour!

🌐 What is the AWS Management Console?

The AWS Management Console is your web-based interface to access and manage all your AWS services. Imagine it as the command center where you can launch virtual servers, store data, monitor your applications, and much more—all from the comfort of your browser. It’s like having a remote control for your entire cloud infrastructure! 📺☁️

🔑 Logging In and Setting Up

Step 1: Visit the AWS Management Console

Head over to aws.amazon.com and click on “Sign In to the Console” in the top right corner. If you’ve already set up your free AWS account, this is your gateway to cloud paradise! 🌴💻

Step 2: Enter Your Credentials

Input your email and password. If you’ve forgotten your password, AWS has your back with a helpful “Forgot your password?” link. It’s like having a friendly concierge at your cloud hotel! 🏨🔑

Step 3: Multi-Factor Authentication (MFA) – Optional but Recommended 🔐📲

For an extra layer of security, enable MFA. It’s like having a bouncer at the cloud club, ensuring only you get in! 🕶️🛡️

A screenshot showing the AWS Services menu dropdown with icons for EC2, S3, IAM and more.

🖥️ Overview of the Dashboard

Once you’re in, you’ll be greeted by the AWS Management Console Dashboard. Here’s a quick rundown of the main sections:

1. Services Menu 🛠️

Located at the top, this is your portal to over 200 AWS services. Whether you need computing power, storage, or machine learning tools, it’s all here. It’s like a magical toolbox where every tool is just a click away! 🧰✨

2. Search Bar 🔍

At the top of the dashboard, the search bar is your best friend. Can’t find a service? Just type its name, and voilà! It’s like having a genie in a bottle granting your search wishes. 🧞‍♂️🔮

3. Resource Groups 🗂️

This feature helps you organize and manage resources across multiple services. Think of it as your digital filing cabinet, keeping everything neat and accessible. 📁🖨️

4. Billing and Cost Management 💰📊

Monitor your spending, set up budgets, and analyze costs. It’s like having a personal accountant who never sleeps! 🧾😴

5. Support Center 🛎️

Need help? The Support Center connects you to AWS support plans, documentation, and community forums. It’s your tech support hotline, but cooler! ☎️💬


A series of screenshots showing the EC2 launch wizard steps: selecting AMI, choosing instance type, configuring details, and launching.

🛠️ Key Sections and How to Use Them

1. Services Menu 🛠️

The Services Menu is where the magic happens. From launching virtual servers with EC2 to storing data in S3, it’s your command center for all things AWS.

Example: Launching an EC2 Instance

  1. Click on “EC2” in the Services Menu.
  2. Hit the “Launch Instance” button.
  3. Choose an Amazon Machine Image (AMI)—think of it as selecting the blueprint for your virtual server.
  4. Pick an instance type based on your needs (CPU, memory, etc.).
  5. Configure instance details, add storage, and set up security groups.
  6. Review and launch!

2. Search Bar 🔍

The search bar is perfect for power users who know exactly what they want. Simply type in a service name like “Lambda” or “RDS”, and jump straight to it.

3. Resource Groups 🗂️

Organize your projects by creating resource groups. For example, if you’re working on a web app, you might group together your EC2 instances, S3 buckets, and RDS databases for easy management.

Pro Tip: Tag your resources with relevant labels (e.g., “Project”) to keep things tidy. It’s like color-coding your closet for easy outfit selection! 👗🧥

4. Billing and Cost Management 💰📊

Stay on top of your cloud expenses by regularly checking the Billing Dashboard. Set up alerts to notify you when you approach your budget limits—no more surprise bills at the end of the month!

5. Support Center 🛎️

Access support plans, AWS documentation, and community forums from the Support Center. Whether you’re troubleshooting an issue or learning a new service, this is your go-to spot for assistance.

Screenshot of the AWS Billing Dashboard showing cost breakdown.

🎯 Creating Your First EC2 Instance: A Fun Step-by-Step

Let’s walk through creating your first EC2 instance. Don’t worry; it’s easier than assembling IKEA furniture (and less frustrating)! 🛠️🔧, also refer to the EC2 screenshots above.

Step 1: Navigate to EC2

From the Services Menu, click on EC2. You’ll land on the EC2 Dashboard, your starting point for virtual servers.

Step 2: Launch Instance

Click the “Launch Instance” button. This brings up the Launch Wizard, guiding you through the process.

Step 3: Choose an AMI

Select an Amazon Machine Image (AMI). Think of it as picking your server’s operating system and pre-installed software. Choose Ubuntu Server if you’re into Linux, or Windows Server for a Windows environment.

Step 4: Select Instance Type

Choose the instance type based on your needs. For beginners, the t2.micro instance is perfect—it’s free-tier eligible and great for learning.

Step 5: Configure Instance Details

Set the number of instances, network settings, and other configurations. For now, the default settings are just fine. It’s like setting up your first smartphone—simple and straightforward! 📱👍

Step 6: Add Storage

AWS provides default storage, but you can add more if needed. Just like adding more drawers to your desk for extra storage. 🗄️✨

Step 7: Add Tags

Tags help you organize your instances. Add a tag like “Name

to easily identify your server later.

Step 8: Configure Security Group

Set up firewall rules to control traffic to your instance. Allow SSH (port 22) for Linux or RDP (port 3389) for Windows to access your server remotely. It’s like setting up a security system for your virtual home! 🏠🔒

Step 9: Review and Launch

Double-check your settings, select an existing key pair or create a new one for secure access, and hit “Launch”. Congratulations! You’ve just launched your first EC2 instance. 🎉🖥️

💡 Tips and Tricks for a Smooth AWS Experience

1. Customize Your Dashboard 🖥️✨

Tailor the AWS Management Console to suit your workflow. Pin frequently used services for quick access. It’s like setting your favorite apps on your phone’s home screen! 📱🏠

2. Utilize Keyboard Shortcuts ⌨️🚀

Speed up your navigation with keyboard shortcuts. Learn the most common ones to save time and boost productivity. It’s like having a secret handshake with the console! 🤝💨

3. Explore AWS Documentation and Tutorials 📚🎓

AWS offers extensive resources to help you learn. Dive into documentation, follow tutorials, and join webinars to expand your knowledge. Think of it as attending a masterclass in cloud wizardry! 🧙‍♂️📖

4. Leverage AWS Free Tier Wisely 🆓💡

Take advantage of the AWS Free Tier to experiment without worrying about costs. Monitor your usage regularly to stay within free limits and avoid unexpected charges. It’s like having a free trial membership at a gym—use it before it expires! 🏋️‍♂️📈

📝 Let’s Get Interactive!

Quiz Time! 🧠

Question: What does EC2 stand for in AWS?

  1. A) Elastic Cloud 2
    B) Elastic Compute Cloud
    C) Enhanced Compute Capacity
    D) Easy Cloud Control

Think you know the answer?

Answer: B) Elastic Compute Cloud 🖥️💨

Congrats if you got it right! 🎉 If not, no worries—now you know! EC2 is one of AWS’s core services, providing scalable computing power in the cloud.

😂 Cloud Computing Humor Break!

Why did the cloud go to therapy?

Because it had too many layered issues! 😅☁️

🌟 Final Thoughts: Embrace the AWS Adventure

Navigating the AWS Management Console is the first step to unlocking the full potential of cloud computing. With its vast array of services and intuitive interface, AWS empowers you to build, deploy, and manage applications with ease. Remember, every expert was once a beginner, so don’t hesitate to explore and experiment. 🧪🔍

Pro Tips:

  • Start Small: Begin with free-tier services to get comfortable.
  • Stay Organized: Use tags and resource groups to manage your assets.
  • Keep Learning: AWS is constantly evolving—stay updated with the latest features and best practices.

📢 Stay Tuned!

Tomorrow, we’ll take a closer look at Navigating the AWS Management Console 🖥️🛠️, where we’ll dive deeper into advanced features, tips for optimizing your workflow, and creating your first EC2 instance. Exciting times ahead! 🚀

Got questions, experiences with AWS, or your own cloud jokes? Drop them below! Let’s make this journey interactive and fun. 💬

P.S. What did one AWS server say to the other? “I think we’re in sync!” 😂🔄

The Journey Continues…

Thanks for joining me on this introductory tour of the AWS Management Console! 🌟 Remember, the cloud is vast and full of opportunities—embrace it with enthusiasm and a sense of humor. Until next time, keep your data safe and your spirits high! ☁️✨

Disclaimer: No servers were harmed in the making of this blog post, though some may have been mildly amused. 😉💻

Let’s Keep the Conversation Cloudy!

Feel free to share this post with friends, colleagues, or that one person who still thinks “AWS” stands for “Awesome Web Snacks.” Together, we’ll continue unraveling the wonders of the cloud! ☁️🎉

Note: All big animated emojis are intended to add a splash of fun and visual excitement to the topics discussed. 🎨✨

```