Author name: towardscloud

In the rapidly evolving landscape of artificial intelligence, few advancements have captured the imagination of creators, technologists, and the public alike as profoundly as generative AI. This field, which empowers machines to synthesize visual content—from photorealistic images to dynamic videos—is redefining creativity, storytelling, and problem-solving across industries. Once confined to the realm of science fiction, tools like DALL·E, MidJourney, and DeepMind’s Sora now demonstrate that machines can not only replicate human creativity but also augment it in unprecedented ways.

Suggestion:Please read this blog in multiple sittings as it has lot to cover :-)

The rise of generative AI in image and video synthesis marks a paradigm shift in how we produce and interact with visual media. Whether crafting hyperrealistic digital art, restoring historical footage, generating virtual environments for gaming, or enabling personalized marketing content, these technologies are dissolving the boundaries between the real and the synthetic. Yet, with such power comes profound questions: How do these systems work? What ethical challenges do they pose? And how might they shape industries like entertainment, healthcare, and education in the years ahead?

This exploration begins by unpacking the foundational technologies behind generative AI—Generative Adversarial Networks (GANs), Variational Autoencoders (VAEs), diffusion models, and transformers—each acting as a building block for synthesizing visual content. 

Foundational Concepts

Core Technologies

Generative Adversarial Networks (GANs): Systems with two neural networks—a generator creating images and a discriminator evaluating them—competing to improve output quality through iterative training.

Diffusion Models: Algorithms that gradually add noise to images and then learn to reverse this process, creating new content by progressively removing noise from random patterns.

Transformers: Originally designed for language tasks, now adapted for visual generation by treating images as sequences of patches and applying self-attention mechanisms

Key Concepts

Latent Space: An abstract, compressed representation of visual data where similar concepts are positioned closely together, allowing for meaningful manipulation and interpolation.

Text-to-Image Generation: Converting natural language descriptions into corresponding visual content using models trained on text-image pairs.

Image-to-Image Translation: Transforming images from one domain to another while preserving structural elements (e.g., turning sketches into photorealistic images).

Inpainting and Outpainting: Filling in missing portions of images (inpainting) or extending images beyond their boundaries (outpainting).

Style Transfer: Applying the artistic style of one image to the content of another while maintaining the original content’s structure.

Motion Synthesis: Creating realistic movement in videos either from scratch or by animating static images.

Prompt Engineering: Crafting effective text descriptions that guide AI systems to produce desired visual outputs.

Fine-tuning: Adapting pre-trained models to specific visual styles or domains with smaller datasets.

Generative Adversarial Networks (GANs)

Real-World Example: StyleGAN

StyleGAN, developed by NVIDIA, revolutionized realistic face generation. Its architecture separates high-level attributes (gender, age) from stochastic details (freckles, hair texture).

Applications:

  • ThisPersonDoesNotExist.com: Generates photorealistic faces of non-existent people
  • Fashion design: Companies like Zalando use GANs to create virtual clothing models
  • Game asset creation: Automating character and texture generation

Diffusion Models

Real-World Example: Stable Diffusion & DALL-E

Diffusion models have become the dominant approach for high-quality image generation, with Stable Diffusion being an open-source implementation that gained massive popularity.

Applications:

  • Midjourney: Creates artistic renderings from text descriptions
  • Product visualization: Companies generate product mockups before manufacturing
  • Adobe Firefly: Integrates diffusion models into creative software for professional workflows
  • Medical imaging: Generates synthetic medical images for training diagnostic systems

Transformers for Vision

Real-World Example: Sora by OpenAI

Sora uses a transformer-based architecture to generate high-definition videos from text prompts, understanding complex scenes, camera movements, and multiple characters.

Applications:

  • Video generation: Creating complete short films from text descriptions
  • Simulation: Generating synthetic training data for autonomous vehicles
  • VFX automation: Generating background scenes or crowd simulations
  • Educational content: Creating visual explanations from textual concepts

Latent Space Manipulation

Real-World Example: GauGAN by NVIDIA

NVIDIA’s GauGAN allows users to draw simple segmentation maps that are then converted to photorealistic landscapes, operating in a structured latent space.

Applications:

  • Face editing: Modifying specific attributes like age, expression, or hairstyle
  • Interior design: Changing room styles while maintaining layout
  • Content creation tools: Allowing non-artists to generate professional-quality visuals
  • Virtual try-on: Changing clothing items while preserving the person’s appearance

Text-to-Image Generation

Real-World Example: Midjourney

Midjourney has become renowned for its artistic renditions of text prompts, allowing users to specify styles, compositions, and content with natural language.

Applications:

  • Marketing materials: Generating custom imagery for campaigns
  • Book illustrations: Creating visual companions to written content
  • Conceptual design: Rapid visualization of product ideas
  • Social media content: Creating engaging visuals from descriptive prompts

Inpainting and Outpainting

Real-World Example: Photoshop Generative Fill

Adobe’s Photoshop now features “Generative Fill” powered by Firefly AI, which allows users to select areas of an image and replace them with AI-generated content based on text prompts.

Applications:

  • Photo restoration: Filling in damaged portions of historical photos
  • Object removal: Erasing unwanted elements from photos
  • Creative expansion: Extending existing artwork beyond original boundaries
  • Film restoration: Repairing damaged frames in old films

Motion Synthesis

Real-World Example: RunwayML’s Gen-2

RunwayML’s Gen-2 can animate still images or generate videos from text prompts, producing natural motion and maintaining visual consistency.

Applications:

  • Character animation: Bringing illustrations to life with realistic movements
  • Visual effects: Generating dynamic elements like fire, water, or crowds
  • Digital avatars: Creating animated versions of static portraits
  • Architectural visualization: Adding movement to static building renders

Fine-tuning and Personalization

Real-World Example: DreamBooth and LoRA

DreamBooth technology allows users to personalize diffusion models with just 3-5 images of a subject, enabling the generation of that subject in new contexts and styles.

Applications:

  • Brand personalization: Training models to generate content in specific brand styles
  • Personal avatars: Creating customized digital representations of individuals
  • Product visualization: Generating variations of products in different contexts
  • Character design: Maintaining consistent character appearance across multiple scenes

This comprehensive overview demonstrates how generative AI for image and video synthesis works at a foundational level, with real-world applications that are transforming creative industries, entertainment, design, and many other fields. Each of these technologies continues to evolve rapidly, with new capabilities emerging regularly.

Cloud Implementation Comparison

Now, let’s cover cloud implementations and some comarison across cloud providers.

AWS Implementation: Amazon Bedrock and SageMaker

AWS offers multiple approaches for deploying generative AI for image and video synthesis.

Amazon Bedrock

Amazon Bedrock provides a fully managed service to access foundation models through APIs, including Stability AI’s models for image generation.

AWS Bedrock Image Generation with Stability AI

import boto3
import json
import base64
from PIL import Image
import io

# Initialize Bedrock client
bedrock = boto3.client(
    service_name='bedrock-runtime',
    region_name='us-west-2'
)

def generate_image_with_bedrock(prompt, model_id="stability.stable-diffusion-xl", height=1024, width=1024):
    """Generate an image using Amazon Bedrock with Stability AI model"""
    
    # Request body for Stability AI models
    request_body = {
        "text_prompts": [{"text": prompt}],
        "cfg_scale": 7,
        "steps": 50,
        "seed": 42,
        "style_preset": "photographic",
        "height": height,
        "width": width
    }
    
    # Invoke the model
    response = bedrock.invoke_model(
        modelId=model_id,
        body=json.dumps(request_body)
    )
    
    # Parse the response
    response_body = json.loads(response.get('body').read())
    
    # For Stability AI models, the image is base64 encoded
    image_b64 = response_body.get('artifacts')[0].get('base64')
    
    # Decode the image
    image_data = base64.b64decode(image_b64)
    image = Image.open(io.BytesIO(image_data))
    
    return image

# Example usage
if __name__ == "__main__":
    prompt = "A futuristic cityscape with flying cars and neon lights"
    image = generate_image_with_bedrock(prompt)
    image.save("aws_bedrock_generated_image.png")
    print("Image generated and saved successfully!")

Amazon SageMaker with Custom Models

For more control and customization, you can deploy your own image synthesis models on SageMaker:

AWS SageMaker Custom Deployment for Stable Diffusion

import boto3
import sagemaker
from sagemaker.huggingface import HuggingFaceModel
import json

# Initialize SageMaker session
sagemaker_session = sagemaker.Session()
role = "arn:aws:iam::123456789012:role/SageMakerExecutionRole"
bucket = "your-s3-bucket"

# Define Hugging Face model
huggingface_model = HuggingFaceModel(
    model_data="s3://your-bucket/stable-diffusion-model.tar.gz",
    role=role,
    transformers_version="4.26.0",
    pytorch_version="1.13.1",
    py_version="py39",
)

# Deploy the model
predictor = huggingface_model.deploy(
    initial_instance_count=1,
    instance_type="ml.g4dn.xlarge",
    endpoint_name="stable-diffusion-endpoint"
)

def generate_image(prompt):
    """Generate an image using the deployed Stable Diffusion model"""
    payload = {
        "inputs": prompt,
        "parameters": {
            "height": 512,
            "width": 512,
            "num_inference_steps": 50,
            "guidance_scale": 7.5
        }
    }
    
    # Invoke the endpoint
    response = predictor.predict(json.dumps(payload))
    
    # Parse and save the response
    # Implementation depends on your model's output format
    
    return response

# Clean up resources when done
def cleanup():
    predictor.delete_endpoint()
    predictor.delete_model()

GCP Implementation: Vertex AI with Imagen

Google Cloud Platform offers Imagen on Vertex AI for image generation, providing a powerful and easy-to-use service for developers.

GCP Vertex AI Imagen Implementation

import vertexai
from vertexai.preview.vision_models import Image, ImageGenerationModel
import os

# Initialize Vertex AI
vertexai.init(project="your-project-id", location="us-central1")

def generate_image_with_imagen(prompt, output_file="gcp_imagen_output.png"):
    """Generate an image using Vertex AI's Imagen model"""
    
    # Load the image generation model
    model = ImageGenerationModel.from_pretrained("imagegeneration@002")
    
    # Generate the image
    response = model.generate_images(
        prompt=prompt,
        # Optional parameters
        guidance_scale=7.0,
        negative_prompt="blurry, bad quality, unrealistic",
        samples=1,
        seed=42,
        # Image dimensions - see API docs for available options
        resolution="1024x1024",
    )
    
    # Save the generated image
    image = response[0]
    image.save(output_file)
    print(f"Image saved to {output_file}")
    return image

# Example usage
if __name__ == "__main__":
    prompt = "An astronaut riding a horse on Mars, photorealistic"
    generate_image_with_imagen(prompt)

For Video Synthesis on GCP:

GCP Video Synthesis Implementation

import vertexai
from vertexai.preview.generative_models import GenerativeModel
import time
import os

# Initialize Vertex AI
vertexai.init(project="your-project-id", location="us-central1")

def generate_video_with_vertex_ai(prompt, output_file="gcp_generated_video.mp4"):
    """Generate a video using Vertex AI's video generation capabilities"""
    
    # Load the generative model for video
    model = GenerativeModel("gemini-1.5-flash")
    
    # Generate the video
    response = model.generate_content(
        [prompt],
        generation_config={
            "temperature": 0.9,
            "max_output_tokens": 2048,
            "top_p": 1.0,
            "top_k": 32,
        },
        # Video generation specific parameters
        video_dimensions="1280x720",
        video_length_seconds=5,
    )
    
    # Process the response
    if hasattr(response, 'video'):
        with open(output_file, 'wb') as f:
            f.write(response.video)
        print(f"Video saved to {output_file}")
        return output_file
    else:
        print("No video was generated.")
        return None

# Example usage
if __name__ == "__main__":
    prompt = "Generate a 5-second video of a spaceship landing on an alien planet with a sunset in the background"
    generate_video_with_vertex_ai(prompt)

Azure Implementation: Azure OpenAI Service with DALL-E

Microsoft Azure provides the Azure OpenAI Service, which includes DALL-E models for image generation:

Azure OpenAI Service with DALL-E Implementation

import os
import requests
import json
from PIL import Image
import io
import base64

def generate_image_with_azure_openai(prompt, size="1024x1024", output_file="azure_dalle_output.png"):
    """Generate an image using Azure OpenAI Service with DALL-E model"""
    
    # Azure OpenAI configuration
    api_key = os.environ.get("AZURE_OPENAI_API_KEY")
    api_base = os.environ.get("AZURE_OPENAI_ENDPOINT")
    api_version = "2023-12-01-preview"
    deployment_name = "dall-e-3"  # Your DALL-E deployment name
    
    # Prepare the request URL
    url = f"{api_base}/openai/deployments/{deployment_name}/images/generations?api-version={api_version}"
    
    # Prepare the request headers
    headers = {
        "Content-Type": "application/json",
        "api-key": api_key
    }
    
    # Prepare the request body
    body = {
        "prompt": prompt,
        "size": size,
        "n": 1,
        "quality": "standard",  # or "hd" for higher quality
        "style": "natural"  # or "vivid" for more vibrant images
    }
    
    # Make the request
    response = requests.post(url, headers=headers, json=body)
    
    if response.status_code == 200:
        # Extract the image URL from the response
        response_data = response.json()
        image_url = response_data["data"][0]["url"]
        
        # Download the image
        image_response = requests.get(image_url)
        image = Image.open(io.BytesIO(image_response.content))
        image.save(output_file)
        
        return image
    else:
        print(f"Error: {response.status_code}")
        print(response.text)
        return None

# Example usage
if __name__ == "__main__":
    prompt = "A serene Japanese garden with a koi pond, cherry blossoms, and a small wooden bridge"
    generate_image_with_azure_openai(prompt)

Azure Video Indexer and Custom Video Synthesis

For video synthesis and processing, Azure offers Video Indexer along with custom solutions on Azure Machine Learning:

Azure Custom Video Synthesis

import os
from azure.ai.ml import MLClient
from azure.ai.ml.entities import Environment, BuildContext
from azure.ai.ml.entities import ManagedOnlineEndpoint, ManagedOnlineDeployment
from azure.identity import DefaultAzureCredential

def deploy_video_synthesis_model():
    """Deploy a custom video synthesis model on Azure Machine Learning"""
    
    # Initialize ML client
    credential = DefaultAzureCredential()
    ml_client = MLClient(
        credential=credential,
        subscription_id="your-subscription-id",
        resource_group_name="your-resource-group",
        workspace_name="your-workspace"
    )
    
    # Create a compute cluster if needed
    if "gpu-cluster" not in ml_client.compute.list():
        from azure.ai.ml.entities import AmlCompute
        gpu_compute = AmlCompute(
            name="gpu-cluster",
            size="Standard_NC6s_v3",
            min_instances=0,
            max_instances=4,
            tier="Dedicated"
        )
        ml_client.begin_create_or_update(gpu_compute).result()
    
    # Create a custom environment for video synthesis
    env = Environment(
        name="video-synthesis-env",
        description="Environment for video synthesis models",
        build=BuildContext(
            path="./dockerfile",
        ),
        image="mcr.microsoft.com/azureml/curated/pytorch-1.10-cuda11.3:latest",
    )
    ml_client.environments.create_or_update(env)
    
    # Create an online endpoint
    endpoint_name = "video-synthesis-endpoint"
    endpoint = ManagedOnlineEndpoint(
        name=endpoint_name,
        description="Endpoint for video synthesis",
        auth_mode="key",
    )
    ml_client.begin_create_or_update(endpoint).result()
    
    # Create a deployment
    deployment = ManagedOnlineDeployment(
        name="video-synthesis-deployment",
        endpoint_name=endpoint_name,
        model="azureml:video-synthesis-model:1",
        environment="azureml:video-synthesis-env:1",
        code_configuration=CodeConfiguration(
            code="./src",
            scoring_script="score.py"
        ),
        instance_type="Standard_NC6s_v3",
        instance_count=1
    )
    ml_client.begin_create_or_update(deployment).result()
    
    return endpoint_name

# Example scoring script for the deployment (would be in ./src/score.py)
"""
import os
import torch
import torchvision
import tempfile
import json
import numpy as np
from diffusers import DiffusionPipeline, DPMSolverMultistepScheduler

def init():
    global model
    model = DiffusionPipeline.from_pretrained(
        "damo-vilab/text-to-video-ms-1.7b",
        torch_dtype=torch.float16,
        variant="fp16"
    )
    model.scheduler = DPMSolverMultistepScheduler.from_config(model.scheduler.config)
    model = model.to("cuda")

def run(raw_data):
    try:
        request_data = json.loads(raw_data)
        prompt = request_data.get("prompt", "A spaceship flying through a nebula")
        num_frames = request_data.get("num_frames", 16)
        
        # Generate the video frames
        with torch.autocast("cuda"):
            video_frames = model(prompt, num_inference_steps=25, num_frames=num_frames).frames
        
        # Save frames to a video file
        temp_dir = tempfile.mkdtemp()
        video_path = os.path.join(temp_dir, "output.mp4")
        torchvision.io.write_video(video_path, video_frames, fps=8)
        
        # Return the video file path
        return {"video_path": video_path}
    except Exception as e:
        return {"error": str(e)}
"""

Independent Implementation: Using Open Source Models

If you prefer vendor-agnostic solutions, you can deploy open-source models like Stable Diffusion on your own infrastructure:

Independent Stable Diffusion Implementation

import torch
from diffusers import StableDiffusionPipeline, StableDiffusionImg2ImgPipeline
from diffusers import DPMSolverMultistepScheduler
import numpy as np
from PIL import Image

def setup_stable_diffusion(device="cuda"):
    """Set up the Stable Diffusion pipeline"""
    
    # Initialize text-to-image pipeline
    txt2img_pipe = StableDiffusionPipeline.from_pretrained(
        "runwayml/stable-diffusion-v1-5",
        torch_dtype=torch.float16,
        safety_checker=None  # Remove safety checker for faster inference (use responsibly)
    )
    txt2img_pipe.scheduler = DPMSolverMultistepScheduler.from_config(txt2img_pipe.scheduler.config)
    txt2img_pipe = txt2img_pipe.to(device)
    
    # Initialize image-to-image pipeline (for modifications)
    img2img_pipe = StableDiffusionImg2ImgPipeline.from_pretrained(
        "runwayml/stable-diffusion-v1-5",
        torch_dtype=torch.float16,
        safety_checker=None
    )
    img2img_pipe.scheduler = DPMSolverMultistepScheduler.from_config(img2img_pipe.scheduler.config)
    img2img_pipe = img2img_pipe.to(device)
    
    return txt2img_pipe, img2img_pipe

def generate_image(prompt, pipe, height=512, width=512, num_inference_steps=30, guidance_scale=7.5):
    """Generate an image from a text prompt"""
    
    with torch.no_grad():
        image = pipe(
            prompt=prompt,
            height=height,
            width=width,
            num_inference_steps=num_inference_steps,
            guidance_scale=guidance_scale
        ).images[0]
    
    return image

def modify_image(prompt, init_image, pipe, strength=0.75, num_inference_steps=30, guidance_scale=7.5):
    """Modify an existing image with a text prompt"""
    
    with torch.no_grad():
        image = pipe(
            prompt=prompt,
            image=init_image,
            strength=strength,
            num_inference_steps=num_inference_steps,
            guidance_scale=guidance_scale
        ).images[0]
    
    return image

# Example usage
if __name__ == "__main__":
    # Check if CUDA is available
    device = "cuda" if torch.cuda.is_available() else "cpu"
    print(f"Using device: {device}")
    
    # Set up pipelines
    txt2img_pipe, img2img_pipe = setup_stable_diffusion(device)
    
    # Generate an image
    prompt = "A cyberpunk city at night with neon signs and flying cars"
    image = generate_image(prompt, txt2img_pipe)
    image.save("independent_sd_image.png")
    
    # Modify the generated image
    new_prompt = "A cyberpunk city at sunset with neon signs and flying cars"
    modified_image = modify_image(new_prompt, image, img2img_pipe, strength=0.5)
    modified_image.save("independent_sd_modified.png")

For video synthesis with open-source models:

Independent Video Synthesis Implementation

import torch
from diffusers import DiffusionPipeline, DPMSolverMultistepScheduler
import imageio
import numpy as np
import tempfile
import os

def setup_video_pipeline(device="cuda"):
    """Set up the text-to-video pipeline"""
    
    # Load the pipeline
    pipe = DiffusionPipeline.from_pretrained(
        "damo-vilab/text-to-video-ms-1.7b",
        torch_dtype=torch.float16,
        variant="fp16"
    )
    pipe.scheduler = DPMSolverMultistepScheduler.from_config(pipe.scheduler.config)
    pipe = pipe.to(device)
    
    return pipe

def generate_video(prompt, pipe, num_frames=16, num_inference_steps=25, fps=8, output_file="independent_video.mp4"):
    """Generate a video from a text prompt"""
    
    # Generate video frames
    with torch.autocast(device_type="cuda"):
        video_frames = pipe(
            prompt,
            num_inference_steps=num_inference_steps,
            num_frames=num_frames
        ).frames
    
    # Convert frames to numpy arrays
    video_frames = [frame.permute(1, 2, 0).cpu().numpy() for frame in video_frames]
    
    # Normalize to 0-255 and convert to uint8
    video_frames = [(frame * 255).astype(np.uint8) for frame in video_frames]
    
    # Save as video
    imageio.mimsave(output_file, video_frames, fps=fps)
    print(f"Video saved to {output_file}")
    
    return output_file

# Example usage
if __name__ == "__main__":
    # Check if CUDA is available
    device = "cuda" if torch.cuda.is_available() else "cpu"
    print(f"Using device: {device}")
    
    # Set up pipeline
    pipe = setup_video_pipeline(device)
    
    # Generate a video
    prompt = "A spaceship taking off from Earth and flying to Mars"
    output_file = generate_video(prompt, pipe)

Cloud Implementation Comparison

Let’s compare the different cloud platforms for generative AI image and video synthesis:

Feature Comparison

FeatureAWSGCPAzure
Pre-trained image models✅ Bedrock with Stability AI✅ Imagen on Vertex AI✅ DALL-E on Azure OpenAI
Custom model deployment✅ SageMaker✅ Vertex AI✅ Azure ML
Video synthesis⚠️ Limited native support✅ Built-in capabilities✅ Via custom models
Image editing✅ Via Stability AI✅ Native support✅ Via DALL-E
Fine-tuning support✅ With SageMaker✅ With Vertex AI✅ With Azure ML
API simplicity⭐⭐⭐⭐⭐⭐⭐⭐⭐⭐
Integration with other services⭐⭐⭐⭐⭐⭐⭐⭐⭐⭐⭐⭐⭐⭐

AWS Cost Breakdown:

  • Amazon Bedrock: $0.08-$0.24 per image with Stability AI models
  • Amazon SageMaker: $0.5-$4.0 per hour for GPU instances (ml.g4dn.xlarge to ml.g5.4xlarge)
  • Video synthesis: Additional costs for custom implementations

GCP Cost Breakdown:

  • Vertex AI Imagen: $0.02-$0.08 per image generation (depends on resolution)
  • Vertex AI custom deployment: $0.6-$3.5 per hour for GPU instances (n1-standard-8-gpu to a2-highgpu-1g)
  • Video generation: $0.10-$0.30 per second of generated video

Azure Cost Breakdown:

  • Azure OpenAI DALL-E: $0.04-$0.16 per image (standard vs. HD quality)
  • Azure ML: $0.5-$4.0 per hour for GPU instances (Standard_NC6s_v3 to Standard_ND40rs_v2)
  • Video Indexer: Pay per minute of processed video

Best Practices for Implementation

  1. Use managed services for simplicity:
    • AWS Bedrock for quick image generation
    • Vertex AI Imagen for high-quality images with simpler API
    • Azure OpenAI for DALL-E integration
  2. Custom deployment for specialized needs:
    • Fine-tune models on SageMaker/Vertex AI/Azure ML
    • Batch processing for high-volume generation
    • Integration with existing ML pipelines
  3. Cost optimization:
    • Use serverless options for sporadic usage
    • Reserved instances for consistent workloads
    • Optimize image/video resolution based on needs

Implementation Challenges and Solutions

Real-World Application Example: Product Visualization System

To demonstrate a complete solution, let’s build a product visualization system that generates images and videos of products from different angles and environments.

Product Visualization System Architecture

# product_visualization_system.py
import os
import json
import time
import boto3
import vertexai
import requests
from PIL import Image
import io
import threading
import queue

# Cloud provider selection utility
class CloudProviderSelector:
    def __init__(self, available_providers=["aws", "gcp", "azure"]):
        self.providers = available_providers
        self.metrics = {provider: {"latency": [], "cost": [], "quality": []} for provider in available_providers}
    
    def select_provider(self, task_type, resolution, priority="balanced"):
        """Select the best provider based on task type and priority"""
        if priority == "cost":
            # Return the cheapest option
            if task_type == "image" and "gcp" in self.providers:
                return "gcp"  # GCP generally has lower per-image costs
            elif task_type == "video" and "aws" in self.providers:
                return "aws"  # Using custom implementation on SageMaker
        elif priority == "quality":
            # Return the highest quality option
            if task_type == "image" and "azure" in self.providers:
                return "azure"  # DALL-E models often produce high quality
            elif task_type == "video" and "gcp" in self.providers:
                return "gcp"  # Better native video support
        elif priority == "speed":
            # Return the fastest option based on metrics
            fastest = min(self.providers, key=lambda p: sum(self.metrics[p]["latency"])/max(len(self.metrics[p]["latency"]), 1))
            return fastest
        
        # Balanced approach - default
        if task_type == "image":
            return "gcp"  # Good balance of cost/quality for images
        else:
            return "azure"  # Good balance for videos

# AWS Implementation
class AWSProvider:
    def __init__(self, region="us-west-2"):
        self.bedrock = boto3.client('bedrock-runtime', region_name=region)
    
    def generate_image(self, prompt, width=1024, height=1024):
        """Generate an image using AWS Bedrock with Stability AI"""
        start_time = time.time()
        
        request_body = {
            "text_prompts": [{"text": prompt}],
            "cfg_scale": 7,
            "

Practical Use-Cases for 
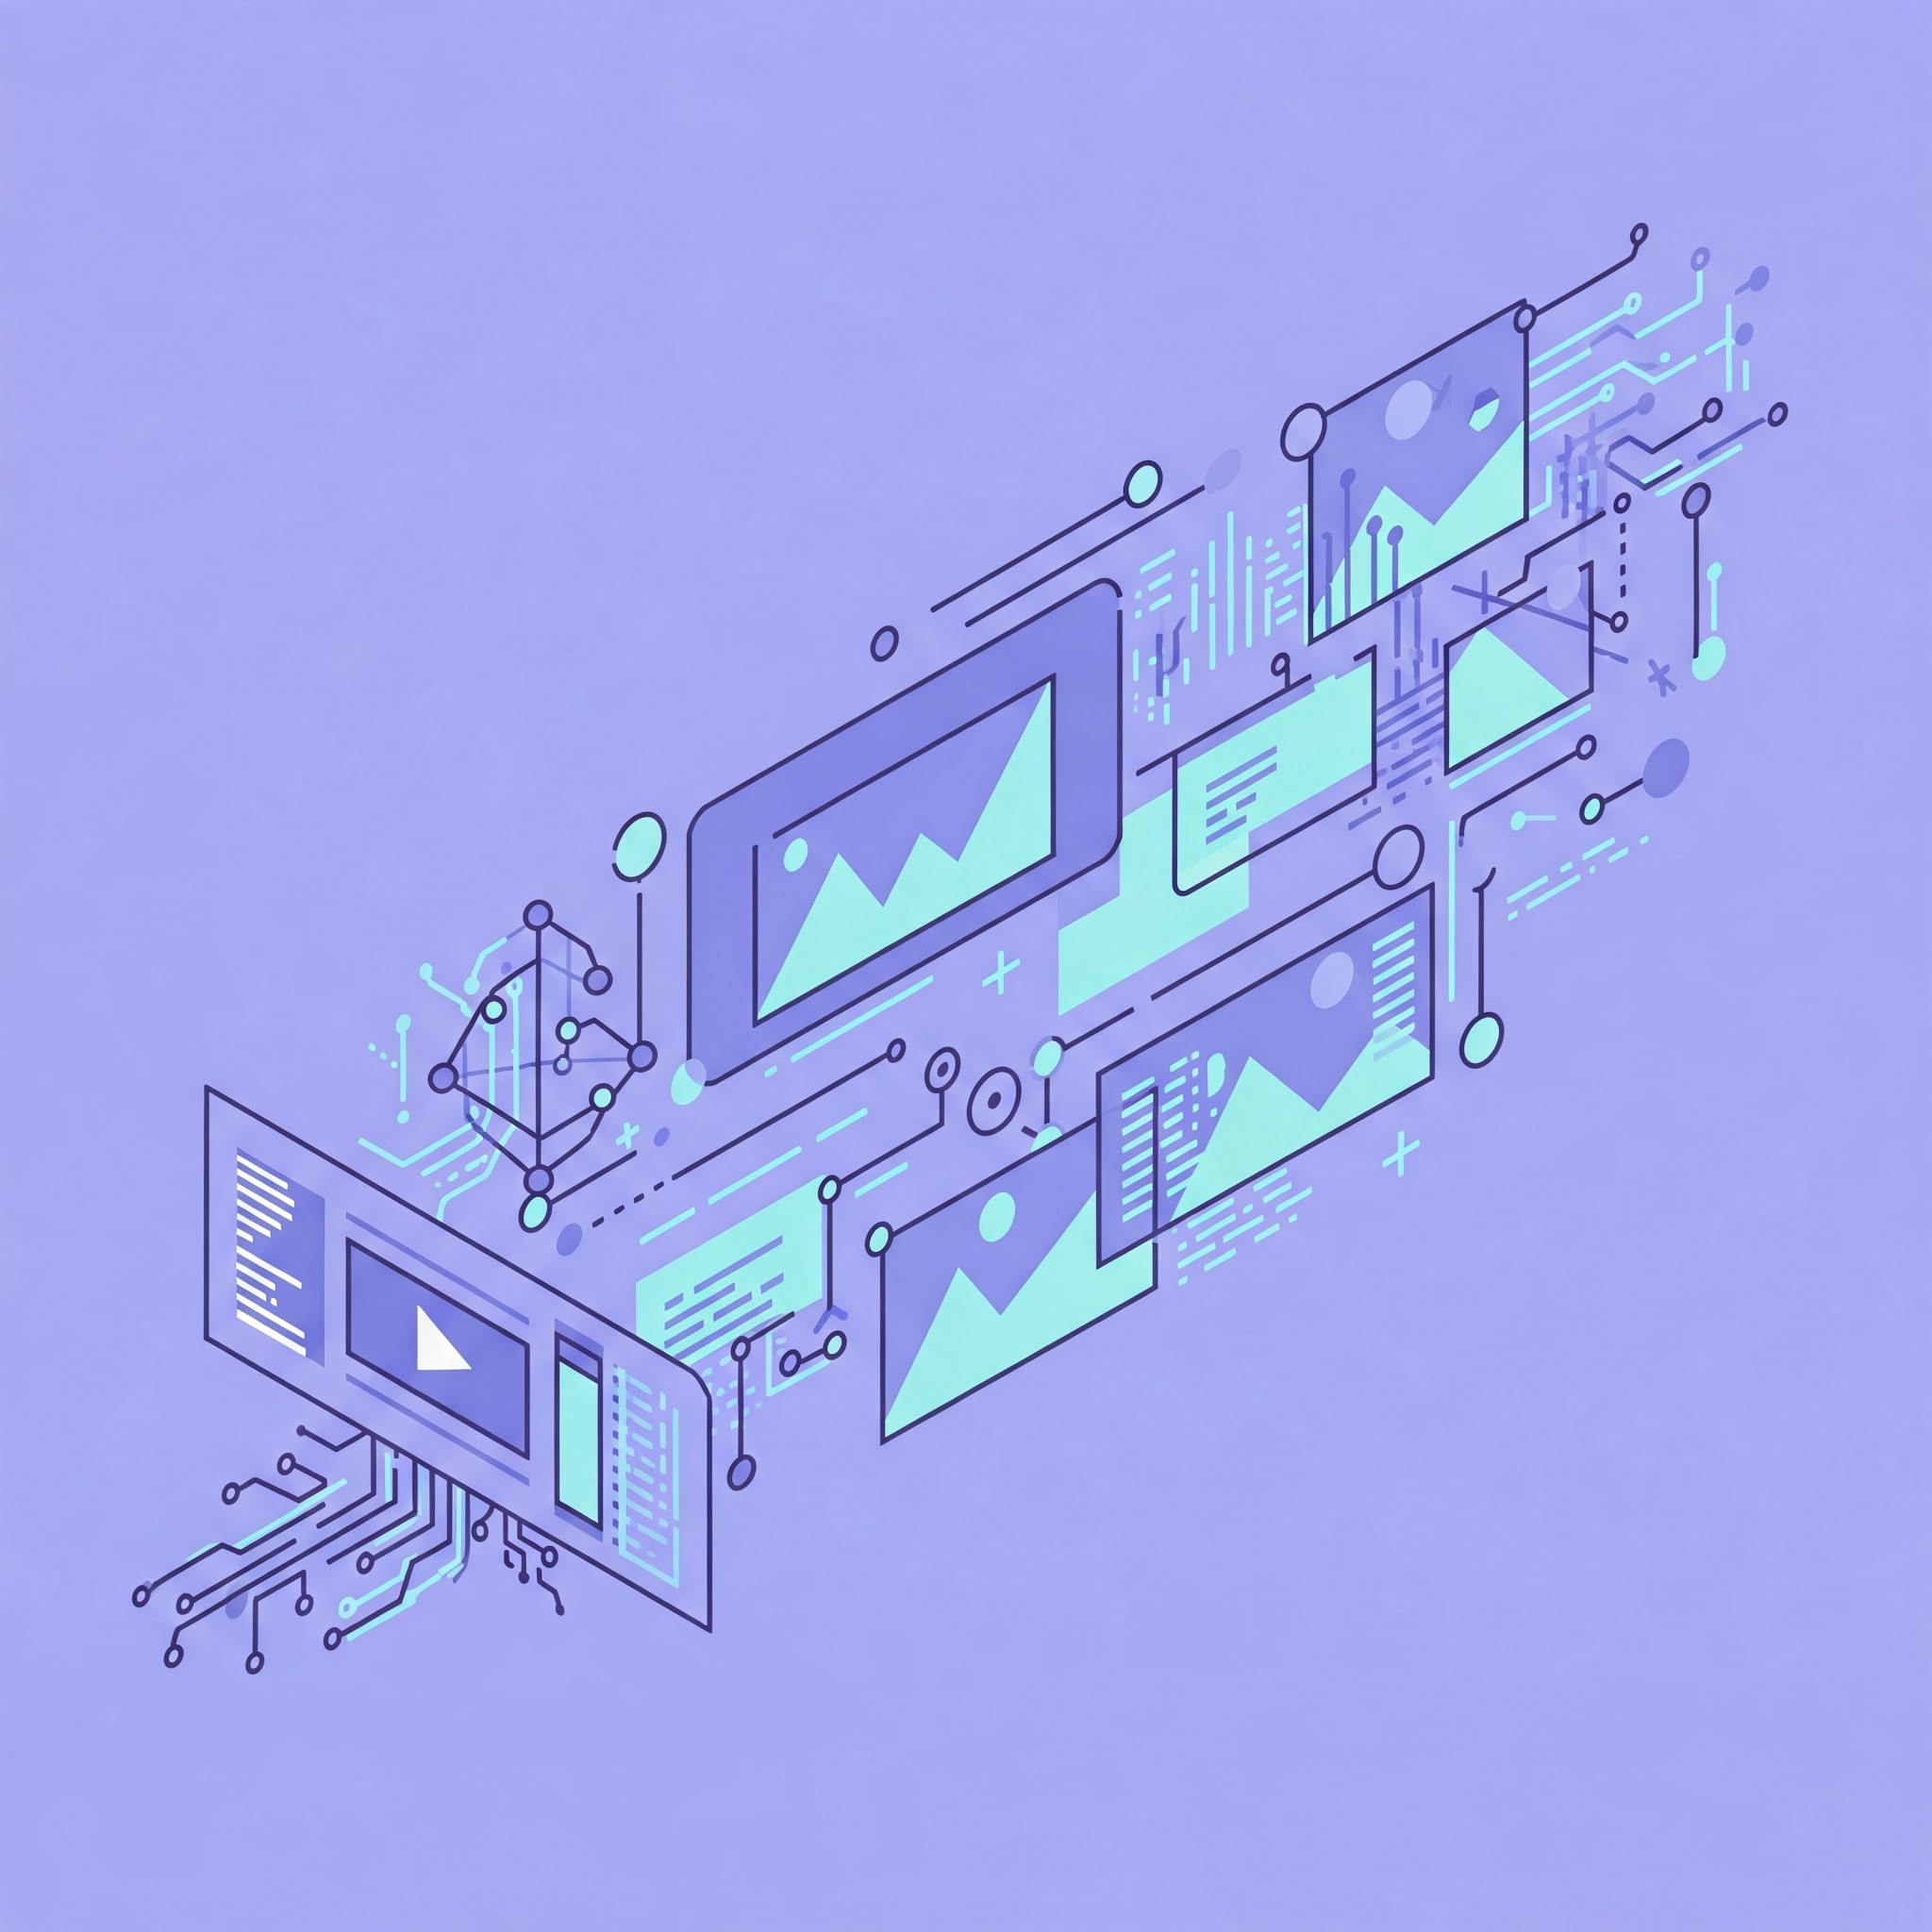
Generative AI in Image and Video Synthesis

  1. E-commerce Product Visualization
    • Generate product images from different angles
    • Create 360° views and videos
    • Show products in different contexts/environments
  2. Content Creation for Marketing
    • Create promotional visuals at scale
    • Generate scene variations for A/B testing
    • Create product demonstrations
  3. Virtual Try-On and Customization
    • Show clothing items on different body types
    • Visualize product customizations (colors, materials)
    • Create virtual fitting rooms
  4. Architectural and Interior Design
    • Generate realistic renderings of designs
    • Show spaces with different furnishings
    • Create walkthrough videos
  5. Educational Content
    • Create visual aids for complex concepts
    • Generate diagrams and illustrations
    • Create educational animations

Cost Optimization Strategies

  1. Implement caching strategies:
    • Store and reuse generated images when possible
    • Use image similarity detection to avoid regenerating similar content
    • Implement CDN for faster delivery and reduced API calls
  2. Right-size your requests:
    • Use appropriate resolutions for your needs (lower for thumbnails, higher for showcases)
    • Match compute resources to workload patterns
    • Implement auto-scaling for fluctuating demand
  3. Optimize prompts:
    • Well-crafted prompts reduce the need for regeneration
    • Use negative prompts to avoid undesired elements
    • Document successful prompts for reuse
  4. Multi-cloud strategy:
    • Use GCP for cost-effective image generation
    • AWS for custom model deployments
    • Azure for high-quality outputs when needed

Performance Considerations

  1. Latency management:
    • Implement asynchronous processing for large batch jobs
    • Pre-generate common images
    • Use edge deployments for latency-sensitive applications
  2. Scaling considerations:
    • Implement queue systems for high-volume processing
    • Use containerization for flexible deployments
    • Consider serverless for sporadic workloads
  3. Quality vs. speed tradeoffs:
    • Adjust inference steps based on quality requirements
    • Use progressive loading techniques for web applications
    • Implement post-processing for quality improvements

Security and Compliance Considerations

  1. Content filtering:
    • Implement pre and post-generation content filters
    • Use provider-supplied safety measures
    • Review generated content for sensitive applications
  2. Data handling:
    • Ensure prompts don’t contain PII
    • Understand provider data retention policies
    • Implement proper access controls
  3. Attribution and usage rights:
    • Understand licensing terms for generated content
    • Implement proper attribution where required
    • Review terms of service for commercial usage

Conclusion

Generative AI for image and video synthesis offers powerful capabilities across all major cloud platforms. Each provider has its strengths:

  • AWS excels in customization and integration with other AWS services
  • GCP offers simplicity and cost-effectiveness for straightforward image generation
  • Azure provides high-quality outputs with strong integration into Microsoft ecosystems

For most applications, a hybrid approach leveraging the strengths of multiple providers can offer the best balance of cost, quality, and performance. Our sample architecture demonstrates how to build a flexible system that can dynamically select the best provider for each task.

As these technologies continue to evolve, we can expect even more powerful capabilities, improved quality, and reduced costs. By implementing the strategies outlined in this post, you’ll be well-positioned to leverage generative AI for image and video synthesis in your applications.

While this blog post grew to a substantial length, we believe it’s important to cover the topic thoroughly from foundational concepts to practical implementation. Towardscloud encourage you to approach it in sections, perhaps dividing your reading into logical parts: first understanding the core concepts, then exploring the implementation details, and finally examining the practical applications. This way, you can digest the information more effectively without feeling overwhelmed by the scope of the content. Thank you and happy reading!

```

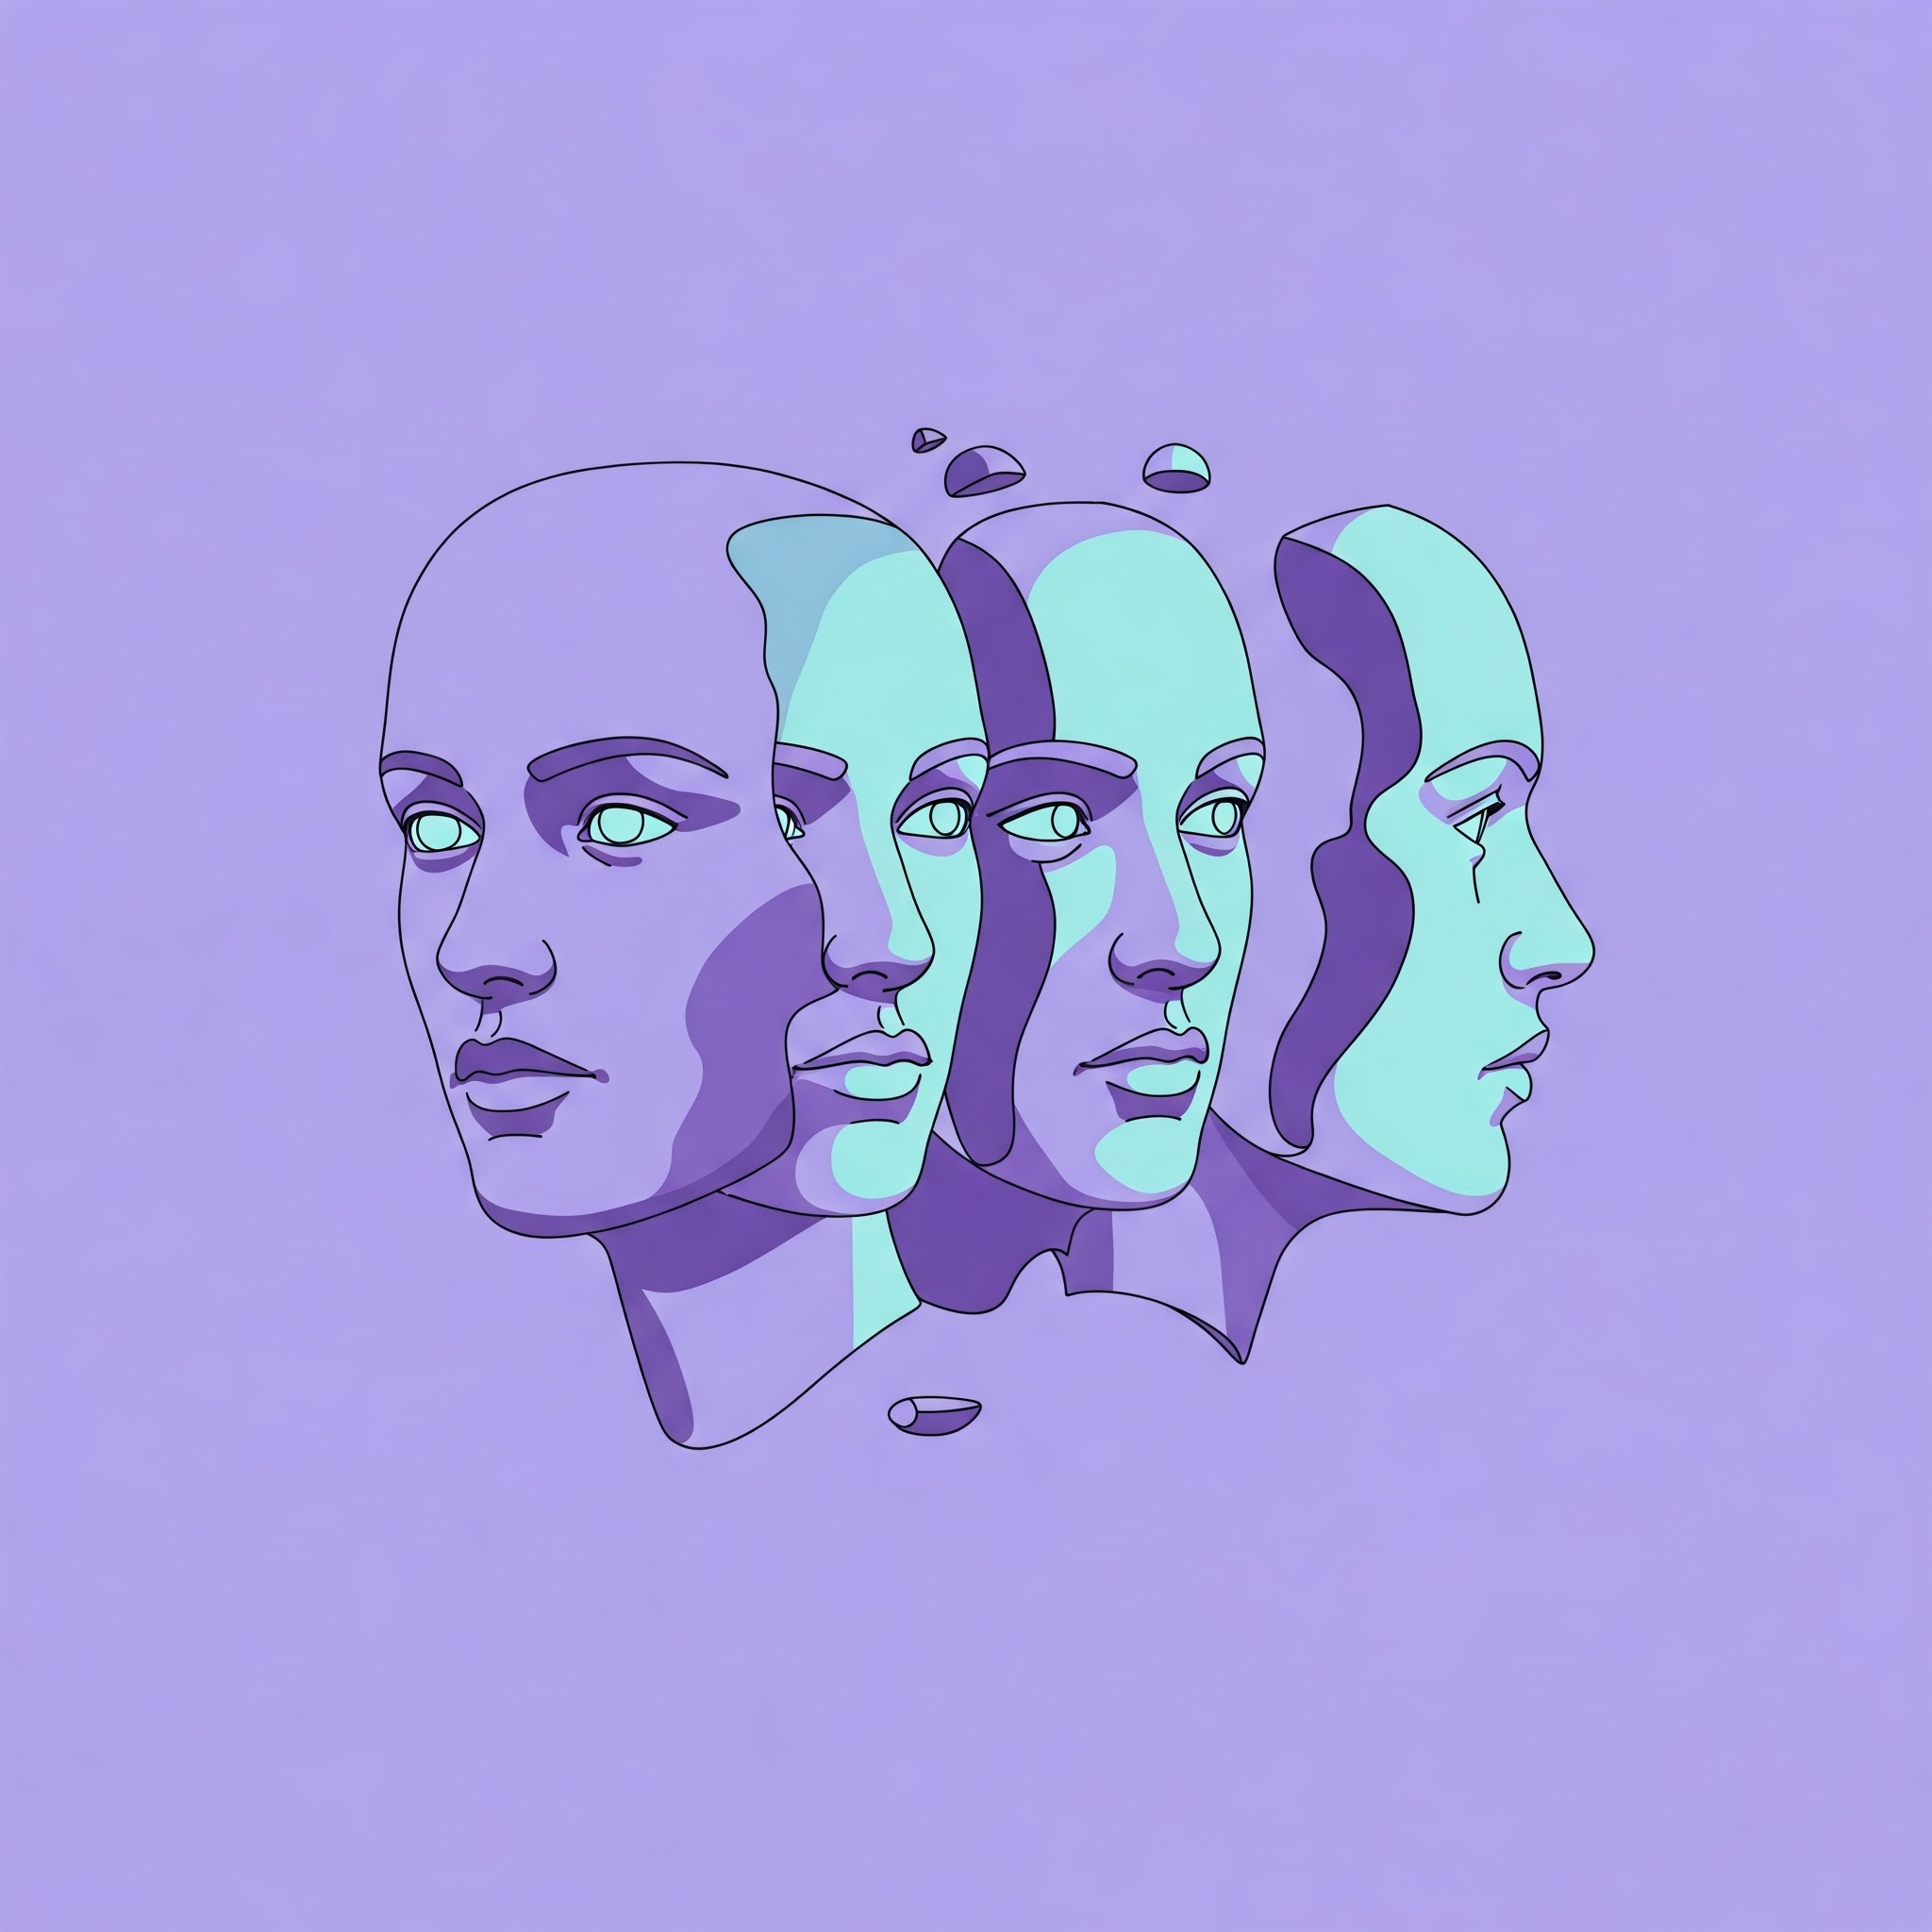
Deepfakes represent one of the most significant technological challenges of our time, blending advanced AI capabilities with potential societal impacts. Let’s explore this fascinating yet concerning technology, its implementations across cloud platforms, and the associated costs.

What Are Deepfakes?

Deepfakes are synthetic media where a person’s likeness is replaced with someone else’s using deep learning techniques. These technologies typically leverage:

  • Generative Adversarial Networks (GANs) – Two neural networks (generator and discriminator) work against each other
  • Autoencoders – Neural networks that learn efficient data representations
  • Diffusion Models – Advanced models that progressively add and remove noise from data

Real-World Impacts of Deepfakes

Deepfakes have several implications across various domains:

  1. Misinformation & Disinformation – Creation of fake news, political manipulation
  2. Identity Theft & Fraud – Impersonation for financial gain
  3. Online Harassment – Non-consensual synthetic content
  4. Entertainment & Creative Applications – Film production, advertising
  5. Training & Education – Simulations in healthcare and other fields

How Deepfakes Are Created

Deepfakes are created through sophisticated AI processes that manipulate or generate visual and audio content. Let’s explore the technical pipeline behind deepfake creation:

The Technical Process Behind Deepfakes

1. Data Collection

The first step involves gathering source material:

  • Target Media: The video/image where faces will be replaced
  • Source Media: The face that will be swapped into the target
  • High-Quality Data: Better results require diverse expressions, angles, and lighting conditions
  • Volume Requirements: Most deepfake models need hundreds to thousands of images for realistic results

2. Preprocessing & Feature Extraction

Before training, the data undergoes extensive preparation:

Deepfake Preprocessing Pipeline

import cv2
import dlib
import numpy as np
from pathlib import Path

def preprocess_dataset(input_dir, output_dir, target_size=(256, 256)):
    """
    Preprocess images for deepfake training by detecting faces,
    aligning them, and normalizing the images.
    """
    # Initialize face detector and landmark predictor
    detector = dlib.get_frontal_face_detector()
    predictor = dlib.shape_predictor('shape_predictor_68_face_landmarks.dat')
    
    # Create output directory
    output_path = Path(output_dir)
    output_path.mkdir(exist_ok=True, parents=True)
    
    # Process each image in the input directory
    for img_path in Path(input_dir).glob('*.jpg'):
        # Load image
        img = cv2.imread(str(img_path))
        
        if img is None:
            print(f"Could not read {img_path}")
            continue
            
        # Convert to grayscale for face detection
        gray = cv2.cvtColor(img, cv2.COLOR_BGR2GRAY)
        
        # Detect faces
        faces = detector(gray)
        
        if not faces:
            print(f"No face detected in {img_path}")
            continue
            
        # Process each detected face
        for i, face in enumerate(faces):
            # Get facial landmarks
            landmarks = predictor(gray, face)
            
            # Extract face bounding box
            x1, y1 = face.left(), face.top()
            x2, y2 = face.right(), face.bottom()
            
            # Add margin
            margin = int(0.2 * (x2 - x1))
            x1 = max(0, x1 - margin)
            y1 = max(0, y1 - margin)
            x2 = min(img.shape[1], x2 + margin)
            y2 = min(img.shape[0], y2 + margin)
            
            # Extract face region
            face_img = img[y1:y2, x1:x2]
            
            # Resize to target size
            face_img = cv2.resize(face_img, target_size)
            
            # Normalize pixel values
            face_img = face_img / 255.0
            
            # Apply histogram equalization for lighting normalization
            # Convert to LAB color space (L=lightness, A=green-red, B=blue-yellow)
            lab = cv2.cvtColor(face_img, cv2.COLOR_BGR2LAB)
            l, a, b = cv2.split(lab)
            
            # Apply CLAHE (Contrast Limited Adaptive Histogram Equalization)
            clahe = cv2.createCLAHE(clipLimit=2.0, tileGridSize=(8, 8))
            cl = clahe.apply(np.uint8(l * 255)) / 255.0
            
            # Merge channels back
            merged = cv2.merge((cl, a, b))
            
            # Convert back to BGR
            norm_img = cv2.cvtColor(merged, cv2.COLOR_LAB2BGR)
            
            # Save the preprocessed face
            output_file = output_path / f"{img_path.stem}_face_{i}.jpg"
            cv2.imwrite(str(output_file), (norm_img * 255).astype(np.uint8))
            
    print(f"Preprocessing complete. Results saved to {output_dir}")

# Example usage
preprocess_dataset(
    input_dir="raw_faces", 
    output_dir="preprocessed_faces"
)

Key preprocessing steps include:

  • Face Detection: Identifying and isolating facial regions
  • Facial Landmark Detection: Locating key points like eyes, nose, and mouth
  • Alignment: Normalizing face orientation
  • Color Correction: Ensuring consistent lighting and contrast
  • Resizing: Standardizing dimensions for model input

3. Model Training

The core of deepfake creation relies on specialized neural network architectures:

Autoencoder Architecture

GAN Architecture

Common model architectures include:

  1. Autoencoder-based Methods:
    • Uses a shared encoder and two separate decoders
    • The encoder learns to represent facial features in a latent space
    • Each decoder reconstructs a specific person’s face
  2. GAN-based Methods (Generative Adversarial Networks):
    • Generator creates synthetic faces
    • Discriminator identifies real vs. fake images
    • The two networks compete, improving quality
  3. Diffusion Models:
    • Gradually add and remove noise from images
    • Currently producing some of the most realistic results
Autoencoder-based Deepfake Model Training

import tensorflow as tf
from tensorflow.keras.layers import Input, Conv2D, MaxPooling2D, UpSampling2D, Flatten, Dense, Reshape, Conv2DTranspose
from tensorflow.keras.models import Model
import numpy as np
import os
from glob import glob
from tensorflow.keras.preprocessing.image import load_img, img_to_array

def build_autoencoder(input_shape=(256, 256, 3), latent_dim=1024):
    """Build an autoencoder model for deepfake generation"""
    # Encoder
    encoder_input = Input(shape=input_shape, name='encoder_input')
    
    # Convolutional layers
    x = Conv2D(64, (3, 3), activation='relu', padding='same')(encoder_input)
    x = MaxPooling2D((2, 2), padding='same')(x)
    x = Conv2D(128, (3, 3), activation='relu', padding='same')(x)
    x = MaxPooling2D((2, 2), padding='same')(x)
    x = Conv2D(256, (3, 3), activation='relu', padding='same')(x)
    x = MaxPooling2D((2, 2), padding='same')(x)
    x = Conv2D(512, (3, 3), activation='relu', padding='same')(x)
    x = MaxPooling2D((2, 2), padding='same')(x)
    
    # Flatten and encode to latent space
    volumeSize = K.int_shape(x)
    x = Flatten()(x)
    latent = Dense(latent_dim, name='latent_vector')(x)
    
    # Build the encoder model
    encoder = Model(encoder_input, latent, name='encoder')
    
    # Decoder architecture (we'll create two decoders)
    decoder_input = Input(shape=(latent_dim,), name='decoder_input')
    
    # Reshape to the last convolution output dimensions
    x = Dense(volumeSize[1] * volumeSize[2] * volumeSize[3])(decoder_input)
    x = Reshape((volumeSize[1], volumeSize[2], volumeSize[3]))(x)
    
    # Deconvolutional layers
    x = Conv2DTranspose(512, (3, 3), activation='relu', padding='same')(x)
    x = UpSampling2D((2, 2))(x)
    x = Conv2DTranspose(256, (3, 3), activation='relu', padding='same')(x)
    x = UpSampling2D((2, 2))(x)
    x = Conv2DTranspose(128, (3, 3), activation='relu', padding='same')(x)
    x = UpSampling2D((2, 2))(x)
    x = Conv2DTranspose(64, (3, 3), activation='relu', padding='same')(x)
    x = UpSampling2D((2, 2))(x)
    
    # Output layer
    decoder_output = Conv2D(3, (3, 3), activation='sigmoid', padding='same')(x)
    
    # Create a reusable decoder architecture
    decoder_template = Model(decoder_input, decoder_output, name='decoder_template')
    
    # Create two instances of the decoder (one for each face)
    decoder_A = Model(decoder_input, decoder_template(decoder_input), name='decoder_A')
    decoder_B = Model(decoder_input, decoder_template(decoder_input), name='decoder_B')
    
    # Create two autoencoders (A→A and B→B)
    autoencoder_A = Model(encoder_input, decoder_A(encoder(encoder_input)), name='autoencoder_A')
    autoencoder_B = Model(encoder_input, decoder_B(encoder(encoder_input)), name='autoencoder_B')
    
    # Compile the models
    autoencoder_A.compile(optimizer='adam', loss='mean_absolute_error')
    autoencoder_B.compile(optimizer='adam', loss='mean_absolute_error')
    
    return encoder, decoder_A, decoder_B, autoencoder_A, autoencoder_B

def load_images(directory, target_size=(256, 256)):
    """Load all images from a directory and convert to numpy arrays"""
    images = []
    image_paths = glob(os.path.join(directory, "*.jpg"))
    
    for img_path in image_paths:
        img = load_img(img_path, target_size=target_size)
        img_array = img_to_array(img) / 255.0  # Normalize to [0,1]
        images.append(img_array)
    
    return np.array(images)

def train_deepfake_model(person_A_dir, person_B_dir, epochs=100, batch_size=16):
    """Train a deepfake model on two people's face datasets"""
    # Load datasets
    faces_A = load_images(person_A_dir)
    faces_B = load_images(person_B_dir)
    
    print(f"Loaded {len(faces_A)} images of person A and {len(faces_B)} images of person B")
    
    # Build models
    encoder, decoder_A, decoder_B, autoencoder_A, autoencoder_B = build_autoencoder()
    
    # Train the autoencoders
    for epoch in range(epochs):
        print(f"Epoch {epoch+1}/{epochs}")
        
        # Train autoencoder A (A→A)
        history_A = autoencoder_A.fit(
            faces_A, faces_A,
            epochs=1,
            batch_size=batch_size,
            verbose=1
        )
        
        # Train autoencoder B (B→B)
        history_B = autoencoder_B.fit(
            faces_B, faces_B,
            epochs=1,
            batch_size=batch_size,
            verbose=1
        )
        
        # Print progress
        print(f"A: {history_A.history['loss'][0]:.4f} - B: {history_B.history['loss'][0]:.4f}")
        
        # Optional: Save sample outputs periodically
        if (epoch + 1) % 10 == 0:
            # Generate sample A→A, A→B, B→B, B→A conversions
            sample_A = faces_A[0:1]  # Get a sample face A
            sample_B = faces_B[0:1]  # Get a sample face B
            
            # Encode the faces
            latent_A = encoder.predict(sample_A)
            latent_B = encoder.predict(sample_B)
            
            # Generate the outputs
            recon_A = decoder_A.predict(latent_A)  # A→A
            recon_B = decoder_B.predict(latent_B)  # B→B
            fake_B = decoder_B.predict(latent_A)   # A→B (deepfake)
            fake_A = decoder_A.predict(latent_B)   # B→A (deepfake)
            
            # Save the images
            for i, img in enumerate([sample_A[0], recon_A[0], fake_B[0], sample_B[0], recon_B[0], fake_A[0]]):
                tf.keras.preprocessing.image.save_img(
                    f"samples/epoch_{epoch+1}_img_{i}.jpg",
                    img
                )
    
    # Save the final models
    encoder.save("models/encoder.h5")
    decoder_A.save("models/decoder_A.h5")
    decoder_B.save("models/decoder_B.h5")
    
    return encoder, decoder_A, decoder_B

# Example usage
train_deepfake_model(
    person_A_dir="preprocessed_faces/person_A",
    person_B_dir="preprocessed_faces/person_B",
    epochs=100
)

4. Face Synthesis & Swapping

Once trained, the models can generate the actual deepfake:

  1. Generation Process:
    • The encoder extracts facial features from the source image
    • The target person’s decoder reconstructs the face with the source facial attributes
    • For video, this process is applied frame-by-frame
  2. Key Techniques:
    • Face Swapping: Replacing an existing face with another
    • Face Reenactment: Transferring expressions from one face to another
    • Puppeteering: Animating a face using another person’s movements

5. Post-processing & Refinement

The raw generated faces typically need additional refinement:

Deepfake Post-processing

import cv2
import numpy as np
from PIL import Image, ImageFilter
import face_recognition
import dlib

def post_process_deepfake(source_image, generated_face, target_image):
    """
    Post-process a generated face to blend it seamlessly into a target image
    
    Args:
        source_image: Original source image (for color correction reference)
        generated_face: The swapped face generated by the deepfake model
        target_image: The target image where the face will be placed
        
    Returns:
        Composite image with the face seamlessly integrated
    """
    # Convert to numpy arrays if needed
    if isinstance(source_image, str):
        source_image = cv2.imread(source_image)
    if isinstance(generated_face, str):
        generated_face = cv2.imread(generated_face)
    if isinstance(target_image, str):
        target_image = cv2.imread(target_image)
    
    # 1. Detect face in target image to determine placement
    face_locations = face_recognition.face_locations(target_image)
    if not face_locations:
        print("No face detected in target image")
        return target_image
    
    # Take the first face (assuming main subject)
    top, right, bottom, left = face_locations[0]
    
    # 2. Get facial landmarks for precise alignment
    target_landmarks = face_recognition.face_landmarks(target_image, face_locations)[0]
    
    # 3. Resize generated face to match target face dimensions
    target_face_height = bottom - top
    target_face_width = right - left
    generated_face_resized = cv2.resize(generated_face, (target_face_width, target_face_height))
    
    # 4. Color correction to match the target image tone
    # Convert to LAB color space
    source_lab = cv2.cvtColor(source_image, cv2.COLOR_BGR2LAB)
    generated_lab = cv2.cvtColor(generated_face_resized, cv2.COLOR_BGR2LAB)
    target_face_lab = cv2.cvtColor(target_image[top:bottom, left:right], cv2.COLOR_BGR2LAB)
    
    # Split channels
    source_l, source_a, source_b = cv2.split(source_lab)
    generated_l, generated_a, generated_b = cv2.split(generated_lab)
    target_l, target_a, target_b = cv2.split(target_face_lab)
    
    # Get mean and standard deviation of each channel
    source_l_mean, source_l_std = np.mean(source_l), np.std(source_l)
    generated_l_mean, generated_l_std = np.mean(generated_l), np.std(generated_l)
    target_l_mean, target_l_std = np.mean(target_l), np.std(target_l)
    
    # Adjust lighting
    generated_l = ((generated_l - generated_l_mean) * (target_l_std / generated_l_std)) + target_l_mean
    
    # Merge channels back
    color_corrected = cv2.merge([generated_l.astype(np.uint8), generated_a, generated_b])
    color_corrected = cv2.cvtColor(color_corrected, cv2.COLOR_LAB2BGR)
    
    # 5. Create a mask for seamless blending
    mask = np.zeros((target_face_height, target_face_width), dtype=np.uint8)
    
    # Create an oval mask based on face dimensions
    center = (target_face_width // 2, target_face_height // 2)
    axes = (int(target_face_width * 0.45), int(target_face_height * 0.55))
    cv2.ellipse(mask, center, axes, 0, 0, 360, 255, -1)
    
    # Feather the mask edges
    mask = cv2.GaussianBlur(mask, (19, 19), 0)
    
    # 6. Alpha blending using the mask
    mask_3channel = cv2.merge([mask, mask, mask]) / 255.0
    
    # Create a copy of the target image
    result = target_image.copy()
    face_area = result[top:bottom, left:right]
    
    # Blend the generated face with the target image
    blended_face = (color_corrected * mask_3channel) + (face_area * (1 - mask_3channel))
    result[top:bottom, left:right] = blended_face.astype(np.uint8)
    
    # 7. Apply additional post-processing for realism
    # Slightly blur the boundary
    temp_result = Image.fromarray(cv2.cvtColor(result, cv2.COLOR_BGR2RGB))
    face_area = temp_result.crop((left, top, right, bottom))
    face_area = face_area.filter(ImageFilter.SMOOTH_MORE)
    temp_result.paste(face_area, (left, top))
    result = cv2.cvtColor(np.array(temp_result), cv2.COLOR_RGB2BGR)
    
    return result

def process_video_deepfake(source_video_path, target_video_path, output_path, 
                          encoder_model, decoder_model):
    """
    Process a video to create a deepfake by swapping faces frame by frame
    
    Args:
        source_video_path: Path to the source video with the face to use
        target_video_path: Path to the target video where faces will be replaced
        output_path: Path to save the resulting deepfake video
        encoder_model: The encoder model for feature extraction
        decoder_model: The decoder model for face generation
    """
    # Open target video
    target_cap = cv2.VideoCapture(target_video_path)
    fps = target_cap.get(cv2.CAP_PROP_FPS)
    width = int(target_cap.get(cv2.CAP_PROP_FRAME_WIDTH))
    height = int(target_cap.get(cv2.CAP_PROP_FRAME_HEIGHT))
    frame_count = int(target_cap.get(cv2.CAP_PROP_FRAME_COUNT))
    
    # Create source face extractor
    source_cap = cv2.VideoCapture(source_video_path)
    _, source_frame = source_cap.read()
    source_cap.release()
    
    # Setup output video
    fourcc = cv2.VideoWriter_fourcc(*'mp4v')
    out = cv2.VideoWriter(output_path, fourcc, fps, (width, height))
    
    # Face detector
    detector = dlib.get_frontal_face_detector()
    
    # Process each frame
    frame_num = 0
    while True:
        ret, target_frame = target_cap.read()
        if not ret:
            break
            
        # Detect faces in target frame
        gray = cv2.cvtColor(target_frame, cv2.COLOR_BGR2GRAY)
        faces = detector(gray)
        
        # If no faces found, use original frame
        if not faces:
            out.write(target_frame)
            continue
        
        # Process each detected face
        for face in faces:
            # Extract face region
            x1, y1 = face.left(), face.top()
            x2, y2 = face.right(), face.bottom()
            
            # Add margin
            margin = int(0.2 * (x2 - x1))
            x1 = max(0, x1 - margin)
            y1 = max(0, y1 - margin)
            x2 = min(target_frame.shape[1], x2 + margin)
            y2 = min(target_frame.shape[0], y2 + margin)
            
            face_img = target_frame[y1:y2, x1:x2]
            
            # Resize to model input size
            face_resized = cv2.resize(face_img, (256, 256))
            face_norm = face_resized / 255.0
            
            # Encode and decode to generate the swapped face
            face_encoded = encoder_model.predict(np.expand_dims(face_norm, axis=0))
            face_generated = decoder_model.predict(face_encoded)[0]
            
            # Convert generated face back to uint8
            face_generated = (face_generated * 255).astype(np.uint8)
            
            # Post-process and blend the face
            processed_face = post_process_deepfake(
                source_image=source_frame,
                generated_face=face_generated,
                target_image=target_frame
            )
            
            # Replace the frame with the processed result
            target_frame = processed_face
        
        # Write the frame to output video
        out.write(target_frame)
        
        # Show progress
        frame_num += 1
        if frame_num % 10 == 0:
            print(f"Processed {frame_num}/{frame_count} frames ({frame_num/frame_count*100:.1f}%)")
    
    # Release resources
    target_cap.release()
    out.release()
    print(f"Deepfake video saved to {output_path}")

Key post-processing techniques include:

  • Color Correction: Matching skin tone and lighting
  • Blending & Feathering: Creating seamless transitions at boundaries
  • Temporal Consistency: Ensuring smooth transitions between frames
  • Artifact Removal: Fixing glitches and artifacts
  • Resolution Enhancement: Improving detail in the final output

6. Audio Synthesis (For Video Deepfakes)

Modern deepfakes often include voice cloning:

  • Voice Conversion: Transforming one person’s voice into another’s while preserving content
  • Text-to-Speech: Generating entirely new speech from text using a voice model
  • Lip Synchronization: Aligning generated audio with facial movements

Implementation Comparison Across Cloud Platforms

Let’s compare how each major cloud provider supports deepfake creation (for legitimate purposes):

AWS Implementation

AWS supports deepfake creation with services like:

  • Amazon SageMaker: For model training and deployment
  • EC2 G4/P4 Instances: GPU-optimized computing
  • Amazon Rekognition: Face detection and analysis
  • Amazon Polly: Text-to-speech capabilities

GCP Implementation

Google Cloud offerings include:

  • Vertex AI: ML model training and deployment
  • T4/V100 GPU Instances: High-performance computing
  • Speech-to-Text/Text-to-Speech API: Voice synthesis
  • Vision AI: Facial analysis and detection

Azure Implementation

Microsoft Azure provides:

  • Azure Machine Learning: Model development platform
  • NVIDIA GPU VMs: Compute resources
  • Speech Services: Voice cloning capabilities
  • Face API: Facial detection and analysis

Ethical & Security Implications

It’s crucial to understand that deepfake creation technology has both legitimate uses and potential for misuse:

Legitimate Applications

  • Film and entertainment (special effects)
  • Privacy protection (anonymizing individuals)
  • Educational simulations and demonstrations
  • Accessibility solutions (e.g., personalized content)

Ethical Concerns

  • Non-consensual creation of synthetic media
  • Political misinformation and propaganda
  • Identity theft and fraud
  • Erosion of trust in visual media

Real-World Impacts of Deepfakes

Deepfakes have several implications across various domains:

  1. Misinformation & Disinformation – Creation of fake news, political manipulation
  2. Identity Theft & Fraud – Impersonation for financial gain
  3. Online Harassment – Non-consensual synthetic content
  4. Entertainment & Creative Applications – Film production, advertising
  5. Training & Education – Simulations in healthcare and other fields

AWS Implementation

AWS provides robust services for building deepfake detection systems:

AWS Deepfake Detection Implementation

import boto3
import json
import numpy as np
from PIL import Image
import io
import cv2

# Setup AWS services
s3 = boto3.client('s3')
rekognition = boto3.client('rekognition')
sagemaker = boto3.client('sagemaker-runtime')

def extract_frames(video_path, frame_interval=30):
    """Extract frames from video at specific intervals"""
    frames = []
    video = cv2.VideoCapture(video_path)
    frame_count = 0
    
    while True:
        success, frame = video.read()
        if not success:
            break
        
        if frame_count % frame_interval == 0:
            frame_rgb = cv2.cvtColor(frame, cv2.COLOR_BGR2RGB)
            frames.append(frame_rgb)
        
        frame_count += 1
    
    video.release()
    return frames

def detect_faces(frame):
    """Detect faces in a frame using Amazon Rekognition"""
    img_bytes = cv2.imencode('.jpg', frame)[1].tostring()
    response = rekognition.detect_faces(
        Image={'Bytes': img_bytes},
        Attributes=['ALL']
    )
    return response['FaceDetails']

def analyze_frame_for_deepfake(frame, endpoint_name):
    """Send frame to SageMaker endpoint for deepfake analysis"""
    img_bytes = cv2.imencode('.jpg', frame)[1].tostring()
    
    response = sagemaker.invoke_endpoint(
        EndpointName=endpoint_name,
        ContentType='application/x-image',
        Body=img_bytes
    )
    
    result = json.loads(response['Body'].read().decode())
    return result

def process_video(video_path, sagemaker_endpoint):
    """Process video to detect deepfakes"""
    frames = extract_frames(video_path)
    results = []
    
    for frame in frames:
        faces = detect_faces(frame)
        
        if not faces:
            continue
            
        # For each detected face, check if it's a deepfake
        for face in faces:
            # Extract face bounding box
            bbox = face['BoundingBox']
            h, w, _ = frame.shape
            
            # Convert relative coordinates to absolute
            x1 = int(bbox['Left'] * w)
            y1 = int(bbox['Top'] * h)
            x2 = int((bbox['Left'] + bbox['Width']) * w)
            y2 = int((bbox['Top'] + bbox['Height']) * h)
            
            # Extract face region
            face_img = frame[y1:y2, x1:x2]
            
            # Analyze face for deepfake
            analysis = analyze_frame_for_deepfake(face_img, sagemaker_endpoint)
            results.append(analysis)
    
    # Aggregate results
    real_prob = np.mean([r['real_probability'] for r in results])
    fake_prob = np.mean([r['fake_probability'] for r in results])
    
    return {
        'is_deepfake': fake_prob > real_prob,
        'confidence': max(real_prob, fake_prob),
        'frame_results': results
    }

# Example SageMaker model deployment script
def deploy_deepfake_model():
    """Deploy a pre-trained deepfake detection model to SageMaker"""
    sagemaker_client = boto3.client('sagemaker')
    
    # Create model
    model_name = 'deepfake-detection-model'
    
    sagemaker_client.create_model(
        ModelName=model_name,
        PrimaryContainer={
            'Image': '12345.dkr.ecr.us-west-2.amazonaws.com/deepfake-detection:latest',
            'ModelDataUrl': 's3://my-bucket/model-artifacts/deepfake-model.tar.gz'
        },
        ExecutionRoleArn='arn:aws:iam::123456789012:role/SageMakerExecutionRole'
    )
    
    # Create endpoint configuration
    endpoint_config_name = 'deepfake-detection-config'
    
    sagemaker_client.create_endpoint_config(
        EndpointConfigName=endpoint_config_name,
        ProductionVariants=[
            {
                'VariantName': 'AllTraffic',
                'ModelName': model_name,
                'InstanceType': 'ml.g4dn.xlarge',  # GPU instance
                'InitialInstanceCount': 1
            }
        ]
    )
    
    # Create endpoint
    endpoint_name = 'deepfake-detection-endpoint'
    
    sagemaker_client.create_endpoint(
        EndpointName=endpoint_name,
        EndpointConfigName=endpoint_config_name
    )
    
    return endpoint_name

# Lambda function for processing videos uploaded to S3
def lambda_handler(event, context):
    bucket = event['Records'][0]['s3']['bucket']['name']
    key = event['Records'][0]['s3']['object']['key']
    
    # Download video from S3
    tmp_video_path = '/tmp/video.mp4'
    s3.download_file(bucket, key, tmp_video_path)
    
    # Process video
    endpoint_name = 'deepfake-detection-endpoint'
    result = process_video(tmp_video_path, endpoint_name)
    
    # Save result to S3
    result_key = key.replace('.mp4', '-analysis.json')
    s3.put_object(
        Bucket=bucket,
        Key=result_key,
        Body=json.dumps(result)
    )
    
    return {
        'statusCode': 200,
        'body': json.dumps({
            'message': 'Video analysis complete',
            'result_location': f's3://{bucket}/{result_key}'
        })
    }

GCP Implementation

Google Cloud offers several services ideal for deepfake detection:

GCP Deepfake Detection Implementation

from google.cloud import storage, vision, videointelligence
from google.cloud import aiplatform
import os
import tempfile
import cv2
import numpy as np
import json
import tensorflow as tf

# Initialize GCP clients
storage_client = storage.Client()
vision_client = vision.ImageAnnotatorClient()
video_client = videointelligence.VideoIntelligenceServiceClient()

def extract_frames_gcs(gcs_uri, local_dir, frame_interval=30):
    """Download video from GCS and extract frames"""
    bucket_name, blob_name = gcs_uri.replace('gs://', '').split('/', 1)
    bucket = storage_client.bucket(bucket_name)
    blob = bucket.blob(blob_name)
    
    # Download to temporary file
    _, temp_local_filename = tempfile.mkstemp(suffix='.mp4')
    blob.download_to_filename(temp_local_filename)
    
    # Extract frames
    frames = []
    frame_paths = []
    video = cv2.VideoCapture(temp_local_filename)
    frame_count = 0
    
    os.makedirs(local_dir, exist_ok=True)
    
    while True:
        success, frame = video.read()
        if not success:
            break
        
        if frame_count % frame_interval == 0:
            frame_path = os.path.join(local_dir, f'frame_{frame_count:04d}.jpg')
            cv2.imwrite(frame_path, frame)
            frames.append(frame)
            frame_paths.append(frame_path)
        
        frame_count += 1
    
    video.release()
    os.remove(temp_local_filename)
    
    return frames, frame_paths

def detect_faces_gcp(image_path):
    """Detect faces using Google Vision API"""
    with open(image_path, 'rb') as image_file:
        content = image_file.read()
    
    image = vision.Image(content=content)
    response = vision_client.face_detection(image=image)
    faces = response.face_annotations
    
    return faces

def upload_frames_to_gcs(frame_paths, gcs_output_uri):
    """Upload frames to GCS for processing"""
    bucket_name, base_path = gcs_output_uri.replace('gs://', '').split('/', 1)
    bucket = storage_client.bucket(bucket_name)
    
    gcs_frame_paths = []
    
    for frame_path in frame_paths:
        frame_name = os.path.basename(frame_path)
        blob_path = f"{base_path}/{frame_name}"
        blob = bucket.blob(blob_path)
        blob.upload_from_filename(frame_path)
        gcs_frame_paths.append(f"gs://{bucket_name}/{blob_path}")
    
    return gcs_frame_paths

def analyze_faces_for_deepfake(gcs_frame_paths, model_endpoint):
    """Analyze extracted faces using Vertex AI endpoint"""
    aiplatform.init(project='my-gcp-project', location='us-central1')
    endpoint = aiplatform.Endpoint(model_endpoint)
    
    results = []
    
    for frame_path in gcs_frame_paths:
        # Get prediction from endpoint
        prediction = endpoint.predict(
            instances=[{"image_gcs_uri": frame_path}]
        )
        
        results.append({
            'frame': frame_path,
            'real_probability': float(prediction.predictions[0][0]),
            'fake_probability': float(prediction.predictions[0][1])
        })
    
    return results

def deploy_vertex_model():
    """Deploy a pre-trained deepfake model to Vertex AI"""
    aiplatform.init(project='my-gcp-project', location='us-central1')
    
    # Upload model to Vertex AI
    model = aiplatform.Model.upload(
        display_name="deepfake-detection",
        artifact_uri="gs://my-models/deepfake-model/",
        serving_container_image_uri="gcr.io/my-project/deepfake-model:latest"
    )
    
    # Deploy model to endpoint
    endpoint = model.deploy(
        machine_type="n1-standard-4",
        accelerator_type="NVIDIA_TESLA_T4",
        accelerator_count=1,
        min_replica_count=1,
        max_replica_count=1
    )
    
    return endpoint.resource_name

def create_cloud_function():
    """Example Cloud Function code for deepfake detection"""
    # This would be in main.py of your Cloud Function
    
    def process_video(request):
        """Process video for deepfake detection when uploaded to GCS"""
        data = request.get_json()
        
        if not data or 'gcs_uri' not in data:
            return {'error': 'Missing GCS URI'}, 400
        
        gcs_uri = data['gcs_uri']
        output_dir = data.get('output_dir', 'gs://output-bucket/results/')
        
        # Create temporary directory for frames
        temp_dir = tempfile.mkdtemp()
        
        try:
            # Extract frames
            _, frame_paths = extract_frames_gcs(gcs_uri, temp_dir)
            
            # Upload frames for processing
            gcs_frame_paths = upload_frames_to_gcs(frame_paths, output_dir)
            
            # Analyze frames
            model_endpoint = "projects/my-project/locations/us-central1/endpoints/12345"
            results = analyze_faces_for_deepfake(gcs_frame_paths, model_endpoint)
            
            # Aggregate results
            real_probs = [r['real_probability'] for r in results]
            fake_probs = [r['fake_probability'] for r in results]
            
            final_result = {
                'is_deepfake': np.mean(fake_probs) > np.mean(real_probs),
                'confidence': max(np.mean(real_probs), np.mean(fake_probs)),
                'frame_results': results
            }
            
            # Save results
            bucket_name, base_path = output_dir.replace('gs://', '').split('/', 1)
            bucket = storage_client.bucket(bucket_name)
            result_blob = bucket.blob(f"{base_path}/analysis_result.json")
            result_blob.upload_from_string(json.dumps(final_result))
            
            return {
                'status': 'success',
                'result_uri': f"gs://{bucket_name}/{base_path}/analysis_result.json"
            }
            
        finally:
            # Cleanup
            import shutil
            shutil.rmtree(temp_dir)
    
    return process_video

Azure Implementation

Microsoft Azure provides powerful services for deepfake detection:

Azure Deepfake Detection Implementation

import os
import tempfile
import json
import numpy as np
import cv2
from azure.storage.blob import BlobServiceClient
from azure.cognitiveservices.vision.face import FaceClient
from msrest.authentication import CognitiveServicesCredentials
from azure.ai.ml import MLClient
from azure.ai.ml.entities import ManagedOnlineEndpoint, ManagedOnlineDeployment
from azure.identity import DefaultAzureCredential
import azure.functions as func

# Azure credentials
face_key = os.environ["FACE_API_KEY"]
face_endpoint = os.environ["FACE_API_ENDPOINT"]
storage_connection_string = os.environ["STORAGE_CONNECTION_STRING"]

# Setup Azure clients
face_client = FaceClient(face_endpoint, CognitiveServicesCredentials(face_key))
blob_service_client = BlobServiceClient.from_connection_string(storage_connection_string)

def extract_frames_azure(blob_url, local_dir, frame_interval=30):
    """Download video from Azure Blob Storage and extract frames"""
    # Parse blob URL
    container_name = blob_url.split('/')[3]
    blob_path = '/'.join(blob_url.split('/')[4:])
    
    # Download blob
    container_client = blob_service_client.get_container_client(container_name)
    blob_client = container_client.get_blob_client(blob_path)
    
    _, temp_local_filename = tempfile.mkstemp(suffix='.mp4')
    with open(temp_local_filename, "wb") as video_file:
        download_stream = blob_client.download_blob()
        video_file.write(download_stream.readall())
    
    # Extract frames
    frames = []
    frame_paths = []
    video = cv2.VideoCapture(temp_local_filename)
    frame_count = 0
    
    os.makedirs(local_dir, exist_ok=True)
    
    while True:
        success, frame = video.read()
        if not success:
            break
        
        if frame_count % frame_interval == 0:
            frame_path = os.path.join(local_dir, f'frame_{frame_count:04d}.jpg')
            cv2.imwrite(frame_path, frame)
            frames.append(frame)
            frame_paths.append(frame_path)
        
        frame_count += 1
    
    video.release()
    os.remove(temp_local_filename)
    
    return frames, frame_paths

def detect_faces_azure(image_path):
    """Detect faces using Azure Face API"""
    with open(image_path, 'rb') as image_file:
        detected_faces = face_client.face.detect_with_stream(
            image_file,
            return_face_attributes=['age', 'gender', 'emotion']
        )
    
    return detected_faces

def upload_frames_to_blob(frame_paths, container_name, base_path):
    """Upload frames to Azure Blob Storage"""
    container_client = blob_service_client.get_container_client(container_name)
    
    blob_paths = []
    
    for frame_path in frame_paths:
        frame_name = os.path.basename(frame_path)
        blob_path = f"{base_path}/{frame_name}"
        blob_client = container_client.get_blob_client(blob_path)
        
        with open(frame_path, "rb") as data:
            blob_client.upload_blob(data, overwrite=True)
            
        blob_paths.append(f"https://{blob_service_client.account_name}.blob.core.windows.net/{container_name}/{blob_path}")
    
    return blob_paths

def deploy_azure_ml_model():
    """Deploy a pre-trained deepfake model to Azure ML"""
    # Initialize MLClient
    credential = DefaultAzureCredential()
    ml_client = MLClient(
        credential=credential,
        subscription_id="your-subscription-id",
        resource_group_name="your-resource-group",
        workspace_name="your-workspace"
    )
    
    # Create an online endpoint
    endpoint = ManagedOnlineEndpoint(
        name="deepfake-endpoint",
        description="Endpoint for deepfake detection",
        auth_mode="key"
    )
    ml_client.begin_create_or_update(endpoint).result()
    
    # Create a deployment
    deployment = ManagedOnlineDeployment(
        name="deepfake-deployment",
        endpoint_name=endpoint.name,
        model="azureml:deepfake-model:1",
        instance_type="Standard_NC6s_v3",  # GPU instance
        instance_count=1
    )
    ml_client.begin_create_or_update(deployment).result()
    
    return endpoint.name

def analyze_frames_for_deepfake(blob_paths, endpoint_name):
    """Analyze frames using Azure ML endpoint"""
    credential = DefaultAzureCredential()
    ml_client = MLClient(
        credential=credential,
        subscription_id="your-subscription-id",
        resource_group_name="your-resource-group",
        workspace_name="your-workspace"
    )
    
    endpoint = ml_client.online_endpoints.get(name=endpoint_name)
    
    results = []
    for blob_path in blob_paths:
        # Prepare the input data
        input_data = {
            "image_url": blob_path
        }
        
        # Get prediction
        response = ml_client.online_endpoints.invoke(
            endpoint_name=endpoint_name,
            deployment_name="deepfake-deployment",
            request_file=json.dumps(input_data)
        )
        
        prediction = json.loads(response)
        
        results.append({
            'frame': blob_path,
            'real_probability': prediction['real_probability'],
            'fake_probability': prediction['fake_probability']
        })
    
    return results

# Azure Function implementation
def main(req: func.HttpRequest) -> func.HttpResponse:
    """Azure Function for deepfake detection"""
    try:
        req_body = req.get_json()
        video_url = req_body.get('video_url')
        
        if not video_url:
            return func.HttpResponse(
                "Please provide a video_url in the request body",
                status_code=400
            )
        
        # Create temporary directory for frames
        temp_dir = tempfile.mkdtemp()
        
        try:
            # Extract frames
            _, frame_paths = extract_frames_azure(video_url, temp_dir)
            
            # Upload frames for processing
            output_container = "deepfake-output"
            base_path = f"analysis/{os.path.basename(video_url)}"
            blob_paths = upload_frames_to_blob(frame_paths, output_container, base_path)
            
            # Detect faces in frames
            face_results = []
            for frame_path in frame_paths:
                faces = detect_faces_azure(frame_path)
                face_results.append({
                    'frame': os.path.basename(frame_path),
                    'faces': len(faces)
                })
            
            # Analyze frames for deepfakes
            endpoint_name = "deepfake-endpoint"
            deepfake_results = analyze_frames_for_deepfake(blob_paths, endpoint_name)
            
            # Aggregate results
            real_probs = [r['real_probability'] for r in deepfake_results]
            fake_probs = [r['fake_probability'] for r in deepfake_results]
            
            final_result = {
                'is_deepfake': np.mean(fake_probs) > np.mean(real_probs),
                'confidence': max(np.mean(real_probs), np.mean(fake_probs)),
                'frame_results': deepfake_results,
                'face_detection': face_results
            }
            
            # Save results to blob storage
            container_client = blob_service_client.get_container_client(output_container)
            result_blob_path = f"{base_path}/analysis_result.json"
            result_blob = container_client.get_blob_client(result_blob_path)
            result_blob.upload_blob(json.dumps(final_result), overwrite=True)
            
            return func.HttpResponse(
                json.dumps({
                    'status': 'success',
                    'result_url': f"https://{blob_service_client.account_name}.blob.core.windows.net/{output_container}/{result_blob_path}"
                }),
                mimetype="application/json"
            )
            
        finally:
            # Cleanup
            import shutil
            shutil.rmtree(temp_dir)
            
    except Exception as e:
        return func.HttpResponse(
            f"An error occurred: {str(e)}",
            status_code=500
        )

Implementing a Custom Deepfake Detection Model

For those wanting to deploy a platform-independent solution:

Custom Deepfake Detection Model

import tensorflow as tf
from tensorflow.keras import layers, Model, applications
import cv2
import numpy as np
import os
import glob
from sklearn.model_selection import train_test_split

# Define model architecture for deepfake detection
def create_deepfake_detection_model(input_shape=(224, 224, 3)):
    """Create a CNN model for deepfake detection"""
    # Use a pre-trained model as base
    base_model = applications.EfficientNetB0(
        include_top=False,
        weights='imagenet',
        input_shape=input_shape
    )
    
    # Freeze the base model
    base_model.trainable = False
    
    # Create new model on top
    inputs = tf.keras.Input(shape=input_shape)
    x = tf.keras.applications.efficientnet.preprocess_input(inputs)
    x = base_model(x, training=False)
    x = layers.GlobalAveragePooling2D()(x)
    x = layers.Dropout(0.2)(x)
    x = layers.Dense(1024, activation='relu')(x)
    x = layers.Dropout(0.2)(x)
    x = layers.Dense(512, activation='relu')(x)
    outputs = layers.Dense(2, activation='softmax')(x)
    
    model = Model(inputs, outputs)
    
    # Compile the model
    model.compile(
        optimizer='adam',
        loss='categorical_crossentropy',
        metrics=['accuracy']
    )
    
    return model

def prepare_dataset(real_dir, fake_dir, img_size=(224, 224)):
    """Prepare dataset from directories of real and fake images"""
    # Load real images
    real_images = glob.glob(os.path.join(real_dir, "*.jpg"))
    real_images.extend(glob.glob(os.path.join(real_dir, "*.png")))
    
    # Load fake images
    fake_images = glob.glob(os.path.join(fake_dir, "*.jpg"))
    fake_images.extend(glob.glob(os.path.join(fake_dir, "*.png")))
    
    # Create labels
    real_labels = np.array([[1, 0]] * len(real_images))  # [1, 0] for real
    fake_labels = np.array([[0, 1]] * len(fake_images))  # [0, 1] for fake
    
    # Combine datasets
    all_images = real_images + fake_images
    all_labels = np.vstack((real_labels, fake_labels))
    
    # Split into train and validation sets
    train_images, val_images, train_labels, val_labels = train_test_split(
        all_images, all_labels, test_size=0.2, random_state=42
    )
    
    # Create data generators
    def data_generator(images, labels, batch_size=32):
        num_samples = len(images)
        while True:
            indices = np.random.permutation(num_samples)
            for i in range(0, num_samples, batch_size):
                batch_indices = indices[i:i+batch_size]
                batch_images = []
                
                for idx in batch_indices:
                    img = cv2.imread(images[idx])
                    img = cv2.cvtColor(img, cv2.COLOR_BGR2RGB)
                    img = cv2.resize(img, img_size)
                    batch_images.append(img)
                
                batch_images = np.array(batch_images) / 255.0
                batch_labels = labels[batch_indices]
                
                yield batch_images, batch_labels
    
    return data_generator(train_images, train_labels), data_generator(val_images, val_labels), len(train_images), len(val_images)

def train_model(model, train_generator, val_generator, train_steps, val_steps, epochs=10):
    """Train the deepfake detection model"""
    history = model.fit(
        train_generator,
        steps_per_epoch=train_steps // 32,
        epochs=epochs,
        validation_data=val_generator,
        validation_steps=val_steps // 32,
        callbacks=[
            tf.keras.callbacks.EarlyStopping(
                monitor='val_loss',
                patience=3,
                restore_best_weights=True
            ),
            tf.keras.callbacks.ReduceLROnPlateau(
                monitor='val_loss',
                factor=0.2,
                patience=2
            )
        ]
    )
    
    return history

def fine_tune_model(model, train_generator, val_generator, train_steps, val_steps, epochs=5):
    """Fine-tune the model by unfreezing some layers"""
    # Unfreeze the top layers of the base model
    base_model = model.layers[2]  # Assuming base_model is at index 2
    base_model.trainable = True
    
    # Freeze all the layers except the last 15
    for layer in base_model.layers[:-15]:
        layer.trainable = False
    
    # Recompile the model with a lower learning rate
    model.compile(
        optimizer=tf.keras.optimizers.Adam(1e-5),
        loss='categorical_crossentropy',
        metrics=['accuracy']
    )
    
    # Continue training
    history = model.fit(
        train_generator,
        steps_per_epoch=train_steps // 32,
        epochs=epochs,
        validation_data=val_generator,
        validation_steps=val_steps // 32,
        callbacks=[
            tf.keras.callbacks.EarlyStopping(
                monitor='val_loss',
                patience=3,
                restore_best_weights=True
            )
        ]
    )
    
    return history

def detect_deepfake(model, image_path, threshold=0.5):
    """Detect if an image is a deepfake"""
    # Load and preprocess image
    img = cv2.imread(image_path)
    img = cv2.cvtColor(img, cv2.COLOR_BGR2RGB)
    img = cv2.resize(img, (224, 224))
    img = np.expand_dims(img / 255.0, axis=0)
    
    # Make prediction
    prediction = model.predict(img)[0]
    real_prob = prediction[0]
    fake_prob = prediction[1]
    
    result = {
        'is_deepfake': fake_prob > threshold,
        'confidence': max(real_prob, fake_prob),
        'real_probability': float(real_prob),
        'fake_probability': float(fake_prob)
    }
    
    return result

def process_video_for_deepfakes(model, video_path, frame_interval=30, threshold=0.5):
    """Process a video to detect deepfakes"""
    # Extract frames
    frames = []
    video = cv2.VideoCapture(video_path)
    frame_count = 0
    
    while True:
        success, frame = video.read()
        if not success:
            break
        
        if frame_count % frame_interval == 0:
            frames.append(frame)
        
        frame_count += 1
    
    video.release()
    
    # Analyze each frame
    results = []
    for i, frame in enumerate(frames):
        frame_rgb = cv2.cvtColor(frame, cv2.COLOR_BGR2RGB)
        frame_resized = cv2.resize(frame_rgb, (224, 224))
        frame_normalized = np.expand_dims(frame_resized / 255.0, axis=0)
        
        prediction = model.predict(frame_normalized)[0]
        results.append({
            'frame': i *

Comparing Cloud Implementations

Cost Comparison

Let’s analyze the costs for implementing a deepfake detection system across cloud providers (monthly basis):

Service ComponentAWSGCPAzure
Storage (1TB)S3: $21.85Cloud Storage: $19.00Blob Storage: $17.48
Compute (10M invocations)Lambda: $16.34Cloud Functions: $15.68Functions: $15.52
Face Detection (1M images)Rekognition: $1,000.00Vision API: $1,200.00Face API: $1,000.00
ML InferenceSageMaker: $209.00 (ml.g4dn.xlarge)Vertex AI: $235.00 (n1-standard-4 + T4 GPU)Azure ML: $240.00 (Standard_NC6s_v3)
MonitoringCloudWatch: $12.00Cloud Logging: $9.50Application Insights: $16.50
Total (approx.)$1,259.19$1,479.18$1,289.50

Note: Costs are approximations based on 2025 pricing trends and will vary based on exact usage patterns, regional pricing differences, and any additional promotional discounts. Check billing service for respective cloud provider for latest charges.

Mitigating Deepfakes: Detection and Prevention

Detection Techniques

  1. Visual Inconsistencies Analysis
    • Eye blinking patterns
    • Facial texture analysis
    • Lighting inconsistencies
    • Unnatural movements
  2. Audio-Visual Synchronization
    • Lip-sync analysis
    • Voice pattern matching
  3. Metadata Analysis
    • Digital fingerprinting
    • Hidden watermarks

Prevention Strategies

  1. Digital Content Provenance
    • Content Authentication Initiative (CAI)
    • Blockchain verification
  2. Media Literacy Education
    • Public awareness campaigns
    • Educational programs in schools
  3. Regulatory Frameworks
    • Legal protections
    • Industry standards

Ethical and Legal Considerations

Implementing deepfake detection systems raises several considerations:

  1. Privacy Concerns
    • Facial data collection and storage
    • Biometric data protection regulations (GDPR, CCPA)
  2. False Positives/Negatives
    • Impact of wrongful identification
    • Liability considerations
  3. Regulatory Compliance
    • Regional variations in content laws
    • Cross-border data transfer requirements

Future Developments

The field of deepfake detection continues to evolve rapidly:

  1. Real-time Detection Systems
    • Low-latency detection in video streams
    • In-browser verification tools
  2. Multimodal Analysis
    • Combined audio-visual-textual verification
    • Physiological impossibility detection
  3. Adversarial Training
    • Constantly updating models against new techniques
    • Self-improving systems through GANs

Conclusion

Deepfake creation involves sophisticated AI techniques combining computer vision, deep learning, and digital media processing. While the technical aspects are fascinating, it’s essential to approach this technology responsibly and with awareness of potential ethical implications.

Cloud providers offer powerful tools that enable the creation of deepfakes for legitimate purposes, but users must adhere to terms of service and ethical guidelines when implementing these technologies.

The AWS solution offers the best overall value, with GCP providing the most advanced AI capabilities at a premium price point. Azure represents a middle ground with strong integration into enterprise environments.

As deepfake technology continues to evolve, detection systems must keep pace through continuous model improvement, multi-modal analysis, and real-time capabilities. The ethical dimensions of this technology also require careful consideration, particularly around privacy, false identification, and regulatory compliance.

Stay tuned to for exciting articles on Towardscloud.

```

Let’s create a comprehensive guide for implementing a conversational bot using OpenAI’s GPT models across AWS, GCP, and Azure, with code examples and cost comparisons.

Understanding GPT Models

OpenAI’s Generative Pre-trained Transformer (GPT) models represent some of the most advanced language models available today. These models are trained on vast amounts of text data and can generate human-like text, translate languages, write different kinds of creative content, and answer questions in an informative way.

Key GPT model variations include:

  • GPT-3.5 (e.g., ChatGPT)
  • GPT-4
  • GPT-4 Turbo
  • GPT-4o

Each model varies in capabilities, token limits, and cost structures.

Word Up! Bot: A Conversational Assistant

Let’s create a “Word Up! Bot” – a conversational assistant that can:

  1. Answer questions about cloud technologies
  2. Generate code examples on demand
  3. Translate technical concepts across cloud platforms
  4. Summarize technical documentation

Implementation Across Cloud Platforms

AWS Implementation

AWS Lambda Function for Word Up! Bot

import json
import os
import boto3
import openai
from aws_lambda_powertools import Logger, Tracer, Metrics
from aws_lambda_powertools.event_handler import APIGatewayRestResolver
from aws_lambda_powertools.utilities.typing import LambdaContext

# Initialize utilities
logger = Logger()
tracer = Tracer()
metrics = Metrics()
app = APIGatewayRestResolver()

# Initialize DynamoDB
dynamodb = boto3.resource('dynamodb')
table = dynamodb.Table(os.environ.get('CONVERSATION_HISTORY_TABLE'))

# Initialize OpenAI client
openai.api_key = os.environ.get('OPENAI_API_KEY')

@app.post("/chat")
@tracer.capture_method
def chat():
    try:
        # Parse request
        request_body = app.current_event.body
        body = json.loads(request_body)
        user_id = body.get('user_id')
        message = body.get('message')
        
        # Get conversation history
        history = get_conversation_history(user_id)
        
        # Prepare messages for OpenAI
        messages = [
            {"role": "system", "content": "You are Word Up! Bot, a helpful assistant that specializes in cloud technologies."}
        ]
        
        # Add conversation history
        for msg in history:
            messages.append(msg)
        
        # Add the current message
        messages.append({"role": "user", "content": message})
        
        # Call OpenAI
        response = openai.ChatCompletion.create(
            model="gpt-4-turbo",
            messages=messages,
            temperature=0.7,
            max_tokens=1000
        )
        
        # Extract assistant's reply
        assistant_message = response['choices'][0]['message']['content']
        
        # Store the conversation
        store_message(user_id, "user", message)
        store_message(user_id, "assistant", assistant_message)
        
        # Return response
        return {
            "statusCode": 200,
            "body": json.dumps({
                "message": assistant_message
            })
        }
    except Exception as e:
        logger.exception("Error processing request")
        return {
            "statusCode": 500,
            "body": json.dumps({
                "error": str(e)
            })
        }

def get_conversation_history(user_id, limit=10):
    response = table.query(
        KeyConditionExpression=boto3.dynamodb.conditions.Key('user_id').eq(user_id),
        Limit=limit * 2,  # Multiply by 2 because we store user and assistant messages separately
        ScanIndexForward=False  # Get most recent messages first
    )
    
    # Sort by timestamp
    messages = sorted(response.get('Items', []), key=lambda x: x['timestamp'])
    
    # Format for OpenAI API
    return [{"role": msg['role'], "content": msg['content']} for msg in messages]

def store_message(user_id, role, content):
    table.put_item(
        Item={
            'user_id': user_id,
            'message_id': f"{user_id}_{int(datetime.now().timestamp())}",
            'role': role,
            'content': content,
            'timestamp': datetime.now().isoformat()
        }
    )

@logger.inject_lambda_context
@tracer.capture_lambda_handler
@metrics.log_metrics
def lambda_handler(event, context: LambdaContext):
    return app.resolve(event, context)

AWS CloudFormation Template for Word Up! Bot

AWSTemplateFormatVersion: '2010-09-09'
Description: 'Word Up! Bot - OpenAI GPT Integration'

Parameters:
  OpenAIApiKey:
    Type: String
    NoEcho: true
    Description: Your OpenAI API Key

Resources:
  # DynamoDB Table for conversation history
  ConversationHistoryTable:
    Type: AWS::DynamoDB::Table
    Properties:
      TableName: WordUpBotConversations
      BillingMode: PAY_PER_REQUEST
      AttributeDefinitions:
        - AttributeName: user_id
          AttributeType: S
        - AttributeName: message_id
          AttributeType: S
      KeySchema:
        - AttributeName: user_id
          KeyType: HASH
        - AttributeName: message_id
          KeyType: RANGE
      TimeToLiveSpecification:
        AttributeName: ttl
        Enabled: true

  # Lambda execution role
  LambdaExecutionRole:
    Type: AWS::IAM::Role
    Properties:
      AssumeRolePolicyDocument:
        Version: '2012-10-17'
        Statement:
          - Effect: Allow
            Principal:
              Service: lambda.amazonaws.com
            Action: sts:AssumeRole
      ManagedPolicyArns:
        - arn:aws:iam::aws:policy/service-role/AWSLambdaBasicExecutionRole
      Policies:
        - PolicyName: DynamoDBAccess
          PolicyDocument:
            Version: '2012-10-17'
            Statement:
              - Effect: Allow
                Action:
                  - dynamodb:Query
                  - dynamodb:PutItem
                Resource: !GetAtt ConversationHistoryTable.Arn

  # Lambda function
  WordUpBotFunction:
    Type: AWS::Lambda::Function
    Properties:
      FunctionName: WordUpBotFunction
      Runtime: python3.9
      Handler: app.lambda_handler
      Role: !GetAtt LambdaExecutionRole.Arn
      Timeout: 30
      MemorySize: 256
      Environment:
        Variables:
          OPENAI_API_KEY: !Ref OpenAIApiKey
          CONVERSATION_HISTORY_TABLE: !Ref ConversationHistoryTable
      Code:
        ZipFile: |
          # Lambda function code would be deployed separately, not inline
          def lambda_handler(event, context):
              return {"statusCode": 200, "body": "Function placeholder"}

  # API Gateway REST API
  WordUpBotApi:
    Type: AWS::ApiGateway::RestApi
    Properties:
      Name: WordUpBotApi
      Description: API for Word Up! Bot

  # API Gateway resource
  ChatResource:
    Type: AWS::ApiGateway::Resource
    Properties:
      RestApiId: !Ref WordUpBotApi
      ParentId: !GetAtt WordUpBotApi.RootResourceId
      PathPart: chat

  # API Gateway method
  ChatMethod:
    Type: AWS::ApiGateway::Method
    Properties:
      RestApiId: !Ref WordUpBotApi
      ResourceId: !Ref ChatResource
      HttpMethod: POST
      AuthorizationType: NONE
      Integration:
        Type: AWS_PROXY
        IntegrationHttpMethod: POST
        Uri: !Sub arn:aws:apigateway:${AWS::Region}:lambda:path/2015-03-31/functions/${WordUpBotFunction.Arn}/invocations

  # API Gateway deployment
  ApiDeployment:
    Type: AWS::ApiGateway::Deployment
    DependsOn: ChatMethod
    Properties:
      RestApiId: !Ref WordUpBotApi
      StageName: prod

  # Lambda permission for API Gateway
  ApiGatewayInvokeLambdaPermission:
    Type: AWS::Lambda::Permission
    Properties:
      FunctionName: !Ref WordUpBotFunction
      Action: lambda:InvokeFunction
      Principal: apigateway.amazonaws.com
      SourceArn: !Sub arn:aws:execute-api:${AWS::Region}:${AWS::AccountId}:${WordUpBotApi}/*/POST/chat

Outputs:
  ApiEndpoint:
    Description: API Endpoint URL
    Value: !Sub https://${WordUpBotApi}.execute-api.${AWS::Region}.amazonaws.com/prod/chat
  DynamoDBTableName:
    Description: DynamoDB Table Name
    Value: !Ref ConversationHistoryTable

GCP Implementation

GCP Cloud Function for Word Up! Bot

import os
import json
import functions_framework
from google.cloud import firestore
import openai
import datetime

# Initialize Firestore client
db = firestore.Client()

# Initialize OpenAI client
openai.api_key = os.environ.get('OPENAI_API_KEY')

@functions_framework.http
def word_up_bot(request):
    """
    HTTP Cloud Function to interact with OpenAI's GPT.
    """
    # Set CORS headers for preflight requests
    if request.method == 'OPTIONS':
        headers = {
            'Access-Control-Allow-Origin': '*',
            'Access-Control-Allow-Methods': 'POST',
            'Access-Control-Allow-Headers': 'Content-Type',
            'Access-Control-Max-Age': '3600'
        }
        return ('', 204, headers)

    # Set CORS headers for main request
    headers = {
        'Access-Control-Allow-Origin': '*'
    }

    try:
        # Parse request data
        request_json = request.get_json(silent=True)
        
        if not request_json:
            return (json.dumps({'error': 'No request data provided'}), 400, headers)
        
        user_id = request_json.get('user_id')
        message = request_json.get('message')
        
        if not user_id or not message:
            return (json.dumps({'error': 'Missing required fields: user_id and message'}), 400, headers)
        
        # Get conversation history
        history = get_conversation_history(user_id)
        
        # Prepare messages for OpenAI
        messages = [
            {"role": "system", "content": "You are Word Up! Bot, a helpful assistant that specializes in cloud technologies."}
        ]
        
        # Add conversation history
        for msg in history:
            messages.append(msg)
        
        # Add the current message
        messages.append({"role": "user", "content": message})
        
        # Call OpenAI
        response = openai.ChatCompletion.create(
            model="gpt-4-turbo",
            messages=messages,
            temperature=0.7,
            max_tokens=1000
        )
        
        # Extract assistant's reply
        assistant_message = response['choices'][0]['message']['content']
        
        # Store the conversation
        store_message(user_id, "user", message)
        store_message(user_id, "assistant", assistant_message)
        
        # Return response
        return (json.dumps({'message': assistant_message}), 200, headers)
    
    except Exception as e:
        print(f"Error: {str(e)}")
        return (json.dumps({'error': str(e)}), 500, headers)

def get_conversation_history(user_id, limit=10):
    """
    Retrieve conversation history from Firestore.
    """
    # Reference to the conversation collection
    conversations_ref = db.collection('conversations')
    
    # Query messages for this user, ordered by timestamp
    query = conversations_ref.where('user_id', '==', user_id).order_by('timestamp').limit(limit * 2)
    
    # Execute query and format messages for OpenAI API
    messages = []
    for doc in query.stream():
        data = doc.to_dict()
        messages.append({"role": data['role'], "content": data['content']})
    
    return messages

def store_message(user_id, role, content):
    """
    Store a message in Firestore.
    """
    # Reference to the conversation collection
    conversations_ref = db.collection('conversations')
    
    # Prepare document data
    now = datetime.datetime.now()
    message_data = {
        'user_id': user_id,
        'role': role,
        'content': content,
        'timestamp': now,
        'ttl': now + datetime.timedelta(days=30)  # TTL for message deletion after 30 days
    }
    
    # Add document to collection
    conversations_ref.add(message_data)

GCP Terraform for Word Up! Bot

provider "google" {
  project = var.project_id
  region  = var.region
}

# Variables
variable "project_id" {
  description = "GCP Project ID"
  type        = string
}

variable "region" {
  description = "GCP Region"
  default     = "us-central1"
}

variable "openai_api_key" {
  description = "OpenAI API Key"
  type        = string
  sensitive   = true
}

# Enable required APIs
resource "google_project_service" "cloudfunctions" {
  project = var.project_id
  service = "cloudfunctions.googleapis.com"
}

resource "google_project_service" "firestore" {
  project = var.project_id
  service = "firestore.googleapis.com"
}

resource "google_project_service" "cloudbuild" {
  project = var.project_id
  service = "cloudbuild.googleapis.com"
}

# Create a storage bucket for Cloud Function code
resource "google_storage_bucket" "function_bucket" {
  name     = "${var.project_id}-word-up-bot-function"
  location = var.region
  uniform_bucket_level_access = true
}

# Create a ZIP archive of Cloud Function code
data "archive_file" "function_zip" {
  type        = "zip"
  output_path = "function-source.zip"
  source_dir  = "function-source"  # Directory containing your function code
}

# Upload the Cloud Function code to the bucket
resource "google_storage_bucket_object" "function_code" {
  name   = "function-source-${data.archive_file.function_zip.output_md5}.zip"
  bucket = google_storage_bucket.function_bucket.name
  source = data.archive_file.function_zip.output_path
}

# Create the Cloud Function
resource "google_cloudfunctions_function" "word_up_bot" {
  name        = "word-up-bot"
  description = "Word Up! Bot - OpenAI GPT Integration"
  runtime     = "python39"

  available_memory_mb   = 256
  source_archive_bucket = google_storage_bucket.function_bucket.name
  source_archive_object = google_storage_bucket_object.function_code.name
  trigger_http          = true
  entry_point           = "word_up_bot"
  
  environment_variables = {
    OPENAI_API_KEY = var.openai_api_key
  }

  depends_on = [
    google_project_service.cloudfunctions,
    google_project_service.cloudbuild
  ]
}

# IAM entry for all users to invoke the function
resource "google_cloudfunctions_function_iam_member" "invoker" {
  project        = var.project_id
  region         = var.region
  cloud_function = google_cloudfunctions_function.word_up_bot.name
  role           = "roles/cloudfunctions.invoker"
  member         = "allUsers"
}

# Output the Cloud Function URL
output "function_url" {
  value = google_cloudfunctions_function.word_up_bot.https_trigger_url
}

Azure Implementation

Azure Function for Word Up! Bot

using System;
using System.IO;
using System.Threading.Tasks;
using Microsoft.AspNetCore.Mvc;
using Microsoft.Azure.WebJobs;
using Microsoft.Azure.WebJobs.Extensions.Http;
using Microsoft.AspNetCore.Http;
using Microsoft.Extensions.Logging;
using Newtonsoft.Json;
using Azure.Data.Tables;
using System.Collections.Generic;
using System.Linq;
using System.Net.Http;
using System.Text;

namespace WordUpBot.Function
{
    public static class WordUpBotFunction
    {
        private static readonly HttpClient httpClient = new HttpClient();
        private static readonly string OpenAIApiKey = Environment.GetEnvironmentVariable("OpenAIApiKey");
        private static readonly string TableConnectionString = Environment.GetEnvironmentVariable("TableConnectionString");
        private static readonly string TableName = "ConversationHistory";

        [FunctionName("WordUpBot")]
        public static async Task Run(
            [HttpTrigger(AuthorizationLevel.Function, "post", Route = null)] HttpRequest req,
            ILogger log)
        {
            log.LogInformation("Word Up! Bot function processed a request.");

            string requestBody = await new StreamReader(req.Body).ReadToEndAsync();
            var data = JsonConvert.DeserializeObject(requestBody);

            if (data == null || string.IsNullOrEmpty(data.UserId) || string.IsNullOrEmpty(data.Message))
            {
                return new BadRequestObjectResult("Please pass a valid request with UserId and Message in the request body");
            }

            try
            {
                // Get conversation history
                var history = await GetConversationHistoryAsync(data.UserId);

                // Prepare messages for OpenAI
                var messages = new List
                {
                    new Message { Role = "system", Content = "You are Word Up! Bot, a helpful assistant that specializes in cloud technologies." }
                };

                // Add conversation history
                messages.AddRange(history);

                // Add the current message
                messages.Add(new Message { Role = "user", Content = data.Message });

                // Call OpenAI
                var openAiResponse = await CallOpenAIAsync(messages);

                if (openAiResponse == null)
                {
                    return new StatusCodeResult(StatusCodes.Status500InternalServerError);
                }

                // Store messages
                await StoreMessageAsync(data.UserId, "user", data.Message);
                await StoreMessageAsync(data.UserId, "assistant", openAiResponse);

                return new OkObjectResult(new { message = openAiResponse });
            }
            catch (Exception ex)
            {
                log.LogError($"Error: {ex.Message}");
                return new StatusCodeResult(StatusCodes.Status500InternalServerError);
            }
        }

        private static async Task> GetConversationHistoryAsync(string userId)
        {
            // Create table client
            var tableClient = new TableClient(TableConnectionString, TableName);
            await tableClient.CreateIfNotExistsAsync();

            // Query messages for this user
            var query = tableClient.QueryAsync(filter: $"PartitionKey eq '{userId}'");

            var messages = new List();
            await foreach (var entity in query)
            {
                messages.Add(new Message
                {
                    Role = entity.Role,
                    Content = entity.Content
                });
            }

            // Order by timestamp and take the last 10 messages
            return messages.OrderBy(m => m.Timestamp).TakeLast(10).ToList();
        }

        private static async Task StoreMessageAsync(string userId, string role, string content)
        {
            // Create table client
            var tableClient = new TableClient(TableConnectionString, TableName);
            await tableClient.CreateIfNotExistsAsync();

            // Create entity
            var entity = new ConversationEntity
            {
                PartitionKey = userId,
                RowKey = Guid.NewGuid().ToString(),
                Role = role,
                Content = content,
                Timestamp = DateTime.UtcNow
            };

            // Add entity to table
            await tableClient.AddEntityAsync(entity);
        }

        private static async Task CallOpenAIAsync(List messages)
        {
            // Set up the request to OpenAI
            var requestData = new
            {
                model = "gpt-4-turbo",
                messages = messages.Select(m => new { role = m.Role, content = m.Content }).ToArray(),
                temperature = 0.7,
                max_tokens = 1000
            };

            var content = new StringContent(JsonConvert.SerializeObject(requestData), Encoding.UTF8, "application/json");
            httpClient.DefaultRequestHeaders.Authorization = new System.Net.Http.Headers.AuthenticationHeaderValue("Bearer", OpenAIApiKey);

            var response = await httpClient.PostAsync("https://api.openai.com/v1/chat/completions", content);
            
            if (!response.IsSuccessStatusCode)
            {
                return null;
            }

            var responseString = await response.Content.ReadAsStringAsync();
            var responseObject = JsonConvert.DeserializeObject(responseString);

            return responseObject.choices[0].message.content.ToString();
        }

        public class RequestData
        {
            public string UserId { get; set; }
            public string Message { get; set; }
        }

        public class Message
        {
            public string Role { get; set; }
            public string Content { get; set; }
            public DateTime Timestamp { get; set; } = DateTime.UtcNow;
        }

        public class ConversationEntity : Azure.Data.Tables.ITableEntity
        {
            public string PartitionKey { get; set; }
            public string RowKey { get; set; }
            public DateTimeOffset? Timestamp { get; set; }
            public ETag ETag { get; set; }
            public string Role { get; set; }
            public string Content { get; set; }
        }
    }
}

Azure Bicep Template for Word Up! Bot

@description('Location for all resources.')
param location string = resourceGroup().location

@description('The name of the function app.')
param functionAppName string = 'wordupbot-${uniqueString(resourceGroup().id)}'

@description('Storage Account type')
@allowed([
  'Standard_LRS'
  'Standard_GRS'
  'Standard_RAGRS'
])
param storageAccountType string = 'Standard_LRS'

@description('OpenAI API Key')
@secure()
param openAIApiKey string

// Storage Account
resource storageAccount 'Microsoft.Storage/storageAccounts@2021-08-01' = {
  name: 'stwordupbot${uniqueString(resourceGroup().id)}'
  location: location
  kind: 'StorageV2'
  sku: {
    name: storageAccountType
  }
  properties: {
    supportsHttpsTrafficOnly: true
    minimumTlsVersion: 'TLS1_2'
  }
}

// Storage Account - Tables
resource tableService 'Microsoft.Storage/storageAccounts/tableServices@2021-08-01' = {
  name: 'default'
  parent: storageAccount
}

// Table for conversation history
resource conversationTable 'Microsoft.Storage/storageAccounts/tableServices/tables@2021-08-01' = {
  name: 'ConversationHistory'
  parent: tableService
}

// App Service Plan (Consumption)
resource appServicePlan 'Microsoft.Web/serverfarms@2021-03-01' = {
  name: 'plan-${functionAppName}'
  location: location
  sku: {
    name: 'Y1'
    tier: 'Dynamic'
  }
  properties: {}
}

// Function App
resource functionApp 'Microsoft.Web/sites@2021-03-01' = {
  name: functionAppName
  location: location
  kind: 'functionapp'
  properties: {
    serverFarmId: appServicePlan.id
    siteConfig: {
      appSettings: [
        {
          name: 'AzureWebJobsStorage'
          value: 'DefaultEndpointsProtocol=https;AccountName=${storageAccount.name};EndpointSuffix=${environment().suffixes.storage};AccountKey=${storageAccount.listKeys().keys[0].value}'
        }
        {
          name: 'WEBSITE_CONTENTAZUREFILECONNECTIONSTRING'
          value: 'DefaultEndpointsProtocol=https;AccountName=${storageAccount.name};EndpointSuffix=${environment().suffixes.storage};AccountKey=${storageAccount.listKeys().keys[0].value}'
        }
        {
          name: 'WEBSITE_CONTENTSHARE'
          value: toLower(functionAppName)
        }
        {
          name: 'FUNCTIONS_EXTENSION_VERSION'
          value: '~4'
        }
        {
          name: 'FUNCTIONS_WORKER_RUNTIME'
          value: 'dotnet'
        }
        {
          name: 'OpenAIApiKey'
          value: openAIApiKey
        }
        {
          name: 'TableConnectionString'
          value: 'DefaultEndpointsProtocol=https;AccountName=${storageAccount.name};EndpointSuffix=${environment().suffixes.storage};AccountKey=${storageAccount.listKeys().keys[0].value}'
        }
      ]
      ftpsState: 'Disabled'
      minTlsVersion: '1.2'
    }
    httpsOnly: true
  }
}

// Application Insights
resource applicationInsights 'Microsoft.Insights/components@2020-02-02' = {
  name: 'ai-${functionAppName}'
  location: location
  kind: 'web'
  properties: {
    Application_Type: 'web'
    Request_Source: 'rest'
  }
}

// Output the function app URL
output functionAppUrl string = 'https://${functionApp.properties.defaultHostName}/api/WordUpBot'

Independent Implementation (Docker)

Dockerfile for Word Up! Bot

FROM python:3.9-slim

WORKDIR /app

# Install dependencies
COPY requirements.txt .
RUN pip install --no-cache-dir -r requirements.txt

# Copy application code
COPY app.py .
COPY .env .

# Set environment variables
ENV PYTHONUNBUFFERED=1

# Expose port
EXPOSE 8080

# Run the application
CMD ["python", "app.py"]

Python App for Containerized Word Up! Bot

import os
from flask import Flask, request, jsonify
from flask_cors import CORS
import openai
import sqlite3
import datetime
from dotenv import load_dotenv

# Load environment variables
load_dotenv()

# Initialize Flask app
app = Flask(__name__)
CORS(app)

# Initialize OpenAI client
openai.api_key = os.getenv('OPENAI_API_KEY')

# Initialize SQLite database
def init_db():
    conn = sqlite3.connect('conversations.db')
    cursor = conn.cursor()
    cursor.execute('''
    CREATE TABLE IF NOT EXISTS conversations (
        id INTEGER PRIMARY KEY AUTOINCREMENT,
        user_id TEXT NOT NULL,
        role TEXT NOT NULL,
        content TEXT NOT NULL,
        timestamp TEXT NOT NULL
    )
    ''')
    conn.commit()
    conn.close()

init_db()

@app.route('/chat', methods=['POST'])
def chat():
    try:
        # Parse request data
        data = request.get_json()
        
        if not data:
            return jsonify({'error': 'No request data provided'}), 400
        
        user_id = data.get('user_id')
        message = data.get('message')
        
        if not user_id or not message:
            return jsonify({'error': 'Missing required fields: user_id and message'}), 400
        
        # Get conversation history
        history = get_conversation_history(user_id)
        
        # Prepare messages for OpenAI
        messages = [
            {"role": "system", "content": "You are Word Up! Bot, a helpful assistant that specializes in cloud technologies."}
        ]
        
        # Add conversation history
        for msg in history:
            messages.append(msg)
        
        # Add the current message
        messages.append({"role": "user", "content": message})
        
        # Call OpenAI
        response = openai.ChatCompletion.create(
            model="gpt-4-turbo",
            messages=messages,
            temperature=0.7,
            max_tokens=1000
        )
        
        # Extract assistant's reply
        assistant_message = response['choices'][0]['message']['content']
        
        # Store the conversation
        store_message(user_id, "user", message)
        store_message(user_id, "assistant", assistant_message)
        
        # Return response
        return jsonify({'message': assistant_message})
    
    except Exception as e:
        print(f"Error: {str(e)}")
        return jsonify({'error': str(e)}), 500

def get_conversation_history(user_id, limit=10):
    """
    Retrieve conversation history from SQLite.
    """
    conn = sqlite3.connect('conversations.db')
    cursor = conn.cursor()
    
    cursor.execute(
        "SELECT role, content FROM conversations WHERE user_id = ? ORDER BY timestamp LIMIT ?", 
        (user_id, limit * 2)
    )
    
    results = cursor.fetchall()
    conn.close()
    
    messages = []
    for role, content in results:
        messages.append({"role": role, "content": content})
    
    return messages

def store_message(user_id, role, content):
    """
    Store a message in SQLite.
    """
    conn = sqlite3.connect('conversations.db')
    cursor = conn.cursor()
    
    now = datetime.datetime.now().isoformat()
    cursor.execute(
        "INSERT INTO conversations (user_id, role, content, timestamp) VALUES (?, ?, ?, ?)",
        (user_id, role, content, now)
    )
    
    conn.commit()
    conn.close()

if __name__ == '__main__':
    # Create database if it doesn't exist
    init_db()
    
    # Run the app
    port = int(os.getenv('PORT', 8080))
    app.run(host='0.0.0.0', port=port)

Docker Compose for Word Up! Bot

version: '3'

services:
  word-up-bot:
    build: .
    ports:
      - "8080:8080"
    volumes:
      - ./data:/app/data
    environment:
      - OPENAI_API_KEY=${OPENAI_API_KEY}
    restart: unless-stopped

Requirements.txt for Word Up! Bot

flask==2.3.3
flask-cors==4.0.0
openai==1.3.5
python-dotenv==1.0.0
gunicorn==21.2.0

Frontend Implementation (example page-not connected to backend)

Word Up! Bot – OpenAI GPT Assistant

Word Up! Bot

Powered by OpenAI GPT

Cloud Technology Expert

AWS

Ask me about Amazon Web Services, Lambda, S3, EC2, and more.

GCP

Ask me about Google Cloud Platform, Cloud Functions, BigQuery, and more.

Azure

Ask me about Microsoft Azure, Functions, Cosmos DB, and more.

GPT Model Implementation Details

GPT Model Selection Guide

When integrating with OpenAI’s GPT models, there are several options to consider:

  1. GPT-3.5 Turbo
    • Best for: General purpose tasks, cost-efficiency
    • Context window: 16K tokens
    • Cost: ~$0.0015 per 1K tokens (input), ~$0.002 per 1K tokens (output)
  2. GPT-4 Turbo
    • Best for: Complex reasoning, advanced capabilities
    • Context window: 128K tokens
    • Cost: ~$0.01 per 1K tokens (input), ~$0.03 per 1K tokens (output)
  3. GPT-4o
    • Best for: Multimodal tasks (text + vision)
    • Context window: 128K tokens
    • Cost: ~$0.005 per 1K tokens (input), ~$0.015 per 1K tokens (output)

For the Word Up! Bot, GPT-4 Turbo provides the best balance between capabilities and cost for cloud technology discussions.

Cost Comparison Across Cloud Platforms

Cost Analysis

The cost breakdown for a Word Up! Bot with approximately 10,000 conversations per month:

  1. Infrastructure Costs
    • AWS: ~$4-5/month (Lambda, API Gateway, DynamoDB)
    • GCP: ~$3.60-4.50/month (Cloud Functions, API Gateway, Firestore)
    • Azure: ~$5.20-6.00/month (Functions, API Management, Table Storage)
    • Self-hosted: ~$5-20/month (VPS)
  2. OpenAI API Costs (dominate total cost)
    • Average cost per conversation (~500 tokens input, ~750 tokens output):
      • GPT-3.5 Turbo: $0.002 per conversation ($20/month)
      • GPT-4 Turbo: $0.03 per conversation ($300/month)
      • GPT-4o: $0.015 per conversation ($150/month)
  3. Key Differences
    • AWS offers the strongest free tier and easier scalability
    • GCP provides slightly lower storage costs
    • Azure has integrated OpenAI options but higher API management costs
    • Self-hosted offers more control but requires maintenance
  4. Recommendation
    • For smaller implementations: Start with AWS due to free tier benefits
    • For integration with existing cloud services: Match your current provider
    • For cost optimization: Use GPT-3.5 for simple queries, GPT-4 for complex ones

Advanced Features and Customizations

Prompt Engineering for Cloud Discussions

Enhance your Word Up! Bot with specialized system prompts:

system_prompt = """
You are Word Up! Bot, a specialized cloud technology assistant focused on AWS, GCP, and Azure.

For each cloud provider question:
1. Explain the service/concept clearly
2. Provide practical code examples when relevant
3. Compare to equivalent services on other cloud platforms
4. Note important pricing considerations
5. Address security best practices

Your specialty is helping users understand cloud services across platforms.
"""

Adding Custom Knowledge Base

Implement a vector database to store specialized knowledge:

Vector Database Integration

import os
from langchain.embeddings import OpenAIEmbeddings
from langchain.vectorstores import Chroma
from langchain.text_splitter import RecursiveCharacterTextSplitter
from langchain.chains import RetrievalQA
from langchain.document_loaders import DirectoryLoader, TextLoader
import openai

# Load documents (cloud service documentation)
loader = DirectoryLoader('./cloud_docs/', glob="**/*.md", loader_cls=TextLoader)
documents = loader.load()

# Split documents into chunks
text_splitter = RecursiveCharacterTextSplitter(chunk_size=1000, chunk_overlap=100)
texts = text_splitter.split_documents(documents)

# Initialize embeddings
embeddings = OpenAIEmbeddings(openai_api_key=os.getenv("OPENAI_API_KEY"))

# Create vector store
vector_store = Chroma.from_documents(texts, embeddings, persist_directory="./cloud_kb")

# Create retrieval chain
retriever = vector_store.as_retriever(search_kwargs={"k": 3})

def enhance_with_knowledge_base(query):
    """Enhance a query with relevant information from the knowledge base."""
    # Get relevant documents
    docs = retriever.get_relevant_documents(query)
    
    # Format as context
    context = "\n\n".join([f"Document {i+1}:\n{doc.page_content}" for i, doc in enumerate(docs)])
    
    # Create enhanced prompt
    enhanced_prompt = f"""
    Answer the following question about cloud technologies. 
    Use the context provided if relevant, but you don't need to use it if you already know the answer.
    
    Context:
    {context}
    
    Question: {query}
    """
    
    return enhanced_prompt

Multi-Cloud Design Patterns

Security Best Practices

OpenAI API Security

  1. API Key Management
    • AWS: Use Secrets Manager
    • GCP: Use Secret Manager
    • Azure: Use Key Vault
    • All: Rotate keys regularly
  2. Input Validation
    • Implement rate limiting
    • Validate and sanitize all user inputs
    • Apply token limits to prevent abuse
  3. Content Filtering
    • Implement pre-processing filters for harmful inputs
    • Use OpenAI’s moderation API
    • Have clear escalation processes for problematic content

Cloud-Specific Security

Security Configuration

# AWS Security Configuration
aws:
  lambda:
    # Use IAM roles with least privilege
    execution_role:
      managed_policies:
        - AWSLambdaBasicExecutionRole
      inline_policies:
        - Effect: Allow
          Action:
            - dynamodb:Query
            - dynamodb:PutItem
          Resource: arn:aws:dynamodb:*:*:table/WordUpBotConversations
    
    # Configure VPC if needed
    vpc_config:
      enabled: true
      security_groups:
        - sg-12345678
      subnets:
        - subnet-12345678
        - subnet-87654321
  
  api_gateway:
    # Enable WAF
    waf:
      enabled: true
      rules:
        - name: RateBasedRule
          priority: 1
          rate_limit: 100
    
    # Use API keys for authentication
    api_key_required: true
    
    # Enable logging
    logging:
      enabled: true
      log_level: ERROR

# GCP Security Configuration
gcp:
  cloud_functions:
    # Use service accounts with minimal permissions
    service_account: [email protected]
    
    # Set ingress settings
    ingress_settings: ALLOW_INTERNAL_ONLY
    
    # Enable VPC connector
    vpc_connector: projects/project-id/locations/region/connectors/connector-name
  
  firestore:
    # Set up security rules
    rules: |
      rules_version = '2';
      service cloud.firestore {
        match /databases/{database}/documents {
          match /conversations/{document=**} {
            allow read, write: if false;  // Only backend access
          }
        }
      }

# Azure Security Configuration
azure:
  functions:
    # Authentication settings
    auth:
      enabled: true
      auth_level: function
    
    # Network restrictions
    network:
      ip_security_restrictions:
        - ip_address: 1.2.3.4/32
          action: Allow
    
    # Use managed identity
    identity:
      type: SystemAssigned
      
  table_storage:
    # Enable encryption
    encryption:
      services:
        table:
          enabled: true
      key_type: Account

Conclusion and Next Steps

Word Up! Bot provides a powerful way to engage with cloud technology information using OpenAI’s GPT models. The implementation across AWS, GCP, and Azure demonstrates the flexibility of integrating AI assistants with cloud infrastructure.

For optimal results:

  1. Choose the GPT model that balances capability with cost for your specific use case
  2. Start with a cloud provider that aligns with your existing infrastructure
  3. Implement robust security measures, especially for API key management
  4. Consider adding a knowledge base for specialized cloud documentation
  5. Monitor and optimize costs as usage increases

By extending Word Up! Bot with additional features like:

  • Support for multi-turn conversations
  • User feedback loops for improvement
  • Domain-specific knowledge augmentation
  • Integration with cloud provider documentation
  • Cost optimization based on query complexity

You can create an even more powerful cloud technology assistant that helps users better understand and implement multi-cloud strategies.

```

Welcome to today’s edition of “Word Up! Bot” where we explore the fascinating world of Generative AI for text generation across the major cloud platforms. Whether you’re a seasoned AI professional or just starting your journey, this guide will walk you through everything you need to know about implementing text generation AI in AWS, GCP, and Azure.

What is Generative AI for Text?

Generative AI for text refers to artificial intelligence systems that can create human-like text based on the input they receive. Think of it as having a smart assistant that can write emails, summarize documents, create content, or even have conversations with your customers.

Understanding Large Language Models (LLMs)

Before diving into cloud implementations, let’s understand the foundation of modern text generation: Large Language Models or LLMs.

What is an LLM?

A Large Language Model (LLM) is a type of artificial intelligence that has been trained on massive amounts of text data. Imagine if someone read virtually everything on the internet, thousands of books, and countless articles – and could use all that knowledge to write new text. That’s essentially what an LLM does.

In simple terms, an LLM is:

  • A mathematical system that has “seen” billions or even trillions of examples of human-written text
  • Capable of recognizing patterns in language and generating new text that follows similar patterns
  • Able to “understand” context and produce relevant responses

A Real-World Analogy for LLMs

Think of an LLM like a super-advanced predictive text system on your phone, but on a massive scale:

  1. Your phone’s predictive text: Suggests the next word based on the few words you’ve typed and your past texting habits
  2. An LLM: Predicts not just the next word, but can continue generating entire paragraphs, essays, or conversations based on all the text it was trained on

An Example of LLM in Action

Let’s see a simple example of how an LLM works:

Prompt: “Write a short email to reschedule a meeting with a client.”

LLM-Generated Response:

Subject: Request to Reschedule Our Upcoming Meeting

Dear [Client Name],

I hope this email finds you well. I'm writing regarding our meeting scheduled for [original date/time]. Unfortunately, I need to request a rescheduling due to an unexpected conflict that has arisen.

Would any of the following alternative times work for you?
- Thursday, March 12th at 2:00 PM
- Friday, March 13th at 10:00 AM
- Monday, March 16th at 3:30 PM

I apologize for any inconvenience this may cause and appreciate your flexibility. Please let me know which option works best for you, or feel free to suggest another time that better suits your schedule.

Thank you for your understanding.

Best regards,
[Your Name]

The LLM didn’t just complete a sentence – it understood the context of “rescheduling a meeting” and generated a complete, professional email with all the appropriate components.

The Technical Side: How LLMs Work

Behind the scenes, LLMs operate through a process that can be broken down into simpler steps:

  1. Tokenization: Breaking text into smaller pieces called tokens (which can be words, parts of words, or even characters)
  2. Embedding: Converting these tokens into numbers (vectors) that the model can process
  3. Processing: Running these numbers through multiple layers of the model, with special mechanisms called “attention” that help the model focus on relevant parts of the input
  4. Generation: Predicting the most likely next token based on what it has processed
  5. Repetition: Repeating steps 3-4 until a complete response is generated

Common LLM Examples

Some of the most well-known LLMs include:

  • GPT-4 (OpenAI): Powers ChatGPT and many AI applications
  • Claude (Anthropic): Known for its helpful, harmless, and honest approach
  • Gemini (Google): Google’s advanced model with strong reasoning capabilities
  • Llama (Meta): An open-source model family that developers can run locally or fine-tune

These models vary in size (measured in parameters, which are like the adjustable settings in the model), capabilities, and specialized strengths.

💡 CALL TO ACTION: Think about how an LLM might interpret your business’s specialized vocabulary. What industry terms would you need to explain clearly when prompting an LLM?

How Does Text Generation Work?

Now that we understand LLMs, let’s explore how they’re used for text generation in practical applications:

  1. Training: LLMs are trained on massive datasets of text from books, websites, and other sources
  2. Prompting: You provide a prompt or instruction to the model
  3. Generation: The model produces text that continues from or responds to your prompt
  4. Fine-tuning: Models can be customized for specific domains or tasks

Real-World Example: The Content Creation Assistant

Imagine Sarah, a marketing manager at a growing e-commerce company. She needs to create product descriptions, blog posts, and social media content for hundreds of products each month. Manually writing all this content would take weeks.

By implementing a generative AI solution, Sarah can:

  • Generate first drafts of all content in minutes instead of weeks
  • Maintain consistent brand voice across all materials
  • Scale content production without hiring additional writers
  • Focus her creative energy on strategy rather than routine writing

💡 CALL TO ACTION: Think about repetitive writing tasks in your organization. Could generative AI help reduce that workload? Share your thoughts in the comments!

Cloud Implementation Comparison

Now, let’s explore how you can implement text generation AI in the three major cloud platforms: AWS, GCP, and Azure.

Implementing Text Generation in AWS

AWS offers several services for generative AI text implementation:

  1. Amazon Bedrock: A fully managed service that provides access to foundation models from Amazon and third parties through a unified API
  2. Amazon SageMaker: For custom model training and deployment
  3. Amazon Comprehend: For natural language processing tasks

Let’s look at a simple implementation example using Amazon Bedrock:

import boto3
import json

# Initialize the Bedrock client
bedrock_runtime = boto3.client(
    service_name='bedrock-runtime',
    region_name='us-west-2'
)

# Define the prompt
prompt = """
Write a product description for an eco-friendly water bottle that keeps 
beverages cold for 24 hours and hot for 12 hours.
"""

# Define model parameters
model_id = "anthropic.claude-v2"
body = json.dumps({
    "prompt": f"\n\nHuman: {prompt}\n\nAssistant:",
    "max_tokens_to_sample": 500,
    "temperature": 0.7,
    "top_p": 0.9,
})

# Make the API call
response = bedrock_runtime.invoke_model(
    modelId=model_id,
    body=body
)

# Process and display the response
response_body = json.loads(response['body'].read())
generated_text = response_body.get('completion')
print(generated_text)

Implementing Text Generation in GCP

Google Cloud Platform offers:

  1. Vertex AI: Google’s unified ML platform with access to Gemini and PaLM models
  2. Generative AI Studio: A visual interface for exploring and customizing generative AI models
  3. Gemini API: For direct access to Google’s latest models

Here’s a simple implementation example using the Vertex AI PaLM API:

import vertexai
from vertexai.generative_models import GenerativeModel
from vertexai.language_models import TextGenerationModel

# Initialize Vertex AI
vertexai.init(project="your-project-id", location="us-central1")

# Use the Gemini model
model = GenerativeModel("gemini-pro")

# Define the prompt
prompt = """
Write a product description for an eco-friendly water bottle that keeps 
beverages cold for 24 hours and hot for 12 hours.
"""

# Generate content
response = model.generate_content(prompt)

# Print the response
print(response.text)

# Alternatively, use the Palm API
palm_model = TextGenerationModel.from_pretrained("text-bison@001")
palm_response = palm_model.predict(
    prompt,
    temperature=0.7,
    max_output_tokens=500,
    top_k=40,
    top_p=0.8,
)

print(palm_response.text)

Implementing Text Generation in Azure

Microsoft Azure offers:

  1. Azure OpenAI Service: Provides access to OpenAI’s models like GPT-4 with Azure’s security and compliance features
  2. Azure AI Studio: For building, testing, and deploying AI applications
  3. Azure Cognitive Services: For specific AI capabilities like language understanding

Here’s a sample implementation using Azure OpenAI Service:

import os
import openai

# Set your Azure OpenAI endpoint information
openai.api_type = "azure"
openai.api_version = "2023-07-01-preview"
openai.api_key = os.getenv("AZURE_OPENAI_KEY")
openai.api_base = os.getenv("AZURE_OPENAI_ENDPOINT")

# Define the prompt
prompt = """
Write a product description for an eco-friendly water bottle that keeps 
beverages cold for 24 hours and hot for 12 hours.
"""

# Generate content using Azure OpenAI
response = openai.Completion.create(
    engine="gpt-4",  # Deployment name
    prompt=prompt,
    max_tokens=500,
    temperature=0.7,
    top_p=0.9,
    frequency_penalty=0.0,
    presence_penalty=0.0,
    stop=None
)

# Print the response
print(response.choices[0].text.strip())

Cost Comparison

Understanding the cost implications of implementing generative AI across different cloud providers is crucial for budget planning. Here’s a detailed comparison:

Cloud ProviderServiceModelCost (Approximate)Notes
AWSAmazon BedrockClaude (Anthropic)$3-11 per 1M input tokens, $8-32 per 1M output tokensPricing varies by model size
AWSAmazon BedrockTitan$0.80 per 1M input tokens, $2.40 per 1M output tokensAmazon’s proprietary model
GCPVertex AIGemini Pro$0.50 per 1M input tokens, $1.50 per 1M output tokensGood balance of performance and cost
GCPVertex AIGemini Ultra$5 per 1M input tokens, $20 per 1M output tokensMost capable model, higher cost
AzureAzure OpenAIGPT-4$30 per 1M input tokens, $60 per 1M output tokensPremium model with highest capabilities
AzureAzure OpenAIGPT-3.5 Turbo$0.50 per 1M input tokens, $1.50 per 1M output tokensCost-effective for many applications

Note: Prices are approximate as of March 2025 and may vary based on region, volume discounts, and other factors. Always check the official pricing pages for the most current information: AWS Pricing, GCP Pricing, Azure Pricing.

💡 CALL TO ACTION: Calculate your estimated monthly token usage based on your use cases. Which cloud provider would be most cost-effective for your specific needs?

Key Differences Between Cloud Providers

While all three major cloud providers offer text generation capabilities, there are important differences to consider:

AWS Advantages

  • Model Variety: Access to multiple model providers (Anthropic, Cohere, AI21, Meta, etc.) through a single API
  • Deep Integration: Seamless integration with other AWS services
  • Customization: Strong options for model customization via SageMaker

GCP Advantages

  • Google’s Research Expertise: Access to state-of-the-art models from Google Research
  • Vertex AI: Comprehensive MLOps platform with strong model monitoring and management
  • Cost-Effectiveness: Generally competitive pricing, especially for Google’s models

Azure Advantages

  • OpenAI Partnership: Exclusive cloud access to OpenAI’s most advanced models
  • Enterprise Focus: Strong security, compliance, and governance features
  • Microsoft Ecosystem: Tight integration with Microsoft products and services

Implementation Considerations

When implementing text generation AI in any cloud platform, consider these key factors:

1. Prompt Engineering

The way you formulate prompts significantly impacts the quality of generated text. Good prompt engineering involves:

  • Being specific and clear in your instructions
  • Providing examples of desired outputs
  • Setting context appropriately
  • Controlling parameters like temperature and max tokens

2. Model Selection

Each model has different capabilities, costs, and performance characteristics:

  • Base Models: Good for general tasks, lower cost
  • Specialized Models: Better for specific domains or tasks
  • Larger Models: Higher quality output but more expensive
  • Smaller Models: Faster, cheaper, but potentially less capable

3. Responsible AI Implementation

Implementing generative AI responsibly is crucial:

  • Content Filtering: Implement filters to prevent harmful content
  • Human Review: Maintain human oversight for sensitive applications
  • Bias Mitigation: Be aware of and address potential biases in generated content
  • Transparency: Be clear with users when they’re interacting with AI-generated content

💡 CALL TO ACTION: Conduct an initial assessment of your organization’s AI readiness. What governance structures would you need to implement to ensure responsible AI usage?

Real-World Use Cases

Let’s explore some practical applications of text generation AI across different industries:

Customer Service

Implement AI-powered chatbots that can:

  • Answer frequent customer questions 24/7
  • Escalate complex issues to human agents
  • Generate personalized responses to customer inquiries
  • Draft email responses for customer service representatives

Content Marketing

Use generative AI to:

  • Create first drafts of blog posts and articles
  • Generate product descriptions at scale
  • Produce social media content
  • Adapt existing content for different audiences or platforms

Software Development

Assist developers by:

  • Generating code snippets and documentation
  • Explaining complex code
  • Converting requirements into pseudocode
  • Suggesting bug fixes and optimizations

Getting Started: Implementation Roadmap

Here’s a step-by-step guide to implementing generative AI text solutions in your organization:

  1. Define Your Use Case
    • Identify specific problems to solve
    • Establish clear success metrics
    • Determine required capabilities
  2. Select Your Cloud Provider
    • Consider existing infrastructure
    • Evaluate model availability and features
    • Compare pricing for your expected usage
  3. Prototype and Test
    • Build small-scale proof of concept
    • Test with real data and scenarios
    • Gather feedback from stakeholders
  4. Implement Production Solution
    • Develop integration with existing systems
    • Establish monitoring and evaluation processes
    • Create fallback mechanisms
  5. Monitor, Learn, and Improve
    • Track performance metrics
    • Gather user feedback
    • Continuously refine prompts and parameters

💡 CALL TO ACTION: Which step in the implementation roadmap do you anticipate being the most challenging for your organization? Share your thoughts in the comments section below!

Conclusion

Generative AI for text is transforming how businesses create and interact with content across all industries. By understanding the capabilities, costs, and implementation considerations of AWS, GCP, and Azure solutions, you can make informed decisions about integrating this powerful technology into your workflows.

The right approach depends on your specific needs, existing infrastructure, and technical expertise. Whether you choose AWS Bedrock’s model variety, GCP Vertex AI’s research-backed models, or Azure OpenAI’s enterprise features, the potential to revolutionize your text-based processes is substantial.

💡 FINAL CALL TO ACTION: Ready to start your generative AI journey? Schedule a 30-minute brainstorming session with your team to identify your first potential use case, then use the code examples in this blog to create a simple prototype. Let us know how it goes!


Stay tuned for our next blog post, where we’ll dive into more interesting topics and explore how to customize these powerful AI tools for your specific industry needs.

```

In today’s digital landscape, artificial intelligence has transcended its traditional role in data processing to become a creative partner in art generation. Let’s explore this fascinating intersection of technology and creativity through our case study of a hypothetical AI art generation system.

Introduction to AI-Generated Art

AI-generated artwork represents one of the most exciting frontiers in creative technology. Unlike traditional digital art tools that simply execute an artist’s commands, AI art systems can generate original compositions based on textual prompts, existing images, or learned artistic styles.

🔍 Call to Action: Have you ever wondered how computers create art? Take a moment to examine any digital artwork you’ve recently encountered and consider whether it might have been created with AI assistance.

Understanding Text-to-Image AI Systems

At the heart of modern AI art generation are sophisticated systems that transform written descriptions into visual creations. Our hypothetical implementation in the creative arts exemplifies this approach, using complex neural networks trained on vast datasets of images paired with textual descriptions. This training enables the system to understand natural language inputs and translate them into corresponding visual elements.

Core Technologies Behind AI Art Generation

The magic behind creative AI art systems comes from the integration of several AI disciplines:

  1. Natural Language Processing (NLP): Interprets user prompts and extracts key concepts, styles, and compositional elements
  2. Computer Vision: Analyzes visual patterns from trained datasets
  3. Generative Adversarial Networks (GANs): Creates the actual imagery based on interpreted prompts
  4. Diffusion Models: Refines the artwork through iterative enhancement

💡 Call to Action: Think about how you would describe your favorite painting to someone who’s never seen it. This exercise highlights the challenge AI faces in converting text to images!

The CLIP Model: Bridging Text and Images

The CLIP (Contrastive Language-Image Pre-training) model plays a crucial role in modern AI art generation systems. Developed by OpenAI, CLIP represents a breakthrough in connecting textual descriptions with visual content.

What is CLIP?

CLIP is a neural network trained on a massive dataset of 400 million image-text pairs collected from the internet. Unlike previous models that were specialized for specific tasks, CLIP learns to understand both images and text in a unified way.

Why is CLIP Important in Image Generation?

CLIP serves as a critical “bridge” between language and imagery in AI art systems. Here’s why it’s so important:

  1. Translation Between Domains: CLIP helps the computer “understand” what users mean when they describe an image in words.
  2. Guided Generation: During the image creation process, CLIP guides other AI models (like diffusion models) by evaluating how well their outputs match the original text description.
  3. Quality Evaluation: CLIP can assess generated images and determine if they truly represent what was requested in the text prompt.

Real-World Example: Creating a “Cozy Coffee Shop at Sunset”

Imagine you want to generate an image of a “cozy coffee shop at sunset with people reading books.” Here’s how CLIP helps in the process:

CLIP in Everyday Terms

Think of CLIP as a bilingual translator who speaks both “image language” and “human language” fluently. When you describe what you want, this translator helps convert your words into visual concepts that other AI components can understand.

For example:

  • When you say “beach at sunset,” CLIP knows this should include sand, water, orange/red sky, and possibly silhouettes
  • When you specify “in the style of Van Gogh,” CLIP understands the characteristic swirling brushstrokes, vibrant colors, and emotional intensity that define this artist’s work

🎨 Call to Action: Try to think of a complex scene and break it down into visual elements that a computer would need to understand. For instance, “a medieval castle in winter” includes stone towers, snow, perhaps a moat, flags, and a certain architectural style. This is similar to how CLIP processes your descriptions!

Practical Applications of CLIP-Powered Art

The CLIP model’s capabilities extend beyond just creating pretty pictures:

  1. Rapid Prototyping: Product designers can quickly generate visual concepts based on written specifications
  2. Personalized Content: Marketing teams can create custom visuals tailored to specific audience descriptions
  3. Educational Visualization: Converting complex scientific concepts into visual representations for better understanding
  4. Accessibility: Helping visually impaired individuals “see” descriptions by generating corresponding images

Technical Architecture

Let’s dive deeper into the architectural components that power a hypothetical AI art generation system (Let’s call it Word Up! bot 🙂 ):

Cloud Infrastructure Comparison

AI art generation systems leverage cloud resources for their compute-intensive operations. Here’s how the major cloud providers support this type of application:

FeatureAWSGCPAzure
GPU OptionsNVIDIA A100, V100, T4 via EC2 P4, P3, G4 instancesNVIDIA A100, V100, T4 via A2, N1 VMsNVIDIA A100, V100, T4 via NC, ND, NV series
AI Framework SupportSageMaker with PyTorch, TensorFlowVertex AI with PyTorch, TensorFlowAzure Machine Learning with PyTorch, TensorFlow
Serverless OptionsLambda with container support (limited memory)Cloud Run (better for larger models)Azure Functions with container support
Storage for Training DataS3, EFSCloud Storage, FilestoreBlob Storage, Azure Files
Cost OptimizationSpot Instances (up to 90% savings)Preemptible VMs (up to 80% savings)Spot VMs (up to 90% savings)

🚀 Call to Action: Which cloud provider are you most familiar with? Consider how you might deploy an AI art system using their services based on the comparison above.

Real-World Example: Digital Marketing Campaign

To understand the practical value of AI art generation, let’s consider how a marketing team might use such a system:

In this scenario, the marketing team saves countless hours of design iterations and gains access to a wider range of creative possibilities than might have been feasible with traditional design processes.

Challenges and Considerations

Despite its impressive capabilities, AI-generated art presents several technical and ethical challenges:

Ethical Considerations

The rise of AI art systems raises important questions about originality, copyright, and the future of human artists:

  1. Copyright and Ownership: Who owns AI-generated artwork? The user, the AI developer, or is it public domain?
  2. Artist Displacement: Will AI art tools replace human artists or serve as collaborative tools?
  3. Dataset Ethics: Many AI systems are trained on existing artwork without explicit artist consent
  4. Authenticity: Does AI-generated art deserve the same cultural value as human-created art?

⚖️ Call to Action: Consider your own stance on AI art. Do you view it as a legitimate art form or merely a technical output? Your perspective shapes how you might use or develop such technologies.

Implementation Steps: Building Your Own AI Art System

For those interested in implementing a similar system, here’s a example simplified roadmap:

Cloud Deployment Comparison

The choice of cloud provider significantly impacts your implementation approach:

Deployment AspectAWSGCPAzure
Container OrchestrationEKS, ECSGKEAKS
Inference OptimizationAWS Inferentia, SageMaker NeoEdge TPU, TensorFlow RTAzure Percept, ONNX Runtime
Monitoring SolutionsCloudWatchCloud MonitoringAzure Monitor
CI/CD IntegrationCodePipeline, CodeBuildCloud BuildAzure DevOps
Model RegistrySageMaker Model RegistryVertex AI Model RegistryAzure ML Model Registry
Cost for typical setup*$2,000-5,000/month$1,800-4,500/month$2,200-5,500/month

*Estimated cost for a production system with moderate usage (costs vary significantly based on scale and optimization)

💰 Call to Action: Use the AWS Pricing Calculator, GCP Pricing Calculator, or Azure Pricing Calculator to estimate costs for your specific implementation requirements.

Business Impact and ROI

Organizations implementing AI art generation systems typically see returns in several areas:

Case studies have shown that creative teams augmented with AI art tools can:

  • Produce 3-5x more design concepts
  • Reduce design iteration cycles by 60%
  • Decrease production costs by 30-50%
  • Respond to market trends with greater agility

Future Directions

The field of AI-generated art continues to evolve rapidly. Some emerging trends include:

Conclusion

This hypothetical implementation in the creative arts domain represents the current state of AI-generated artwork – powerful, accessible, and transformative. As cloud infrastructure continues to evolve, we can expect these systems to become more capable, efficient, and integrated into creative workflows.

Whether you’re a creative professional looking to enhance your capabilities, a technology enthusiast exploring new frontiers, or a business leader seeking innovative solutions, AI art generation offers compelling opportunities worth exploring.

🖋️ Final Call to Action: Share your thoughts on AI-generated art in the comments below. Have you experimented with any AI art tools? What was your experience like? Your insights contribute to our collective understanding of this emerging field!

Further Resources


Did you find this case study helpful? Follow Towardscloud.com for more in-depth explorations of cloud and AI technologies!

```

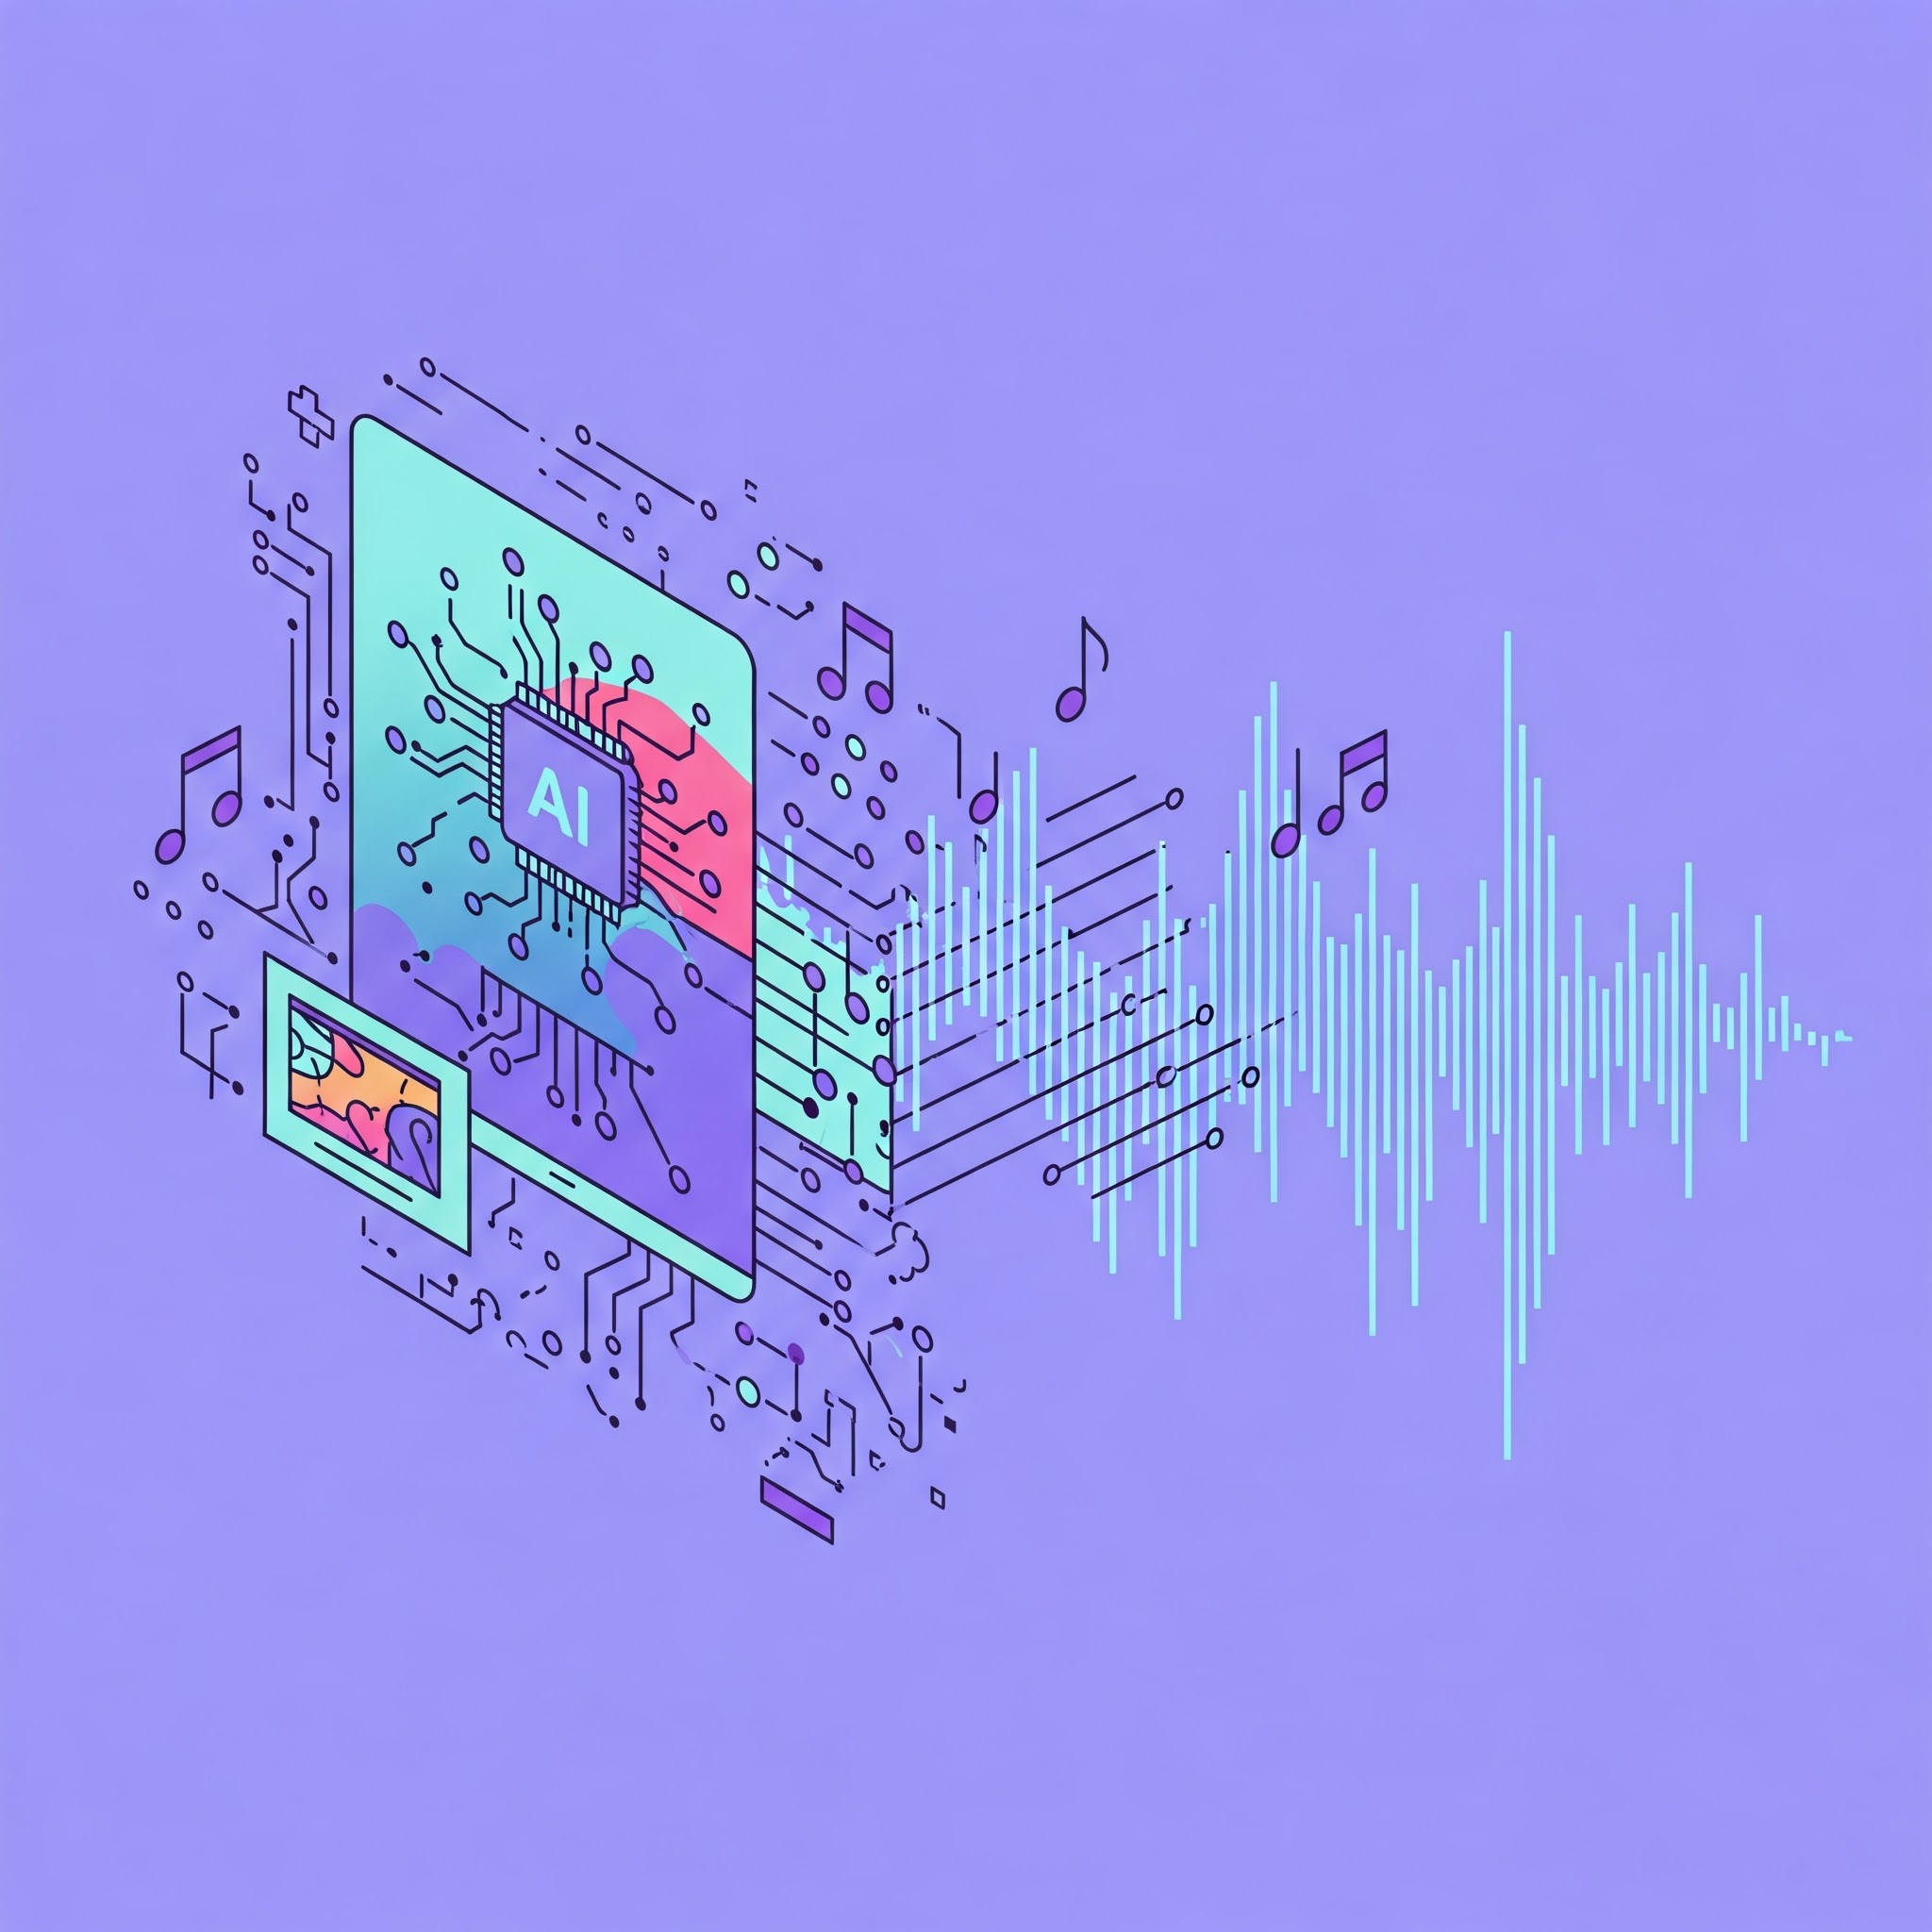
In today’s digital landscape, Generative AI has emerged as a powerful force transforming how we create and experience art and music. From AI-generated paintings that sell for thousands of dollars to music composed entirely by algorithms, the creative world is experiencing a technological renaissance. Let’s dive into this fascinating intersection of technology and creativity.

What is Generative AI?

At its core, Generative AI refers to artificial intelligence systems that can create new content rather than simply analyzing existing data. Think of it as the difference between a critic who reviews art and an artist who creates it.

🔍 Try This: Look at artwork from the AI system DALL-E or Midjourney and try to determine if you can distinguish it from human-created art. What subtle differences do you notice?

Real-World Example

Remember when you were a child and played with building blocks? You started with basic pieces and created something unique. Generative AI works similarly but at an incredibly sophisticated level—it takes building blocks of data (like musical notes or visual patterns) and arranges them into new creations.

The Technology Behind Creative AI

Generative AI systems in art and music typically rely on several key technologies:

Neural Networks: The Digital Brain

Neural networks, particularly Generative Adversarial Networks (GANs) and Transformers, form the backbone of creative AI.

In a GAN, two neural networks work against each other:

  • The Generator creates new content
  • The Discriminator evaluates how realistic it is

This “adversarial” relationship pushes both networks to improve, resulting in increasingly convincing outputs.

Training Data: The Creative Education

Just as human artists learn by studying masterpieces, AI systems need exposure to existing creative works.

Training Data TypeExamplesPurpose
Visual ArtPaintings, photographs, sculpturesTeaches visual composition, style, color theory
MusicClassical compositions, pop songs, jazzTeaches harmony, rhythm, instrumentation
Combined MediaFilm scores, music videosTeaches relationships between visual and audio elements

💡 Think About It: What ethical considerations arise when AI systems are trained on human artists’ work? Who owns the creative rights to AI-generated art inspired by human creations?

Generative AI in Visual Art

Popular AI Art Tools

Several platforms have made AI art creation accessible to everyone:

  1. DALL-E by OpenAI – Creates images from text descriptions
  2. Midjourney – Produces highly detailed artistic renderings
  3. Stable Diffusion – Open-source image generation model

Real-World Application

Consider photography editing tools like Adobe Photoshop’s “Generative Fill.” If you’ve ever wanted to extend a landscape photo beyond its original boundaries or remove an unwanted object from a perfect shot, generative AI can now create new, realistic content that seamlessly blends with the original image.

🎨 Action Item: Try a free AI art generator like Playground AI or Leonardo.ai and create an image using a detailed prompt. Notice how different phrases affect the output.

Generative AI in Music

AI Music Creation Tools

The music industry has embraced several AI tools for composition and production:

  1. OpenAI’s Jukebox – Generates music in different genres with vocals
  2. Google’s Magenta – Creates musical compositions and helps with arrangement
  3. AIVA – Composes emotional soundtrack music

Real-World Example

Think about how streaming services like Spotify recommend music based on your listening habits. Now imagine that instead of just recommending existing songs, these platforms could create entirely new music tailored exactly to your preferences—perhaps a blend of your favorite artists or a new song in the style of a band you love, but with lyrics about topics that interest you.

🎵 Try This: Listen to music created by AI composers like AIVA (available here) and compare it with human-composed music in the same genre. Can you tell the difference?

The Creative Process: Human + AI Collaboration

Most exciting developments in this field come not from AI working alone, but from human-AI collaboration.

Real-World Example

Consider film scoring: A human composer might create a main theme, then use AI to generate variations that match different emotional scenes throughout a movie. The composer then selects and refines these variations, creating a cohesive soundtrack that would have taken much longer to produce manually.

Ethical and Industry Implications

The rise of generative AI in creative fields raises important questions:

ConcernExplanationPotential Solutions
CopyrightWho owns AI-generated art based on existing works?Developing new copyright frameworks specifically for AI
Artist LivelihoodsWill AI replace human artists?Focus on AI as augmentation rather than replacement
AuthenticityDoes AI art have the same value as human art?New appreciation frameworks that consider intention and process
BiasAI systems reflect biases in their training dataDiverse, carefully curated training datasets

🤔 Consider This: How would you feel if your favorite artist’s next album was composed with significant AI assistance? Would it change your perception of their talent or the emotional impact of their work?

Cloud Provider Offerings for Creative AI

All major cloud providers now offer services to help developers implement generative AI for creative applications:

AWS

AWS offers several services that support generative AI for creative applications:

  • Amazon SageMaker Canvas – No-code ML with generative capabilities
  • AWS DeepComposer – AI-assisted music composition

Google Cloud Platform (GCP)

GCP provides powerful tools for creative AI development:

  • Vertex AI – End-to-end platform for building generative models
  • Cloud TPU – Specialized hardware for training complex creative AI systems

Microsoft Azure

Azure provides solutions specifically tailored for creative professionals:

  • Azure OpenAI Service – Access to powerful models like DALL-E
  • Azure Cognitive Services – Vision and speech services for multimedia AI

Getting Started with Creative AI

Interested in experimenting with generative AI for your own creative projects? Here’s a simple roadmap:

  1. Start with user-friendly tools:
  2. Learn prompt engineering – The art of crafting text instructions that yield the best results from generative AI
  3. Explore open-source options like Stable Diffusion for more customization
  4. Consider cloud-based development for more advanced projects

🚀 Challenge Yourself: Create a small multimedia project combining AI-generated images and music around a theme that interests you. How does the creative process differ from traditional methods?

Future Directions

The field of generative AI in art and music is evolving rapidly. Here are some emerging trends to watch:

Real-World Example

In the near future, imagine attending a concert where a human musician performs alongside an AI that adapts in real-time to the musician’s improvisations, the audience’s reactions, and even environmental factors like weather or time of day. The result would be a truly unique performance that could never be exactly replicated.

Conclusion

Generative AI in art and music represents not just a technological advancement but a fundamental shift in how we think about creativity and expression. As these tools become more accessible, we’re seeing a democratization of creative capabilities and the emergence of entirely new art forms.

Whether you’re an artist looking to incorporate AI into your workflow, a developer interested in building creative applications, or simply a curious observer of this technological revolution, the intersection of AI and creativity offers exciting possibilities for exploration.

📣 Share Your Experience: Have you created anything using AI tools? What was your experience like? Share your thoughts in the comments, and let’s discuss the future of creative AI together!


Further Reading:

```

Generative AI represents one of the most transformative technological developments in recent years. As cloud platforms rapidly integrate these capabilities into their service offerings, understanding both the technical and ethical dimensions becomes crucial for IT professionals implementing these powerful tools.

The Double-Edged Sword of Generative AI

Generative AI systems like ChatGPT, Claude, DALL-E, and Midjourney have democratized content creation in unprecedented ways. What once required specialized skills can now be accomplished through simple prompts. This accessibility, however, introduces significant ethical challenges that demand our attention.

Bias and Representation

AI systems learn from existing data, inevitably absorbing the biases present in that data. Consider this real-world scenario: an HR department deployed a resume-screening AI that systematically downgraded candidates from certain universities simply because the training data reflected historical hiring patterns.

When implementing generative AI in AWS, you can use Amazon SageMaker’s fairness metrics to identify and mitigate bias. GCP offers similar capabilities through its Vertex AI platform, while Azure provides fairness assessments in its Responsible AI dashboard.

Content Authenticity and Attribution

The attribution challenges generative AI presents are significant. These systems don’t create truly original content—they synthesize patterns from existing works.

Best practices for using generative AI in content creation include:

  • Clearly disclosing AI assistance
  • Verifying factual claims independently
  • Adding original insights and experiences
  • Never presenting AI-generated content as solely human-created

Privacy Concerns

Training data often contains personal information. One engineering team discovered that their fine-tuned model was occasionally reproducing snippets of customer support conversations—a serious privacy breach.

Different cloud providers handle this differently:

  • AWS SageMaker can be configured with VPC endpoints for enhanced data isolation
  • GCP’s Vertex AI offers encrypted training pipelines
  • Azure’s Machine Learning workspace provides robust data governance tools

Environmental Impact

The computational resources required for training large generative models are staggering. One training run of a large language model can emit more carbon than five cars produce in their lifetimes.

When selecting cloud providers for AI workloads, consider:

  • GCP’s carbon-neutral infrastructure
  • AWS’s commitment to 100% renewable energy by 2025
  • Azure’s carbon negative pledge and sustainability calculator

Cloud Provider AI Ethics Comparison

AWS

Azure

GCP

Transparency and Explainability

As cloud professionals, we often deploy models we didn’t train ourselves. Understanding how these models make decisions is crucial for responsible implementation.

Azure’s Interpretability dashboard is particularly useful for understanding model behavior, while AWS provides SageMaker Clarify for similar insights. GCP’s Explainable AI offers feature attribution that helps identify which inputs most influenced an output.

Implementing Ethical Guardrails

Based on experience across AWS, GCP, and Azure, here are practical steps for ethical AI implementation:

  1. Document your ethical framework – Define clear principles and guidelines before deployment
  2. Implement robust testing – Test for bias, harmful outputs, and privacy violations
  3. Create feedback mechanisms – Enable users to report problematic outputs
  4. Establish human oversight – Never fully automate critical decisions
  5. Stay educated – This field evolves rapidly; continuous learning is essential

The Future of Responsible AI in Cloud Computing

All major cloud providers are developing tools for responsible AI deployment:

  • AWS has integrated ethical considerations into its ML services
  • Google’s Responsible AI Toolkit provides comprehensive resources
  • Microsoft’s Responsible AI Standard offers a structured approach

Conclusion

As cloud professionals, we’re not just implementing technology—we’re shaping how it impacts society. The ethical considerations of generative AI aren’t separate from technical implementation; they’re an integral part of our professional responsibility.

What ethical considerations have you encountered when implementing generative AI in your organization? Share your experiences in the comments below.


```

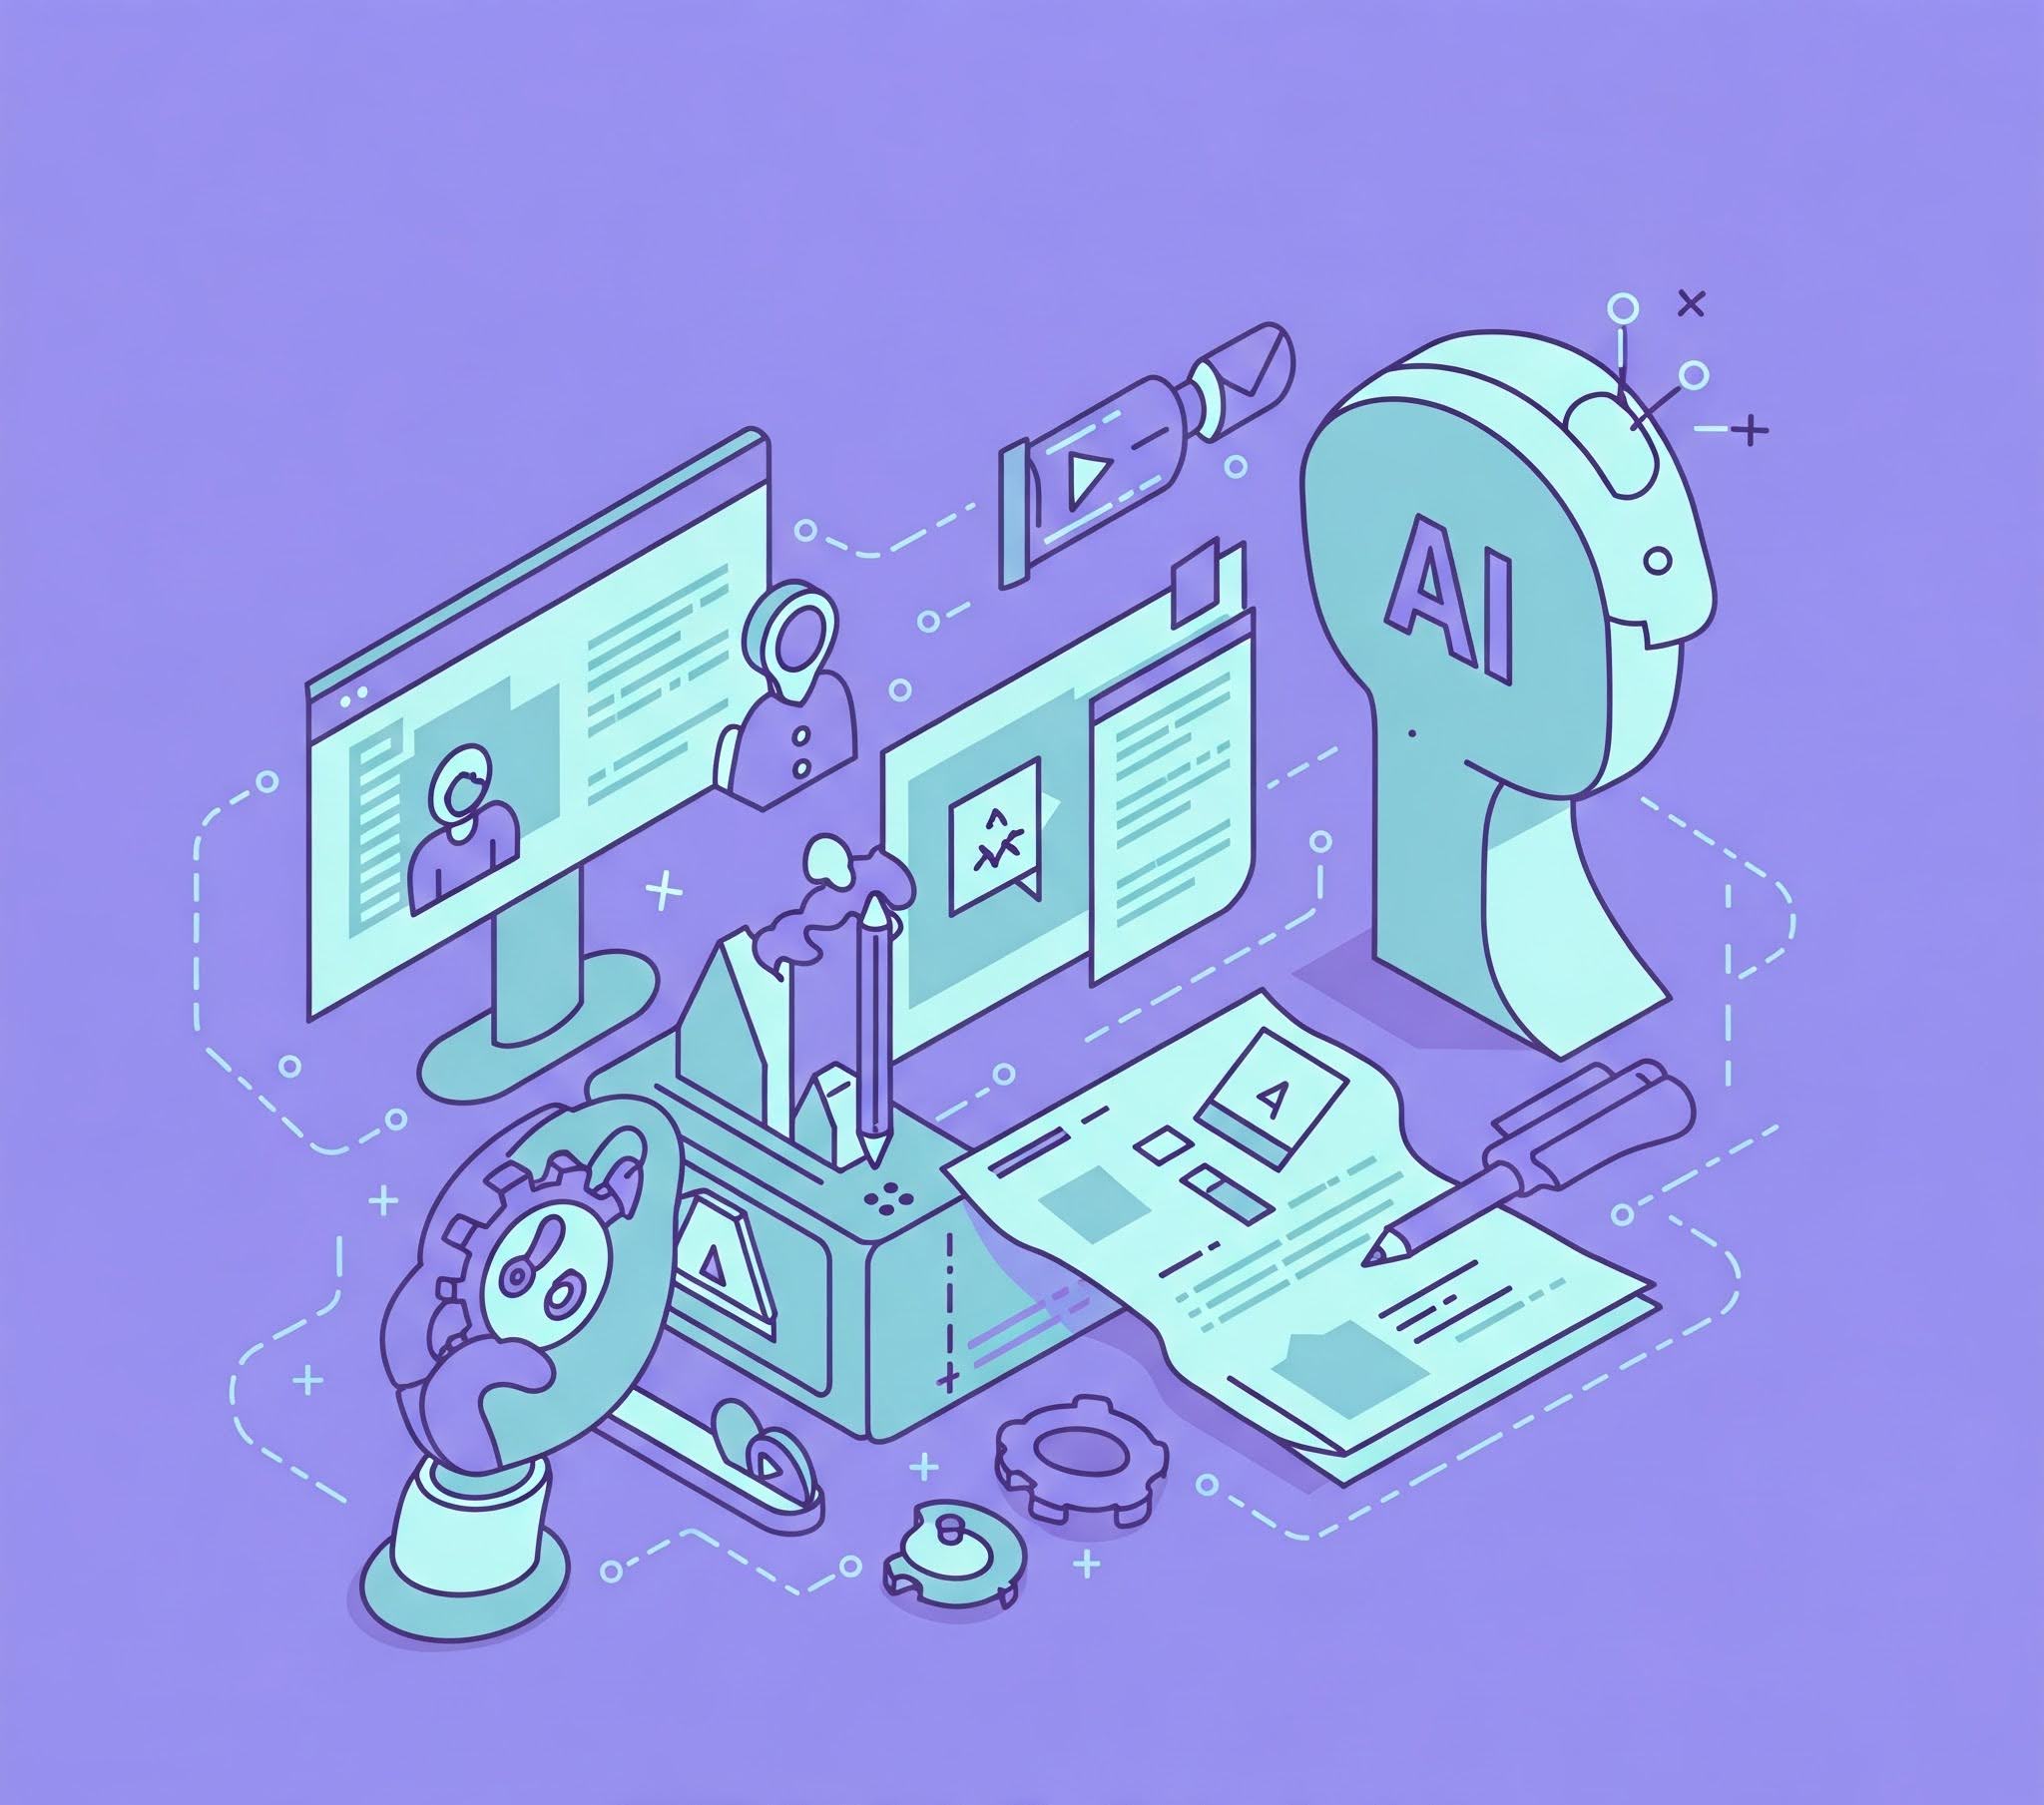
Introduction

Generative AI has rapidly evolved from a cutting-edge research topic to a technology that touches our daily lives in countless ways. From the content we consume to the tools we use for work and creativity, these AI systems are silently transforming how we interact with technology and each other.

Call to Action: Have you noticed how AI has subtly entered your daily routine? As you read through this article, take a moment to reflect on how many of these applications you’ve already encountered, perhaps without even realizing it!

Content Creation: From Blank Canvas to Masterpiece

Generative AI is revolutionizing how we create content, making sophisticated creation tools accessible to everyone regardless of their technical skills.

Writing and Text Generation

AI writing assistants have become invaluable tools for various writing tasks:

Popular tools include:

  • Grammarly for grammar checking and style improvements
  • Jasper for marketing content generation
  • Notion AI for integrated writing assistance

Call to Action: What writing tasks do you find most challenging? Consider how an AI writing assistant might help streamline your workflow. Share your thoughts in the comments!

Image Generation and Editing

AI image generators have democratized visual content creation:

ToolSpecializationPopular Uses
DALL-EPhotorealistic images, artistic stylesMarketing materials, concept visualization
MidjourneyArtistic and stylized imageryArt projects, mood boards, creative ideation
Stable DiffusionOpen-source image generationCustom implementations, specialized applications
CanvaIntegrated design with AI featuresSocial media posts, presentations, marketing materials

Audio and Music Generation

AI is composing music, generating sound effects, and even creating realistic voice overs:

Popular audio AI tools include:

  • Mubert for AI-generated royalty-free music
  • ElevenLabs for realistic text-to-speech
  • Descript for audio editing with AI transcription

Communication: Breaking Down Barriers

Generative AI is transforming how we communicate across languages, time zones, and platforms.

Language Translation and Learning

AI-powered translation has made cross-language communication nearly seamless:

  • Google Translate now handles over 100 languages with near-real-time conversation capabilities
  • DeepL offers nuanced translations that better preserve context and tone
  • Duolingo uses AI to personalize language learning paths

Smart Communication Assistants

AI is helping us communicate more effectively across all channels:

Communication FeatureEveryday ApplicationExample
Smart RepliesSuggested responses in email and messagingGmail’s Smart Compose feature
Meeting SummariesAutomated notes from video/audio callsOtter.ai for meeting transcription
Email OrganizationPriority inbox and categorizationGmail’s inbox categories
Communication SchedulingOptimal timing for messagesBoomerang for Gmail

Call to Action: Think about your most common communication challenges. How might AI-powered tools help overcome language barriers or save time in your daily interactions? Have you tried any of these tools?

Productivity: Your AI Copilot

Generative AI is becoming an invaluable assistant for a wide range of professional tasks.

Code Generation and Software Development

AI coding assistants are transforming software development:

Tools like GitHub Copilot and Amazon Q (CodeWhisperer) can:

  • Generate entire functions from natural language descriptions
  • Suggest code completions as you type
  • Explain complex code in plain language
  • Convert between programming languages

Data Analysis and Insights

AI is making data analysis more accessible to non-specialists:

Document Processing and Management

AI has transformed how we handle documents and information:

AI Document FeaturePractical ApplicationPopular Tools
Intelligent SearchFinding information across documentsMicrosoft 365 Copilot
Automatic SummarizationExtracting key points from lengthy documentsNotion AI
OCR & Data ExtractionConverting images to editable textAdobe Acrobat
Contract AnalysisIdentifying important clauses and termsDocuSign Insight

Entertainment and Media: Personalized Experiences

Generative AI is creating more personalized and interactive entertainment experiences.

Content Recommendation and Personalization

AI recommendation engines have become sophisticated curators of our entertainment:

  • Netflix uses AI to suggest shows and even customize artwork based on your preferences
  • Spotify creates personalized playlists like Discover Weekly based on listening patterns
  • TikTok algorithm quickly learns user preferences to serve highly engaging content

Gaming and Interactive Entertainment

AI is enhancing gaming experiences in multiple ways:

Notable examples include:

  • No Man’s Sky uses procedural generation to create a virtually endless universe
  • AI Dungeon creates interactive stories that respond to player input
  • Modern games use AI to adjust difficulty based on player skill level

Call to Action: What’s your favorite AI-enhanced entertainment experience? Have you noticed how streaming services and games adapt to your preferences? Share your experience in the comments!

Personal Assistance: AI in Your Pocket

Voice assistants and smart personal tools have become ubiquitous in our daily lives.

Voice Assistants and Smart Homes

AI-powered voice assistants have become central to many households:

Common voice assistants include:

Health and Wellness

AI is helping us monitor and improve our health:

AI Health ApplicationFunctionalityExamples
Fitness TrackingPersonalized workout recommendationsFitbit Premium
Meditation & Mental HealthAdaptive mindfulness programsHeadspace
Sleep AnalysisSleep pattern tracking and suggestionsSleep Cycle
Nutrition PlanningPersonalized meal recommendationsNoom

Education and Learning: Personalized Knowledge

Generative AI is transforming how we learn, study, and develop new skills.

Tutoring and Educational Support

AI tutors can provide personalized learning experiences:

Research Assistance and Knowledge Management

AI is helping researchers and students manage information more effectively:

AI Research ToolPurposeExample
Literature ReviewSummarizing research papersElicit
Citation ManagementOrganizing referencesZotero AI Assistant
Concept ExplanationBreaking down complex topicsQuizlet Q-Chat
Study Note GenerationCreating study materialsNotion AI

Call to Action: Are you using AI tools in your learning journey? What educational challenges do you think AI could help solve? Share your experiences or thoughts in the comments!

Professional Tools: AI in the Workplace

AI is transforming professional workflows across industries.

Design and Creative Workflows

AI tools are augmenting the creative process for designers:

  • Adobe Firefly generates images and effects integrated with Creative Cloud
  • Figma AI features assist with UI design and prototyping
  • Runway offers AI video editing and visual effects tools

Business Intelligence and Decision Support

AI is helping businesses make data-driven decisions:

Business AI ApplicationFunctionPopular Platform
Sales ForecastingPredicting revenue based on historical dataSalesforce Einstein
Customer Sentiment AnalysisMonitoring customer feedback across channelsQualtrics XM
Market Trend PredictionIdentifying emerging trendsIBM Watson Discovery
Process OptimizationIdentifying inefficienciesMicrosoft Power Automate

E-Commerce and Shopping: AI as Your Personal Shopper

Generative AI is revolutionizing the online shopping experience.

Product Discovery and Recommendations

AI helps consumers find products that match their preferences:

  • Amazon‘s recommendation engine influences up to 35% of all purchases
  • Stitch Fix uses AI to select personalized clothing items
  • Pinterest leverages visual search to help users discover products

Virtual Try-On and Visualization

AI is enabling virtual shopping experiences:

Virtual Shopping FeatureConsumer BenefitExample Platform
Virtual Clothing Try-OnSee how clothes look without trying them onASOS Virtual Try-On
Furniture VisualizationPlace furniture in your space using ARIKEA Place App
Beauty Product SimulationTest makeup virtuallyL’Oréal’s ModiFace
Eyewear Virtual Try-OnSee how glasses frames look on your faceWarby Parker Virtual Try-On

Call to Action: Have AI shopping recommendations led you to discover products you love? Or have you tried virtual try-on features? Share your experience in the comments!

Finance and Personal Money Management

AI is helping individuals and businesses manage finances more effectively.

Personal Finance Management

AI-powered tools are making personal finance more accessible:

Popular tools include:

  • Mint for automated expense tracking and budgeting
  • Wealthfront for AI-powered investment management
  • Cleo for conversational financial advice

Fraud Detection and Security

AI has become essential for financial security:

AI Security FeatureProtection ProvidedImplementation
Unusual Transaction DetectionIdentifies potentially fraudulent purchasesCredit card company monitoring systems
Login Behavior AnalysisSpots suspicious account accessBanking app security features
Scam Communication FilteringIdentifies potential phishing attemptsEmail and text message filtering
Identity VerificationSecure authentication processesFacial/voice recognition in financial apps

Accessibility: Making Technology Available to All

Generative AI is breaking down barriers for people with disabilities.

Notable accessibility applications include:

Ethical Considerations and Challenges

As generative AI becomes more integrated into our daily lives, important ethical considerations arise:

Privacy and Data Protection

As AI systems process more personal data, privacy concerns grow:

  • Voice assistants record conversations in our homes
  • AI writing assistants analyze our writing patterns and content
  • Health applications collect sensitive medical information

Bias and Representation

AI systems can perpetuate and amplify existing social biases:

  • Image generators may reflect societal stereotypes
  • Language models can produce biased content
  • Recommendation systems may create filter bubbles

Sustainability Concerns

Training and running large AI models requires significant computing resources:

  • Major language models can have substantial carbon footprints
  • Daily use of multiple AI tools contributes to energy consumption

Call to Action: What concerns do you have about AI in your daily life? How do you balance the benefits with potential drawbacks? Share your thoughts in the comments!

The Future: What’s Next for Everyday AI?

Looking ahead, several trends will likely shape how generative AI continues to integrate into our daily lives:

1. Ambient Intelligence

AI will become more seamlessly integrated into our environments:

  • Smart homes that anticipate needs without explicit commands
  • Ubiquitous assistants that understand context across devices
  • Proactive rather than reactive assistance

2. Multimodal Integration

Future AI will move fluidly between different types of content:

  • Translate concepts between text, images, audio, and video
  • Generate coordinated content across multiple mediums
  • Create more natural human-computer interfaces

3. Personalization at Scale

AI will enable mass customization of products and services:

  • Education tailored to individual learning styles and needs
  • Entertainment that adapts to emotional states and preferences
  • Healthcare recommendations based on comprehensive personal data

Conclusion

Generative AI has already transformed countless aspects of our daily lives, often in ways we don’t immediately recognize. From the content we consume to how we communicate, shop, work, and learn, these technologies are becoming increasingly woven into the fabric of everyday experience.

As these tools continue to evolve, they promise to make technology more natural, accessible, and personalized. The challenge ahead lies in harnessing these capabilities while addressing important concerns around privacy, bias, transparency, and sustainability.

The most exciting aspect of generative AI isn’t just what it can do today, but how it will continue to expand the boundaries of what’s possible tomorrow—creating new opportunities for creativity, connection, and problem-solving in our everyday lives.

Call to Action: How has generative AI changed your daily routine? Which applications have you found most useful or interesting? Share your experiences in the comments below, and don’t forget to subscribe to our newsletter for more insights on the evolving world of AI and cloud technologies!

Additional Resources

```
Scroll to Top